
Webgility i posts a refund as a refund receipt or a credit memo in QuickBooks Online, following the refund workflow of its sales channel. A refund posts after its order is in QuickBooks Online.
How refunds are downloaded
Webgility i downloads refunds from your sales channels together with their orders, and matches each refund to its order by the sales channel and order number. To download the newest refunds now, use Refresh refunds on the Refunds page. Next to it, the page shows when the refunds were last downloaded.

Steps:
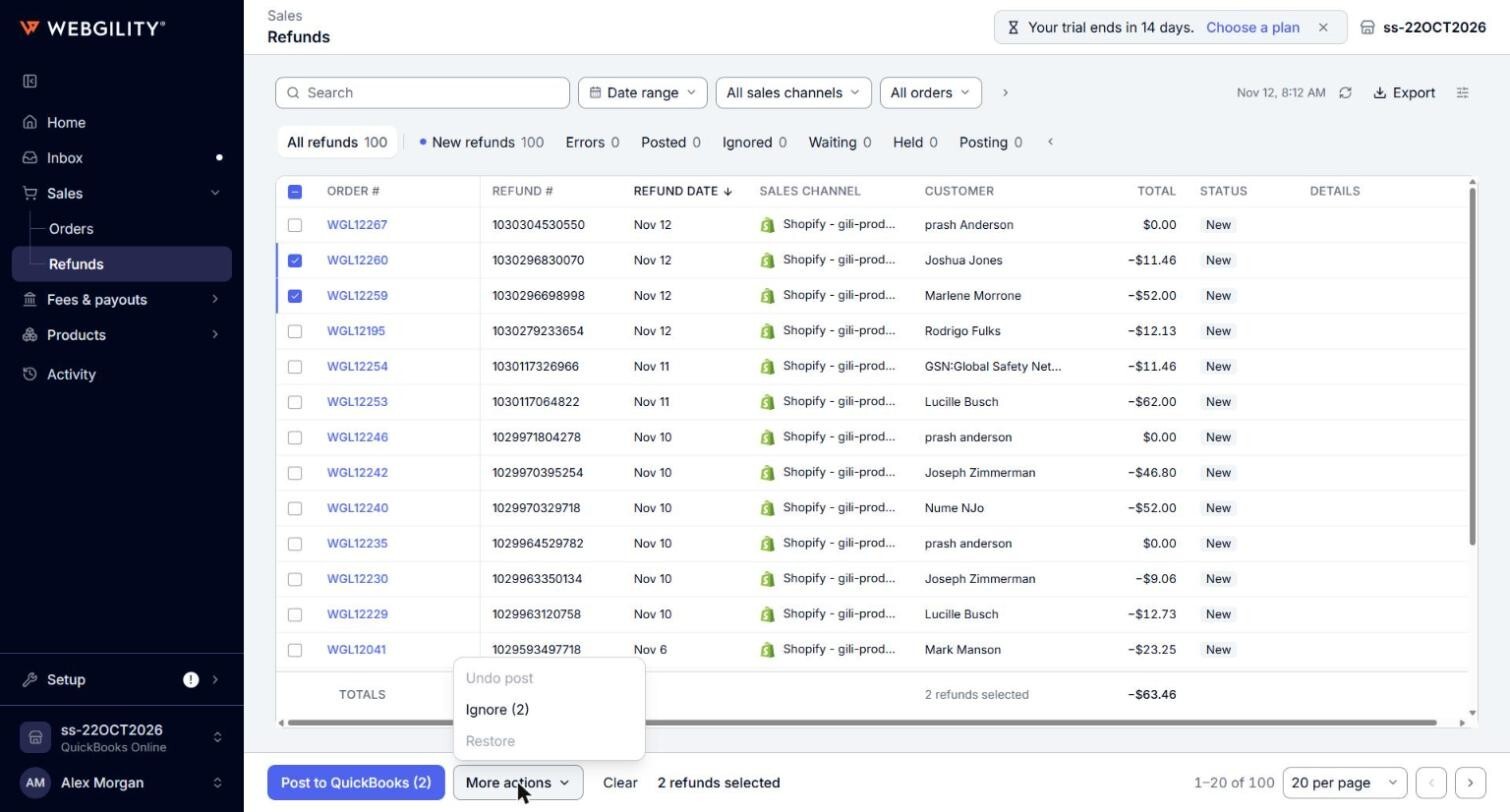
- Go to Sales > Refunds in the left menu. The page opens on the All refunds tab.
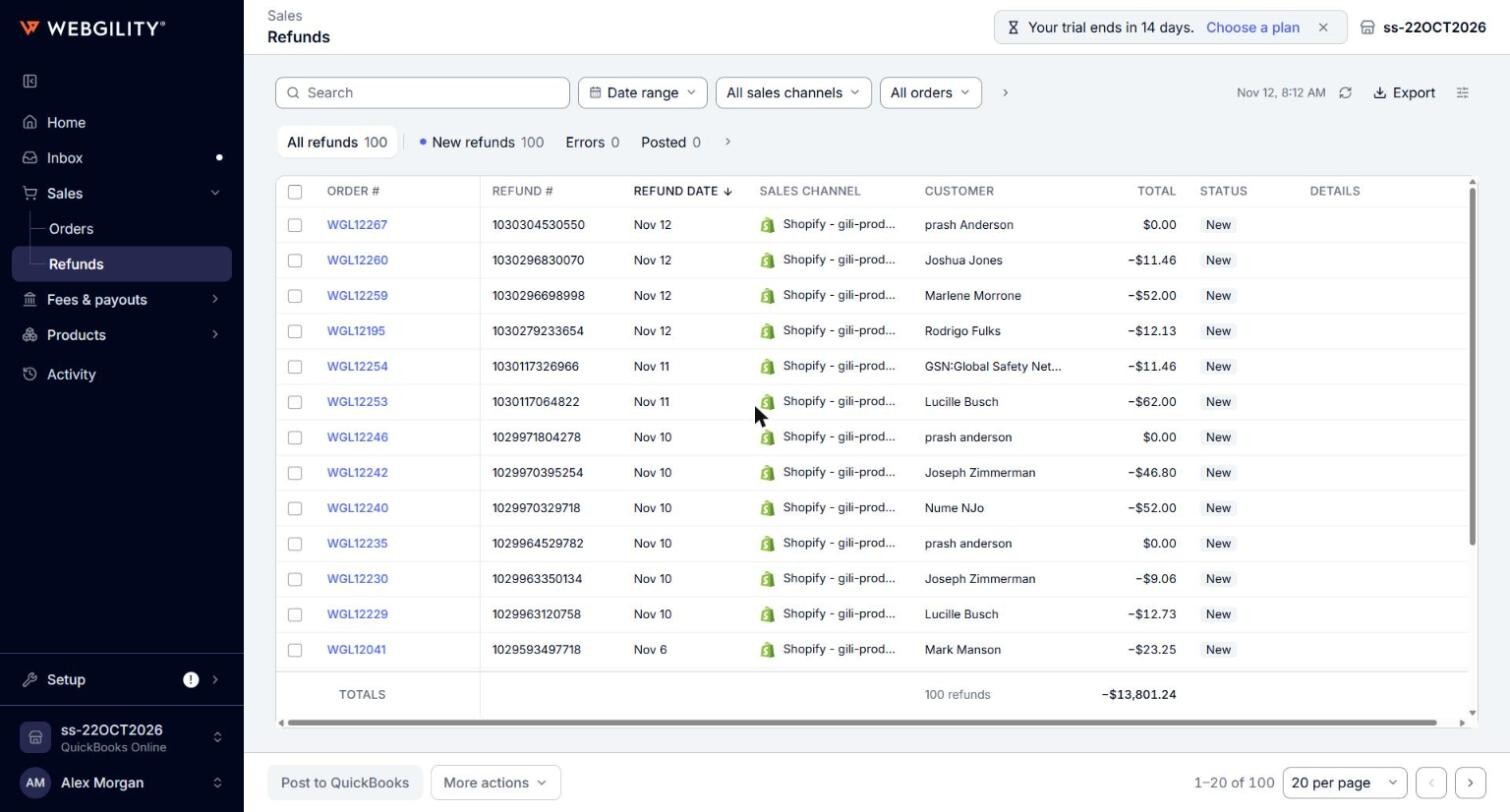
- Click a status tab to see only the refunds in that state. The tabs are All refunds, New refunds, Errors and Posted. Click the arrow at the end of the tabs to show Ignored, Waiting, Held and Posting.

- To find a refund, type its order number, refund number or refund ID in the Search box. To narrow the list, use the same filters as the Orders page: Date range, All sales channels, All orders and Show filters.
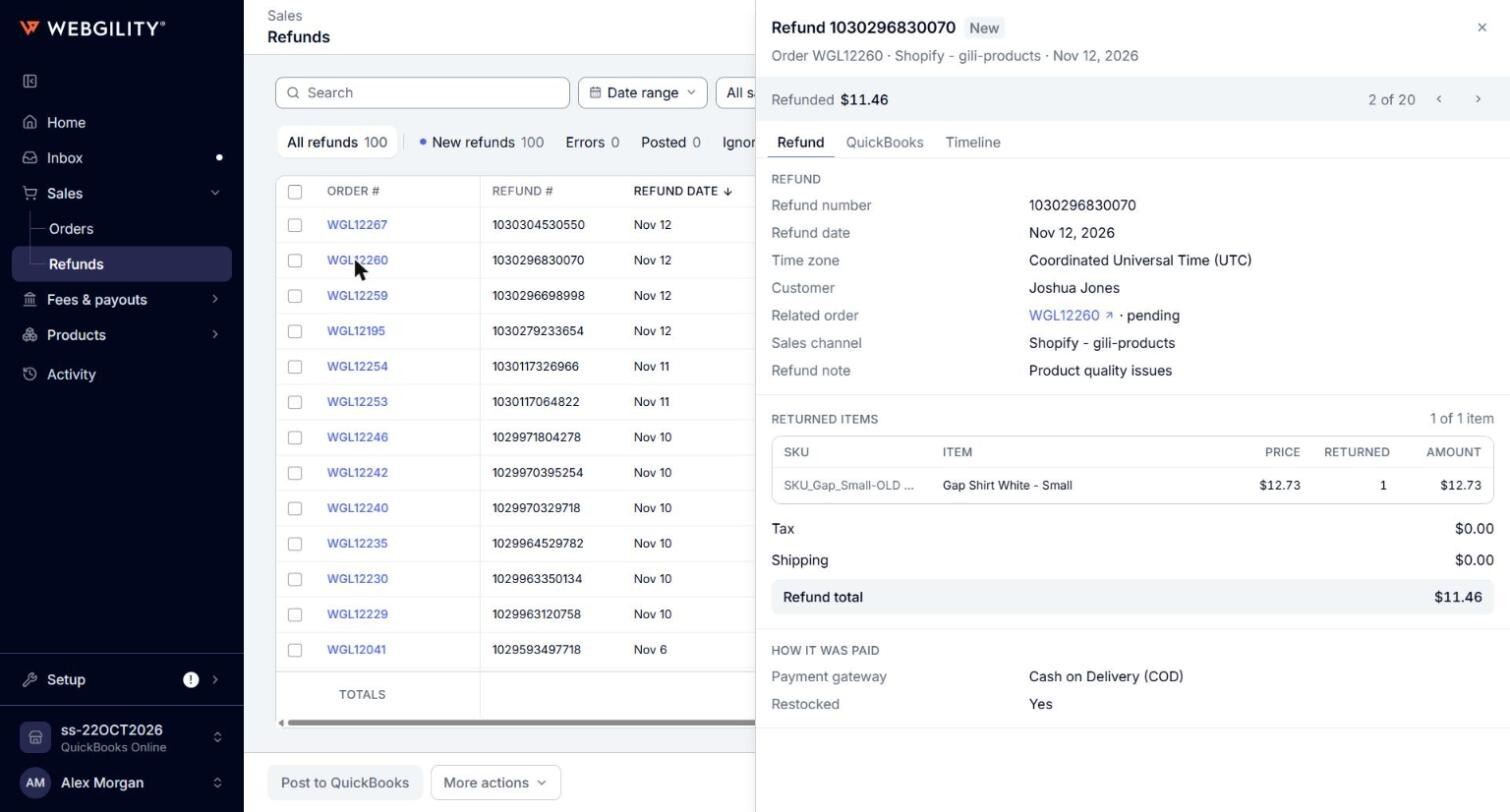
- Click a refund to open it in a panel on the right. The panel has three tabs: Refund (the returned items, the amounts and the related order), QuickBooks (where the refund stands in posting and the document it became) and Timeline (its history).
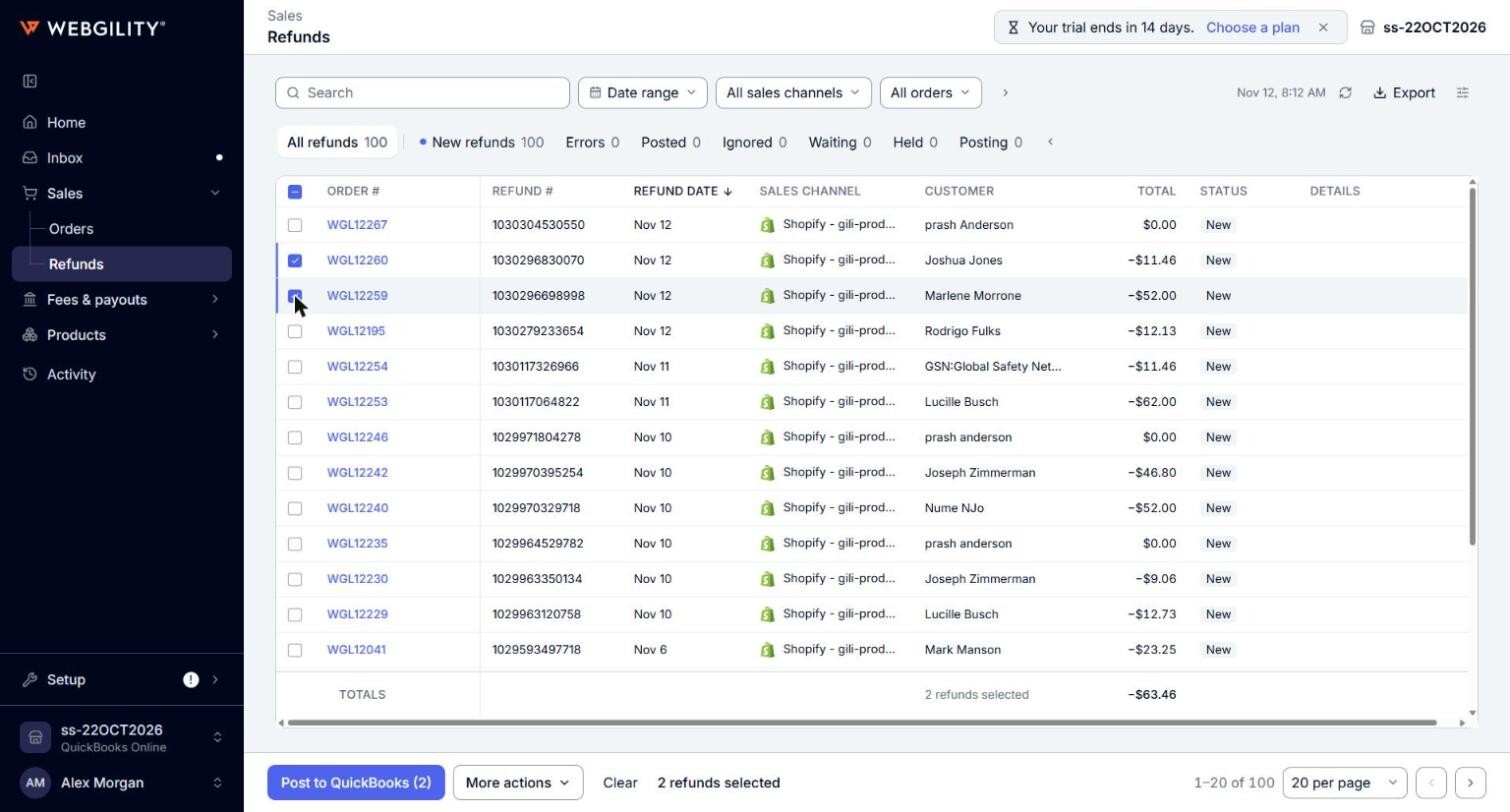
- To post refunds by hand, open the New refunds or Errors tab, tick the refunds you want to post and click Post to QuickBooks. If a ticked refund's sales channel posts one document per day, Webgility i asks first, for example "Consolidated posting is on for 2 ticked refunds". Click Post now to go ahead.
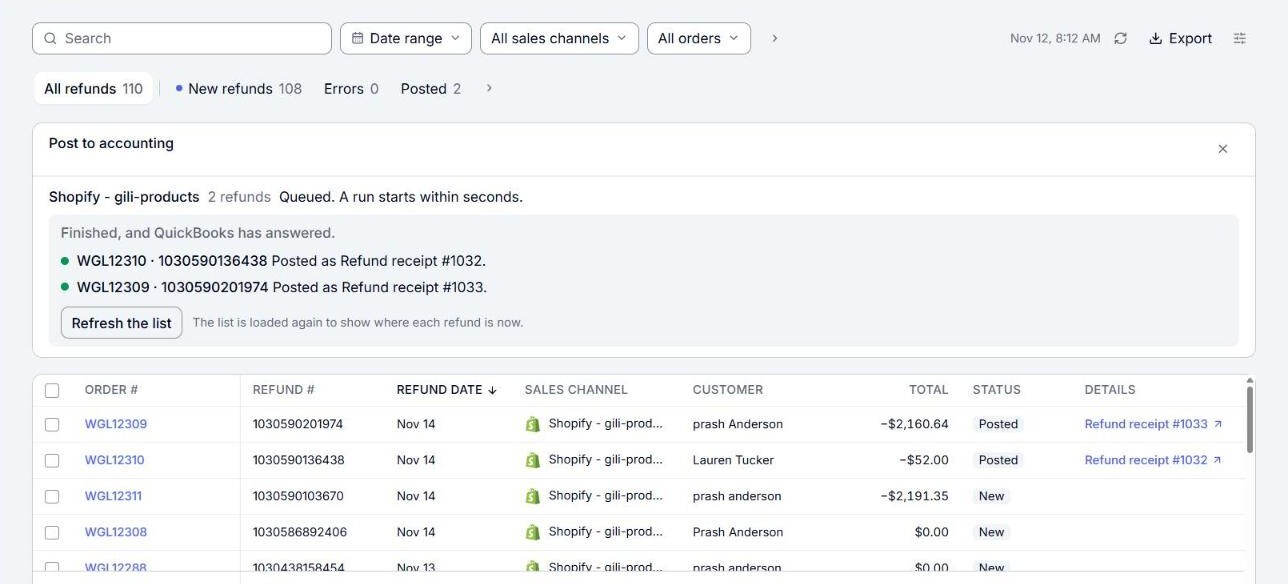
- Watch the Post to accounting card at the top of the page. It shows "Queued. A run starts within seconds.", then "Waiting for QuickBooks' answer" while each refund is sent. When it reads Finished, and QuickBooks has answered., each refund shows its result, for example "Posted as Refund receipt #1032." Click Refresh the list to see where each refund is now.
Note: If the card says a refund was Not posted because refunds from your sales channel are set to not post, your refund workflow holds refunds. See "If refunds are held instead of posted" below.
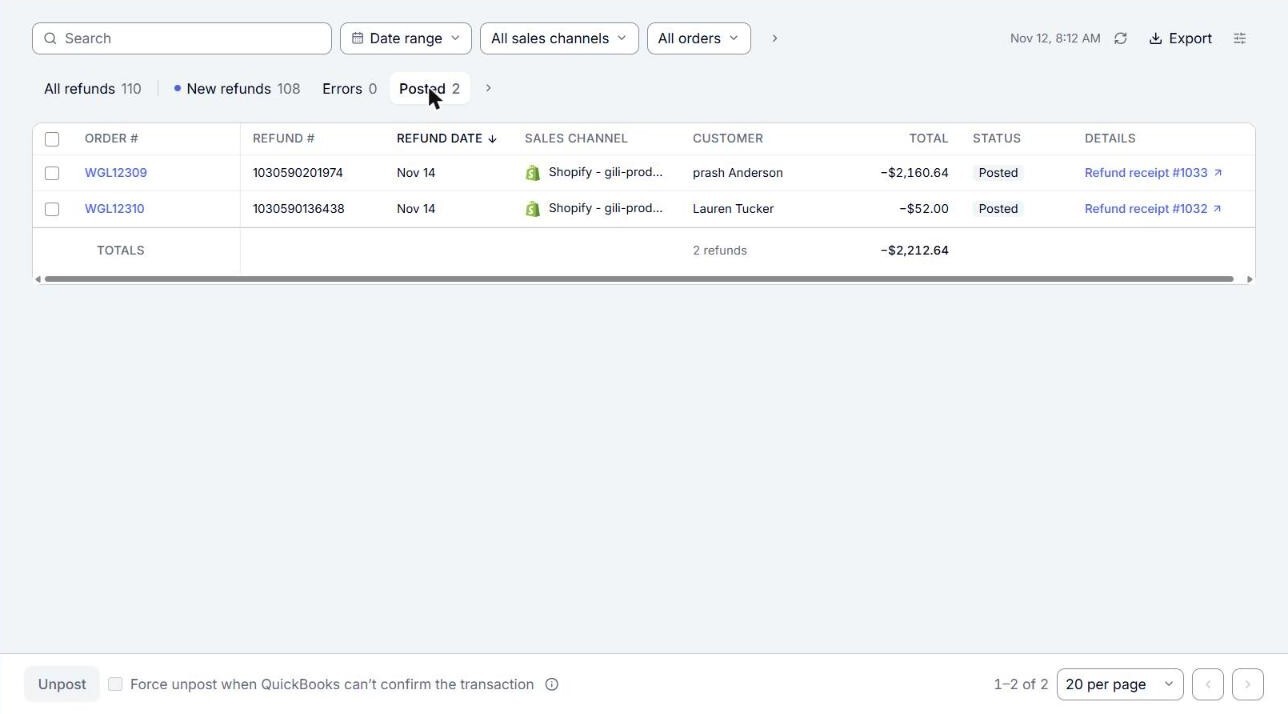
- Once a refund is posted, its Details column names the document, such as Refund receipt or Credit memo, and its number. Click it to open the document in QuickBooks Online.
What each status means
- New: Webgility i has not checked the refund yet.
- Waiting: the refund waits for its order to post. Its Details column shows the order's status and when Webgility i checks again. Once the order is in QuickBooks Online, the refund can post.
- Held: Webgility i holds the refund for a reason its Details column names, such as "Set not to post by its Workflow", "Refunded to store credit or a gift card", "Part of an exchange" or "Refunds exceed the order total (warning)".
- Posting: the refund was sent to QuickBooks Online, and Webgility i is waiting for its answer.
- Error: QuickBooks Online refused the refund. Click Fix error in the Action needed column to see why and what to do.
- Posted: the refund is in QuickBooks Online.
- Ignored: you ignored the refund. It is not posted until you restore it.
Note: A refund that waits on its order follows the order. If its order could not post, fix the order first. See How to Find and Fix Errored Orders. If its order is ignored, the refund is held with the reason "Its order is ignored".
If refunds are held instead of posted
Your refund workflow decides whether refunds post. If the Default of Refunds to accounting is on Hold, refunds that no refund rule matches are not posted. A refund on hold still shows New until you post it. When you post it, the Post to accounting card says, for example, "Not posted: refunds from Shopify - my-store are set to not post (Refunds to accounting > Default is on Hold). Change the Default to Post, or add a refund rule that posts this refund, then post it again." The refund then shows Held, and its Details column reads "Set not to post by its Workflow".
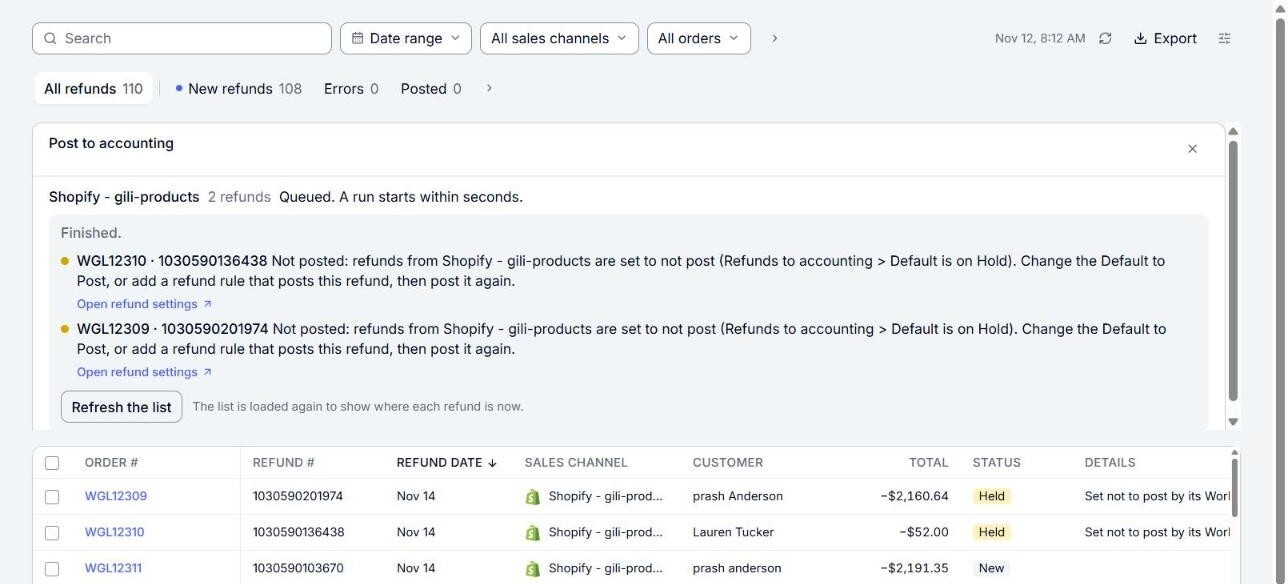
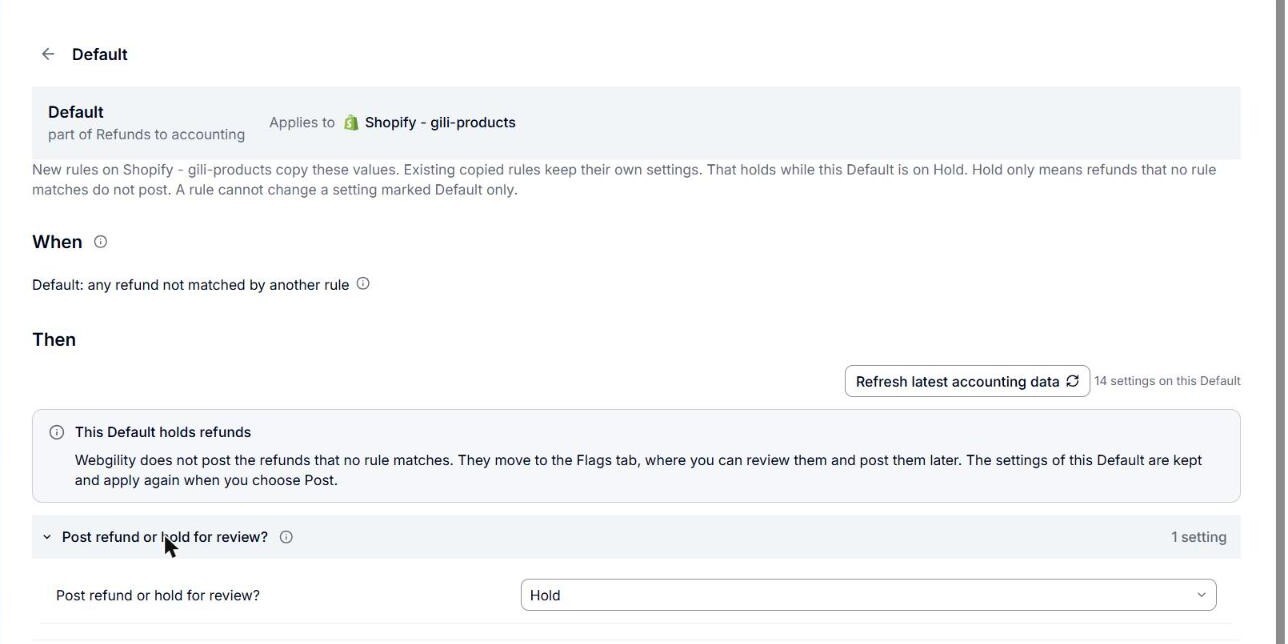
- Click Open refund settings under the refund in the card. You can also go to Setup > Workflows and click Default under Refunds to accounting for your sales channel. The Default says This Default holds refunds.
- Click Post refund or hold for review? to open the section, and choose Post.
- Click Save the Default. On Workflows, the Default now reads "Posts a refund receipt for every other refund."
- Go back to Sales > Refunds, tick the held refunds and click Post to QuickBooks.
Note: To post only some refunds, keep the Default on Hold and add a refund rule that posts the refunds you want instead. See How to Add a Rule to a Workflow.
How to fix a refund that could not post
- Click the Errors tab, then click Fix error in the refund's row.
- Read the Last error on the refund's panel, under Not in QuickBooks. It uses the same words as an order's error, about the refund, for example "A sales tax on this refund has no QuickBooks tax code" or "QuickBooks did not accept this refund", followed by what QuickBooks Online said. Click Technical details to see the exact error, or Contact support if you are not sure what to change.
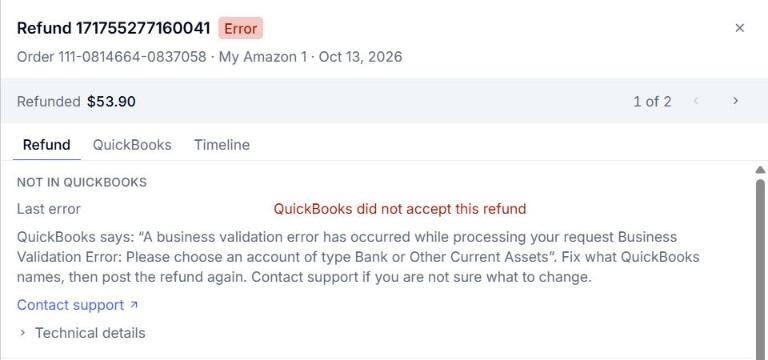
- Make the fix, then tick the refund and click Post to QuickBooks again.
Refund errors also appear in the Inbox as a row that reads, for example, "2 refunds could not post to QuickBooks". A refund that Webgility i cannot post on its own appears in the Inbox as the flag "The refund can't be posted automatically". You can ignore such a refund, or contact support. See Understanding Inbox Flags in Webgility i.
More actions for refunds
Tick one or more refunds and click More actions to:
- Undo post: take posted refunds back out of QuickBooks Online. On the Posted tab, the same action is the Unpost button. The refunds' orders stay as they are. The card at the top then says, for each refund, "Removed from QuickBooks, and the refund can be posted again."
- Ignore: stop a refund from posting. The confirm says: "The selected refund will be marked as ignored and cannot be posted to QuickBooks until it is restored." Posted refunds cannot be ignored. Unpost them first.
- Restore: put ignored refunds back, so they can post again. On the Ignored tab, the same action is the Restore button.
Note: Force unpost when QuickBooks can’t confirm the transaction on the Posted tab of the Refunds page is not available yet.