Steps to follow:
Step 1:
First, ensure products are downloaded in Webgility from both the sales channel and QuickBooks.
Follow the steps in this helpful article on: Products Module View in Webgility Desktop.
If items are missing from QuickBooks in Webgility, refresh the item list from scratch.
Follow the steps in this helpful article on: Download Data from Scratch.
For missing items from the sales channel, access advanced settings and clear the Last Download Date for Store Items. Follow the steps in this helpful article on: Download the Latest Store Data.
Now, click on the Products menu, then click on the Refresh Icon on the top right-hand side.

This process will refresh the item list from the sales channel.
If you encounter connection issues with the sales channel or QuickBooks, refer to the following help articles for troubleshooting:
How to test store connection in Webgility Desktop
How to test QuickBooks connection in Webgility Desktop
Note: The Scheduler should be turned OFF while downloading the data in Webgility Desktop. Also, it is recommended to log in to QuickBooks Desktop as an administrator if we are downloading the items from QuickBooks Desktop.
Step 2:
Verify the matching and mapping of the item causing synchronization issues.
If the item SKU does not match the Product Name or the Item Name / Number according to the matching criteria, then the sync will not work. Also, Incorrect mapping can result in syncing the wrong quantity and other potential errors.
To review matching items, navigate to Products, select View under All Products, and click on the Matching Products option.
To review mapped items, go to the Mapped Products option.
If you wish to map items before syncing, Follow the steps in this helpful article on: How to Map Products.
For deleting existing mappings, choose the Mapped View, select the item, and click on the Remove Mappings icon.

Step 3:
Check the Product Sync Settings
The next step is to check the Product Sync Settings, which can be found under Products> Settings> Sync Settings.
The highlighted settings below are recommended for syncing items. You can also check and make sure the correct Master Data is selected on this page.
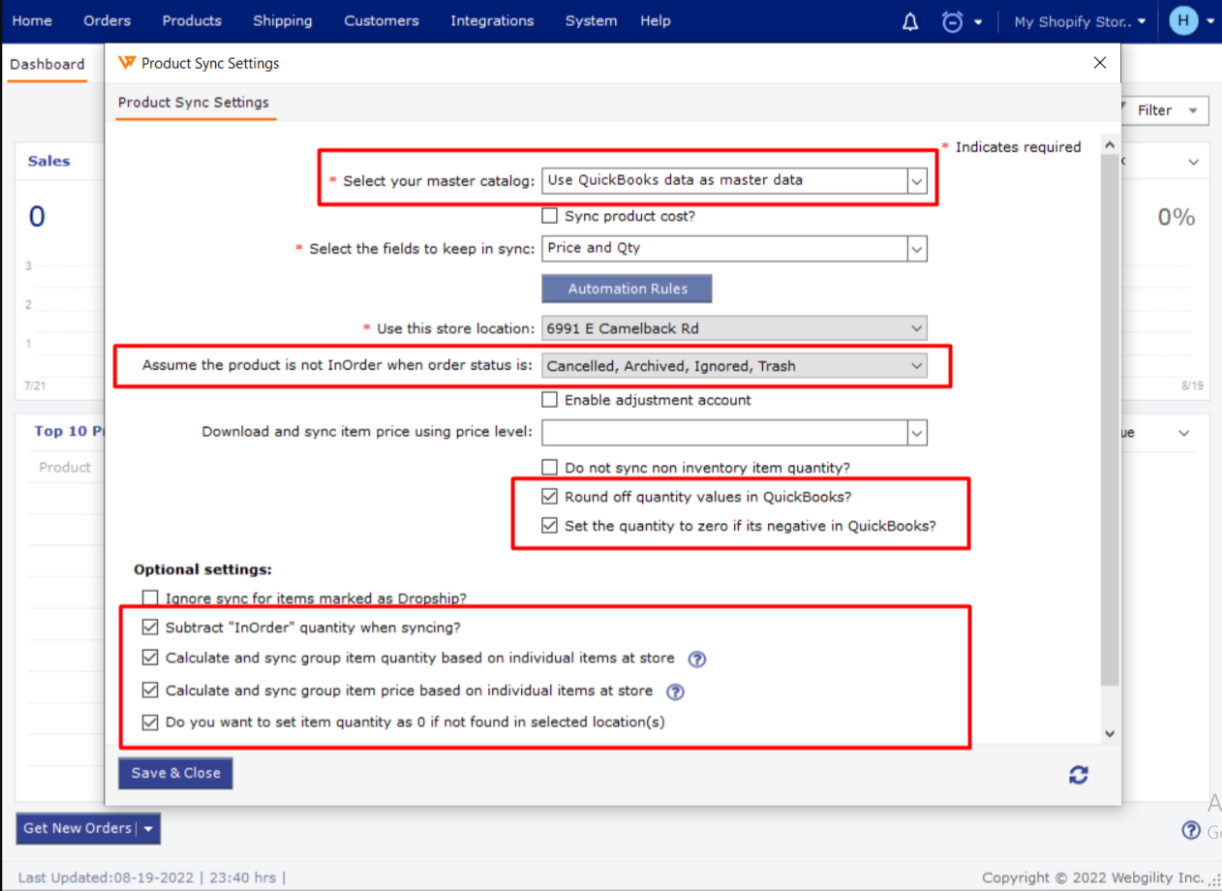
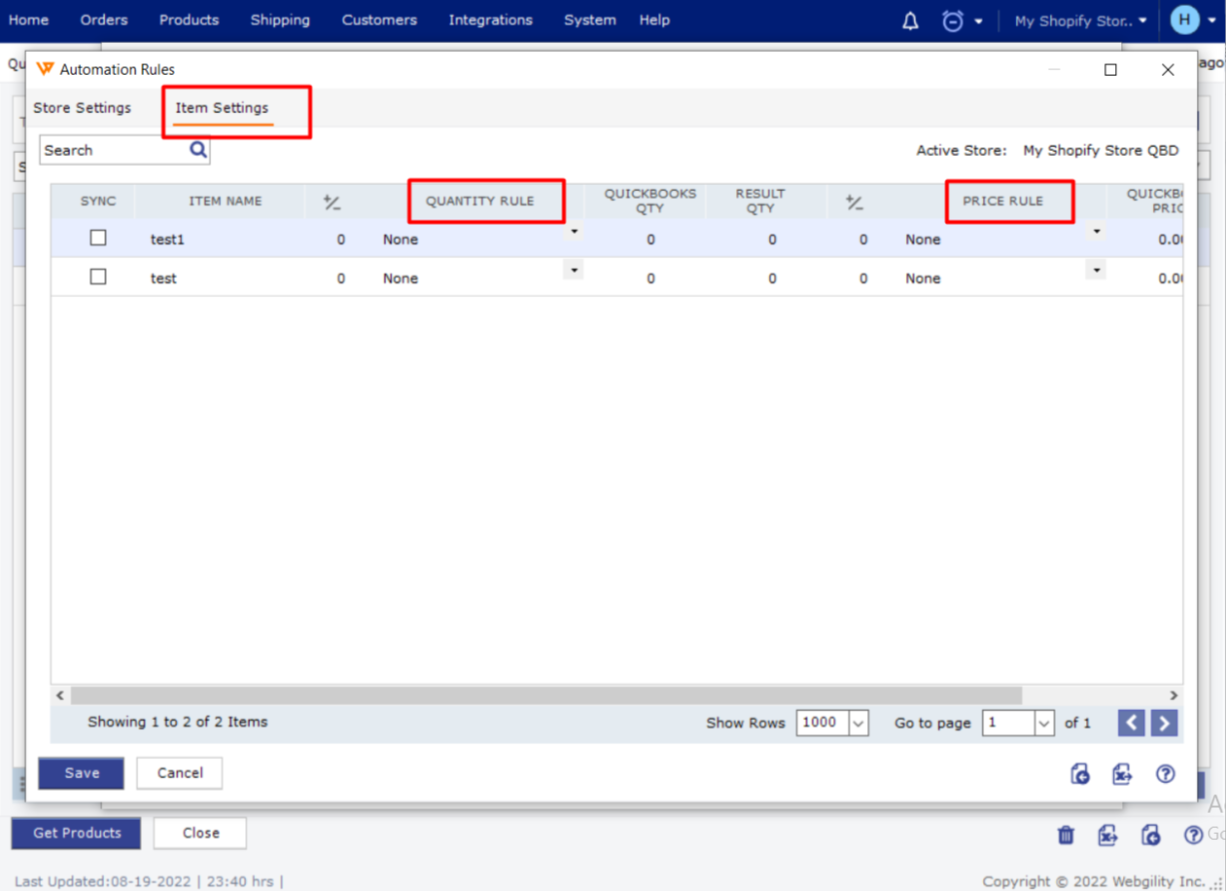
Note: To check if you are syncing the Available or On Hand Quantity access the Automation Rules.
Check the Item Settings to see if any rules are applied to specific items.
Note: If item Packs are defined in Webgility, we need to check if the item quantity is getting calculated for sync according to the item pack defined.
This option is disabled by default. if you see any discrepancies in the quantities of the pack items downloaded from QuickBooks, make sure to check if the below setting is enabled and causing a discrepancy which is found under Products> Additional Mappings> Quantity/Weight
Step 4:
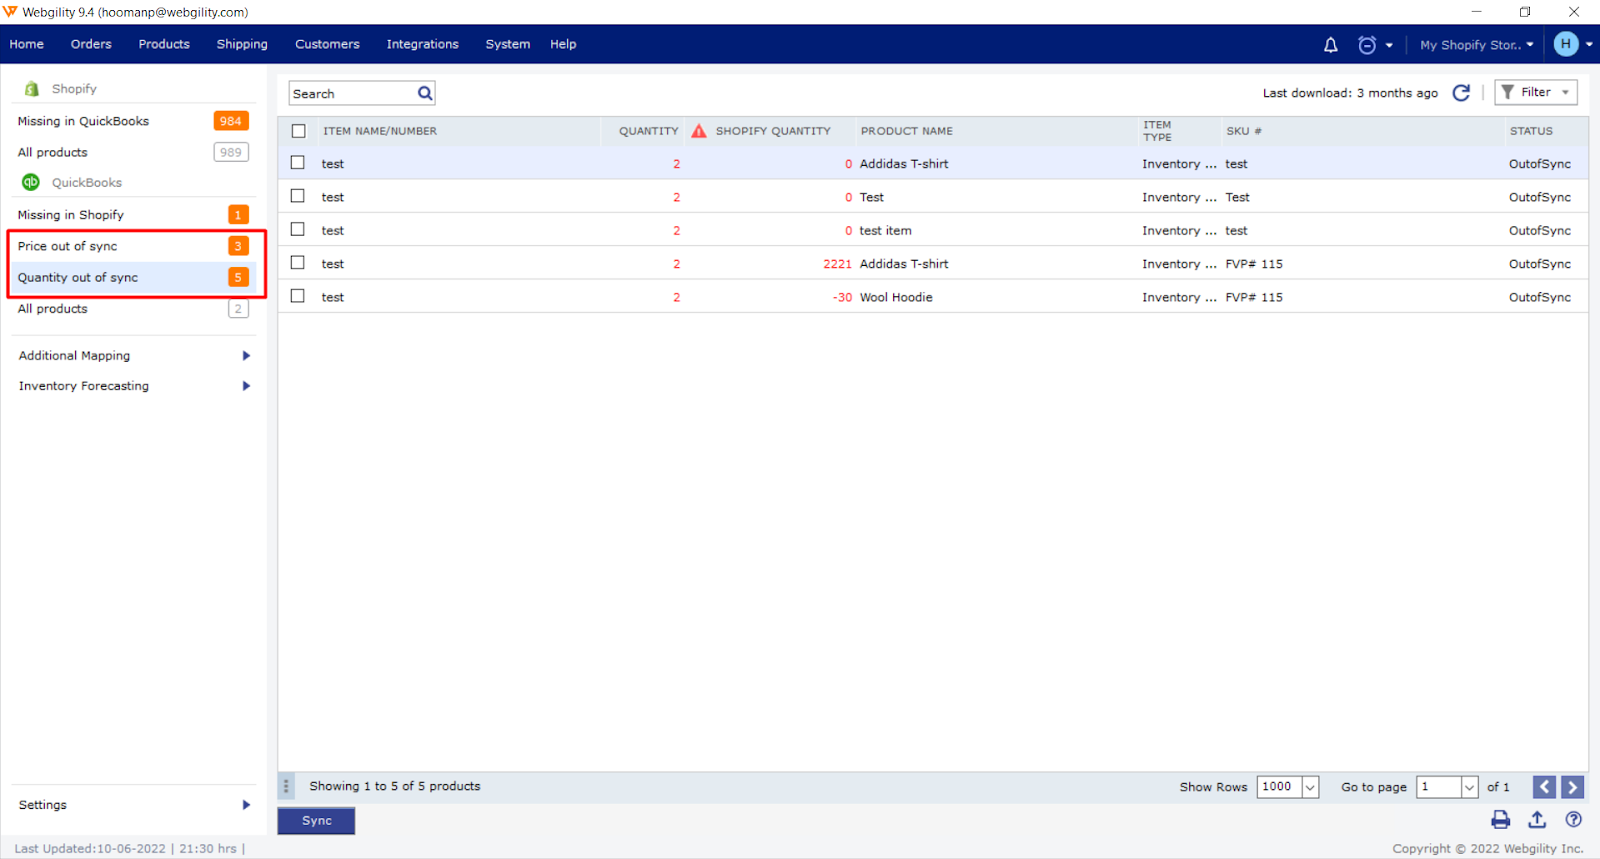
Check the Out of Sync Tab
Access Products> Click Quantity Out of Sync OR Price Out of Sync and the items will show up under the out of sync tab.