Overview:
This guide provides step-by-step troubleshooting tips if your orders need to be synced from Webgility Desktop to QuickBooks. It covers essential checks such as verifying order status, ensuring connections with sales channels and QuickBooks, refreshing data, and configuring posting settings. The article also includes advice on handling common errors, accessing scheduler logs, and mapping items or customers. Follow these steps to identify and resolve syncing issues quickly.
Step 1: Check if the orders show up in the Webgility Desktop Application
The very first step is to check if the orders are downloaded from the sales channel into the Webgility Desktop application.
To check this, we need to launch the Webgility Desktop application and check the New Orders tab.
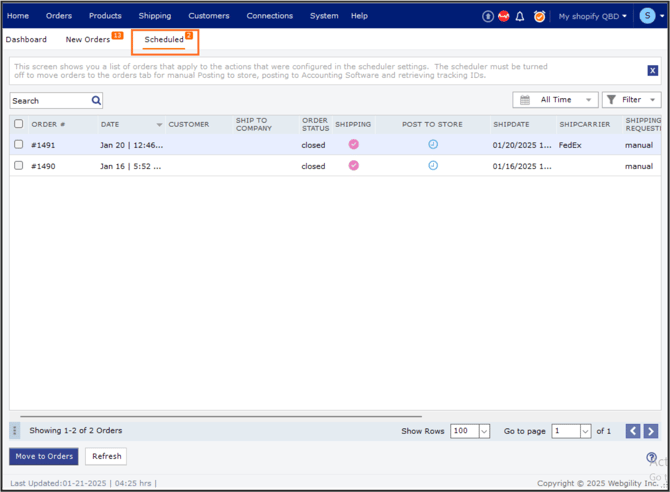
Note 1: If the scheduler is running and configured to download and post the orders in QuickBooks automatically, then the orders will show up in the Scheduled tab temporarily, and after posting to QuickBooks, they should then show in the Posted Orders tab.
To check the scheduler configurations, we can follow the below help article:
Overview of the Scheduler in Webgility Desktop
It might be possible that the orders went into the Errors tab due to an error and were unable to be posted to QuickBooks.
In that case, open the order from the Errors tab and check the History tab in the order details for the error information. Below is the reference article for the same:
Errors View in Webgility Desktop
Step 2: Is my sales channel connected?
To check the Sales Channel connection, please follow the below help articles:
How to update sales channel credentials in Webgility Desktop
Disclaimer: In any given scenario, please do not disconnect the sales channel and reconnect in Webgility Desktop, as that will clear all the previous data and settings.
Step 3: The sales channel is connected, but orders don’t show in the Webgility Desktop application.
- If the orders are not found in the Webgility Desktop application, please check the scheduler logs if you are using the scheduler to download the orders.
- To check the scheduler logs, please access the file path C:\Webgility\UnifyEnterprise\SchedulerLog and open the latest Processing Logs

Note 2: The scheduler logs need to be checked on the computer where the scheduler is running.
-
If you are not using the scheduler and are manually downloading the orders, please click on the Get New Orders button as shown below

If we need to set a "back-date" manually, we can do that as well, as shown in the screenshots below, and then click on Get New Orders:


To make sure the orders are not already downloaded (in the case it is an older order), we recommend checking the archive/repository or the posted tab.
Step 4: Check the QuickBooks Connection
To check the connection with QuickBooks Desktop or QuickBooks Online, please reference the below help article:
How to test QuickBooks connection
Step 5: Download/Refresh Data (Items, Customers, and Other Data)
The next step after checking the QuickBooks connection is to download/refresh the data from scratch from QuickBooks into the Webgility Desktop application.
To download and refresh the data, follow the article link below.
How to Download the Latest Accounting Data from Scratch—Webgility Desktop
Note 3: The scheduler should be turned OFF while downloading the data in Webgility Desktop. Also, it is recommended to log in to QuickBooks as an administrator to do this process.
Step 6: Check and save all the posting configurations
To check the posting settings, please access Connections > Accounting/POS/ERP > Sync Settings and check and save all the configurations.
Note 4: The scheduler should be turned OFF while checking and saving the configurations in Webgility Desktop
Step 7: Item Matching / Mapping
If the items match according to the "matching criteria" setup in Webgility Desktop, and the orders are stuck in the Errors tab due to the item not being found or the customer not being found, the above step will fix the problem.
If the items need to be mapped, we can either do the mapping while posting the order, or we can map the items in advance (recommended) before we start posting the orders. How to Map Products or Inventory in Webgility Desktop