
Use these steps if you connect Square to QuickBooks Desktop through Webgility (How to Connect Webgility Desktop with Square), you have a Square Clearing Account and a Square Fee Expense Account already set up in QuickBooks, and Square deposits appear in the clearing account but the balance does not return to zero because the processing fees are not landing there.
What You'll NeedA Square Clearing Account and a Square Fee Expense Account already set up in your QuickBooks chart of accounts, admin access to Webgility Desktop, and the Webgility Scheduler running on your primary desktop. This Square mapping is independent of Amazon-settlement categories such as orders, Amazon fees, reserves, refund adjustments, and FBA inventory adjustments — none of those are changed by the steps below.
Bill or Line Item: Which to Choose
Webgility Desktop lets you record Square processing fees two ways. Pick Bill when you send invoices to your customers from QuickBooks — recording the fee as a bill keeps the customer-facing invoice clean and routes the fee through the Square Clearing Account where it zeros out at deposit time. Pick Line Item only when you do not send QuickBooks invoices to your customers; the fee then appears directly on the same transaction and stays visible to you internally.
Important Note: "This change applies to new Square transactions going forward only. Past Square orders already posted to QuickBooks will keep their original fee treatment, and non-Square payments (checks, cash) are unaffected."
- In Webgility Desktop, go to Connections > Accounting/POS/ERP > Sync Settings > Expense and fee (Track Payment Processor Fees with Webgility Desktop walks through this tab).
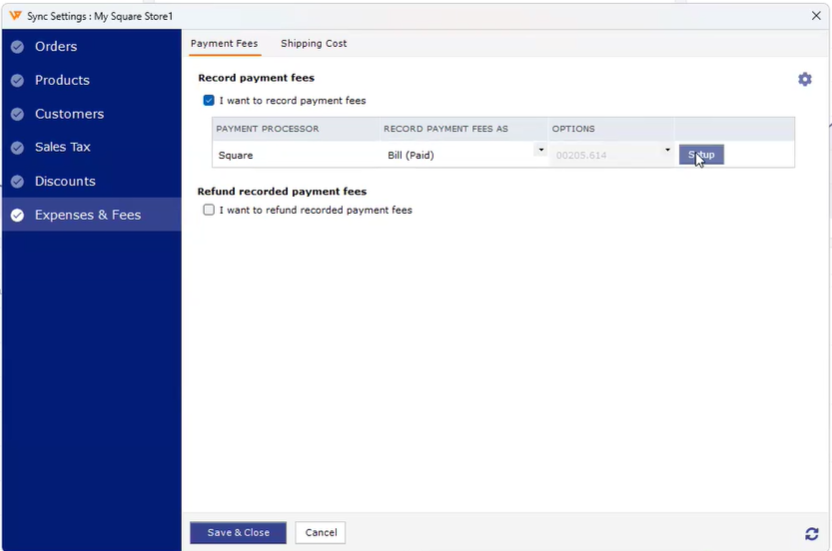
- Click Refresh on that same screen so Webgility pulls the latest chart of accounts from QuickBooks Desktop before you open any account dropdown.
- In the Square fee row, change the recording method to Bill, set the vendor to Square, and map the account to your Square Fee Expense Account.
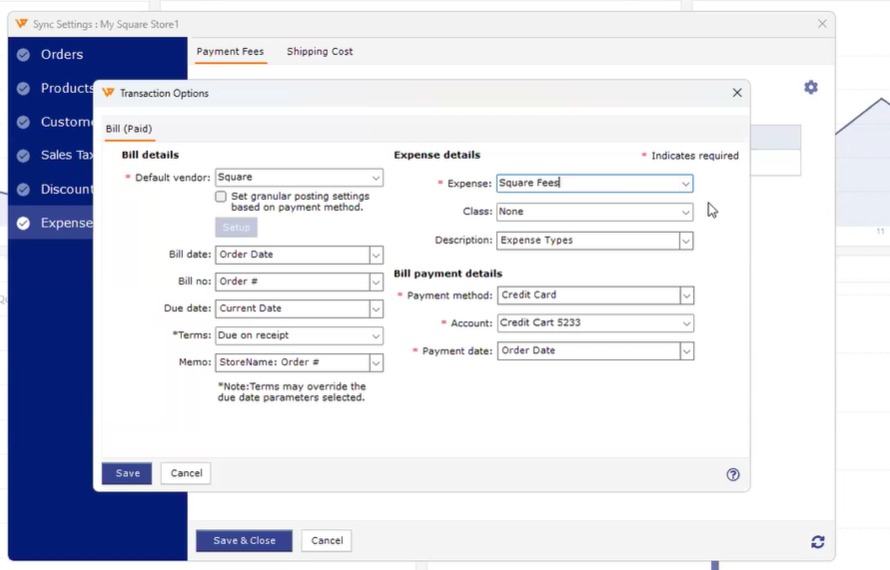
- Confirm the deposit account for Square is set to your Square Clearing Account so the gross deposit lands there.
- Click Save to apply the mapping to the Square channel.
- Unsync one recent Square transaction, then click move to Orders and repost it to verify the bill appears under the Square vendor in QuickBooks and the Square Clearing Account balance returns to zero after the fee bill is paid.
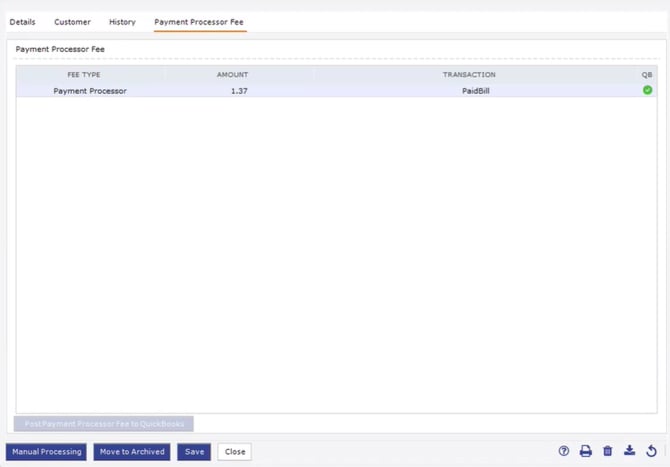
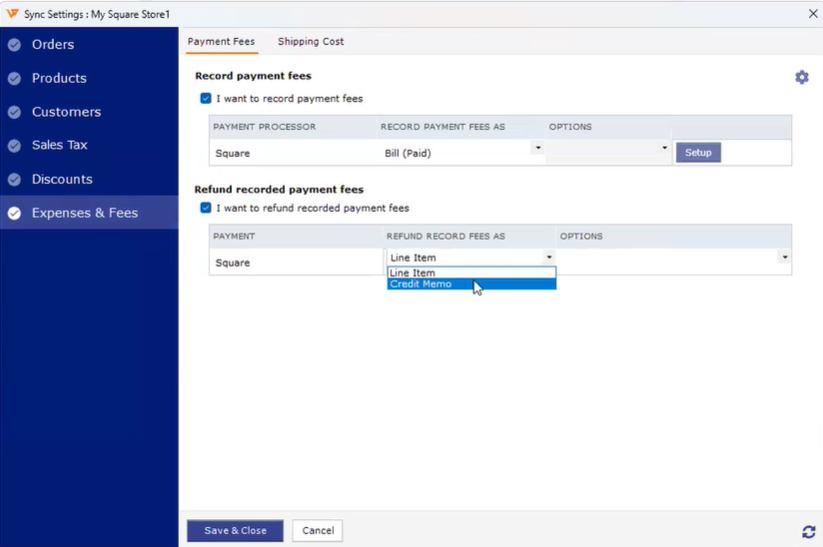
When a Square sale is refunded, process the refund in Webgility as usual and let QuickBooks generate the matching credit memo — Webgility applies the new Bill mapping to the refund the same way it does to the original sale (How to Process Returns and Refunds with Webgility Desktop). Also keep the Webgility Scheduler running on your primary desktop logged in with the primary admin credentials, and stopped on any other workstation, so the Bill mapping is applied by only one scheduler at a time (How to Start or Stop the Scheduler).
If the Square Clearing Account still does not zero out after the next Square deposit, contact Webgility Support at support@webgility.com with the deposit date and the two account names so we can review the mapping with you.