
Every rule screen has three parts: the header, which names the rule and says where it applies, the When section, which says which orders the rule is for, and the Then section, which says how those orders post to QuickBooks Online.
Steps:
- Go to Setup > Workflows and click a rule, or click Add rule to start a new one. The rule's screen opens.
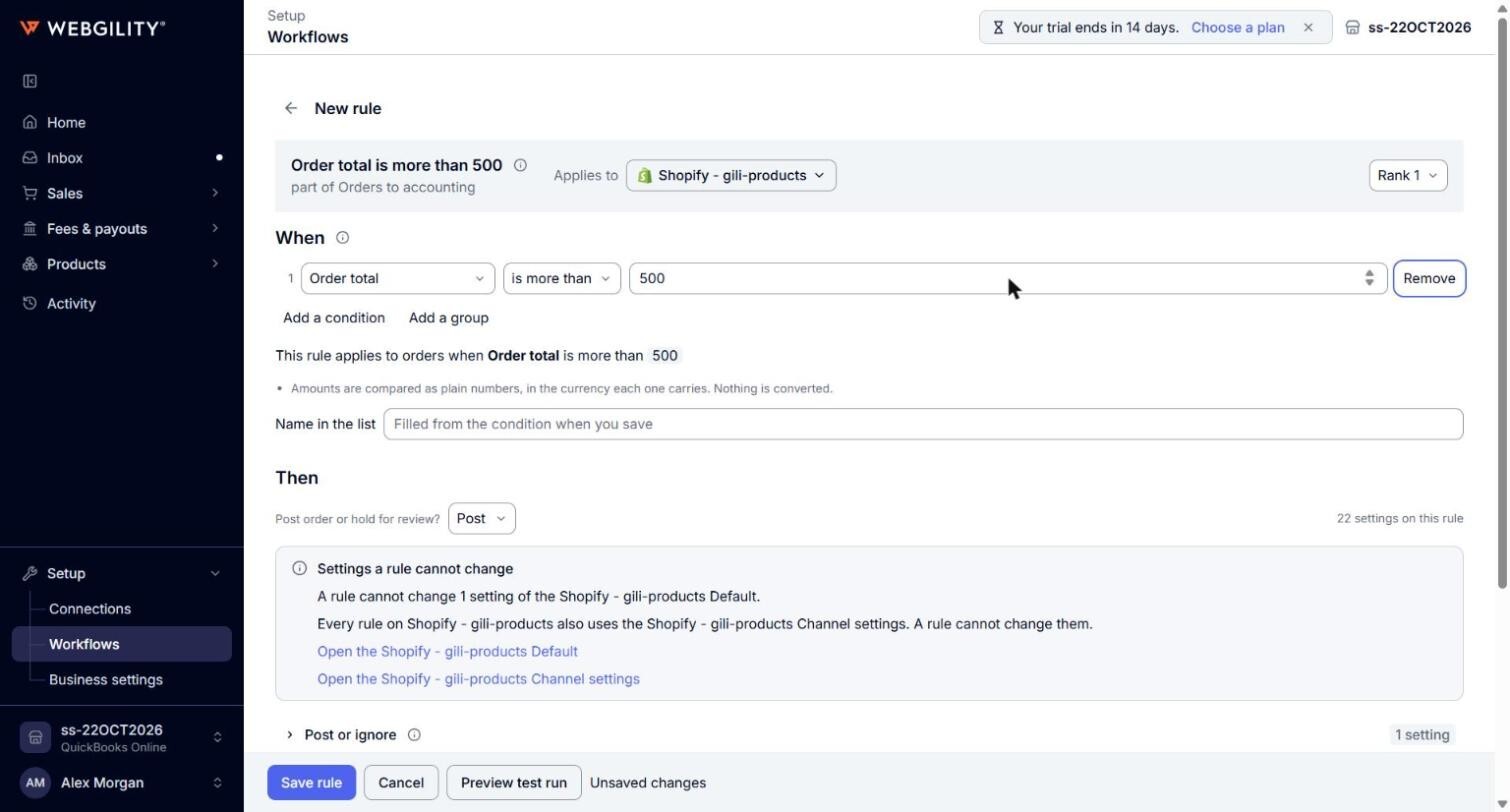
- Read the header, then the When section, then the Then section, as described below.
- Click Save changes, or Save rule on a new rule, to keep your changes. Click Cancel or Back to Workflows to leave. If you made changes, Webgility i asks before it discards them.
The header
- Back to Workflows: the arrow at the top returns to the Workflows page. Next to it, the screen says New rule or Edit rule.
- Rule name: the rule's name, as it shows on the Workflows page. Under it, the workflow the rule is part of, for example "part of Orders to accounting". Point to the info icon next to the name to read how rules are checked.
- Applies to: the sales channel the rule applies to. On a new rule you can click it to select another sales channel.
- Rank: the rule's position among the rules of its sales channel. See How to Change the Priority (Rank) of Your Rules.

The When section
The When section holds the rule's condition: which orders the rule is for. Point to the info icon next to When to read how a rule matches.
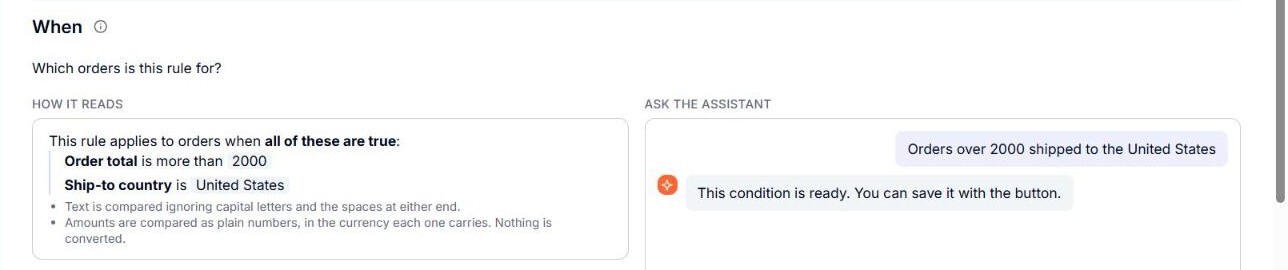
- Ask the assistant: the box where you describe, in your own words, which orders the rule is for, for example "Orders over 2000 shipped to the United States". The assistant sets the condition. See How to Use AI Assistance to Set Up Rule Conditions.
- How it reads: the condition the assistant set, for example "This rule applies to orders when all of these are true: Order total is more than 2000, Ship-to country is United States". It is the condition exactly as Webgility i will check it. Until a condition is set, it says Nothing is set yet.
- Name in the list: the name the rule shows on the Workflows page. Leave it empty and it is filled from the condition when you save.
Note: When the order of your rules affects this rule, a Heads-up: the order of your rules. note shows at the end of the When section. See How to Change the Priority (Rank) of Your Rules.
The Then section
The Then section holds what the rule does with the orders it matches.
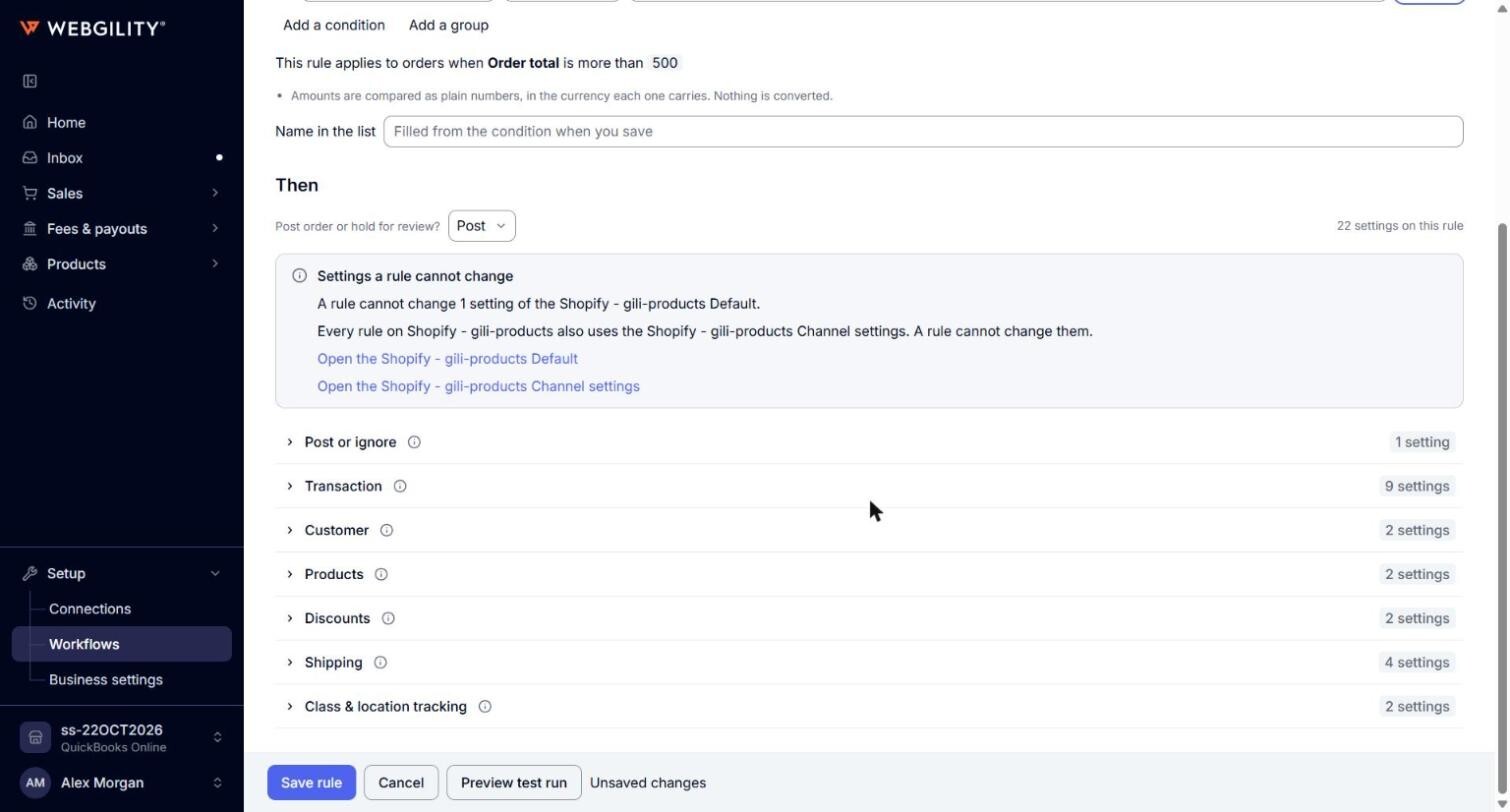
- Post order or hold for review?: select Post to post the orders with this rule's settings, or Hold to keep them from posting. With Hold, the section shows the note This rule does not post in place of the settings: the orders wait on the Orders page with the status Held by rule, and once you change or delete the rule, Webgility i checks them against the rules again.
- Settings count: the number at the right, for example "12 settings on this rule".
- Settings a rule cannot change: a note that says how many settings only the Default sets, and that every rule also uses the channel settings. Its links open them, for example Open the Shopify US Default and Open the Shopify US Channel settings.
- Sections: the settings are grouped in sections, such as Transaction, Customer, Products, Discounts, Shipping, Deposit account, Payments and Class & location tracking. Click a section to open or close it. Point to the info icon next to a section or a setting to read what it covers.
Note: The sections you see depend on the workflow. A refund rule, for example, shows the settings that refunds post with. On a refund rule the question reads Post refund or hold for review?.
The buttons at the bottom
- Save changes or Save rule: saves the rule.
- Delete rule: deletes a saved rule after you confirm. Orders it matched then fall through to the rules below it, and then to the Default. You cannot undo this.
- Cancel: returns to the Workflows page without saving.
- Preview test run: compares what this rule posts with what the Default posts. It saves nothing.
Note: While you have changes you have not saved, the bottom of the screen says Unsaved changes. If you leave the screen, Webgility i asks Discard your changes?. Click Keep editing to stay, or Discard to leave without saving.