
You turn automation on for each channel, on the Automation tab of its settings. Automation decides whether Webgility i posts by itself. Your workflows on the Workflows page decide what posts and how.
Note: Automation posts only what a workflow lets through. Before you turn automation on, check that the Default of each workflow for the channel is set to Post under Setup > Workflows. While a Default is on Hold, Webgility i does not post the records it covers, even with automation on.
Steps:
- Go to Setup > Connections.
- On the card of the sales channel, click Settings. The channel's settings open on the Posting and sync tab.
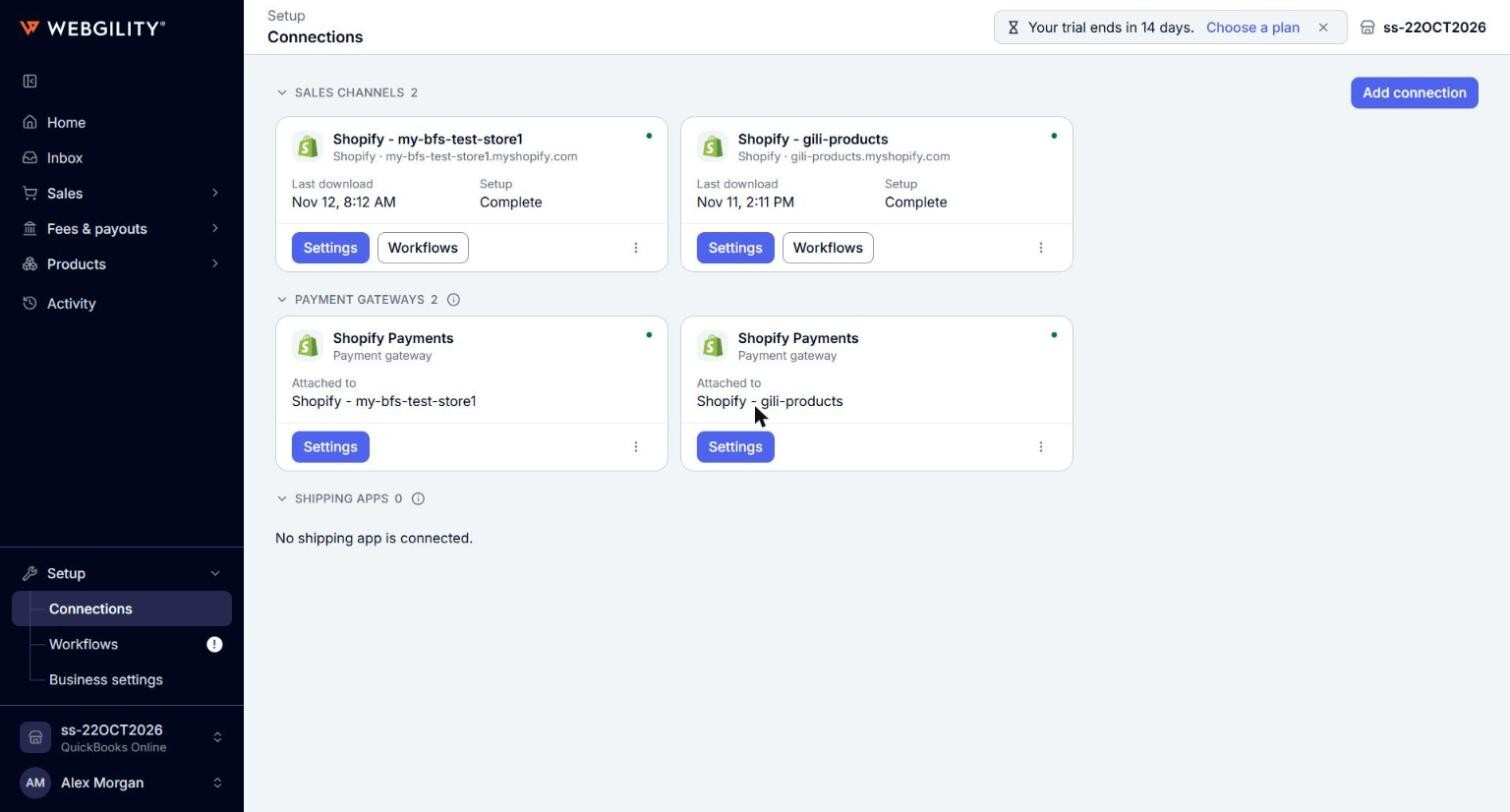
Note: While the channel's setup is not finished, the button reads Complete setup instead of Settings.
- Click the Automation tab.
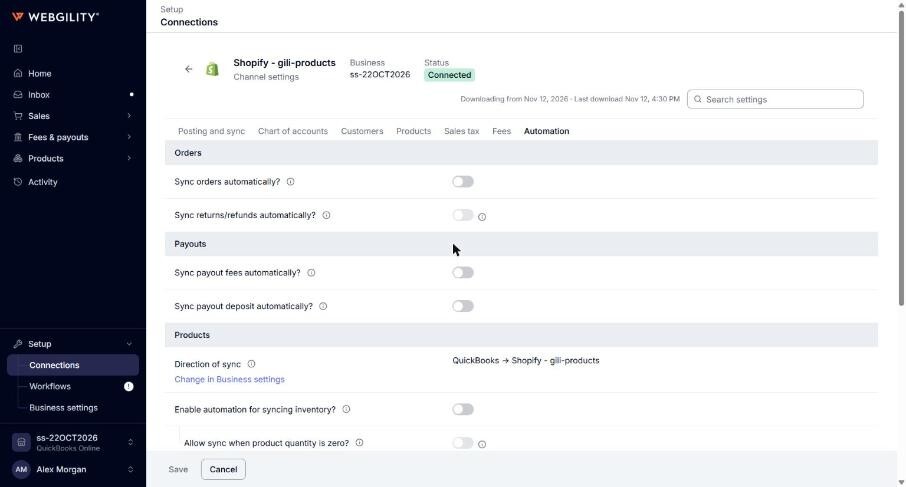
- Under Orders, turn on Sync orders automatically? to have Webgility i post the channel's orders by itself.
- Turn on Sync returns/refunds automatically? to have Webgility i post the channel's refunds by itself, after the orders.
- Under Payouts, turn on Sync payout fees automatically? to post the fees of each payout, and Sync payout deposit automatically? to post the deposit of each payout. On an Amazon channel these read Sync marketplace fees automatically? and Sync settlement deposit automatically?. The Payouts section shows only on channels that have payouts.
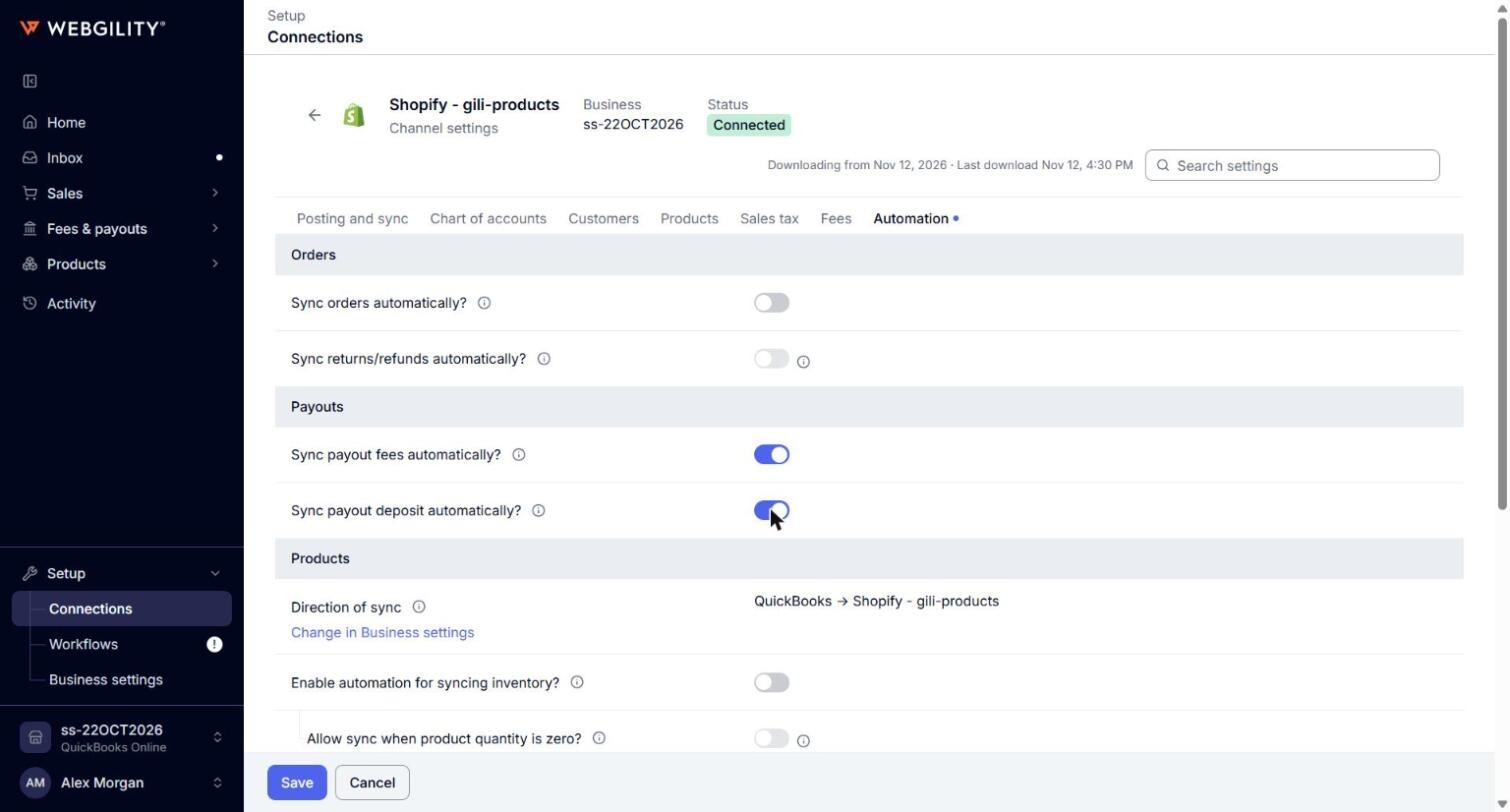
- Click Save. Webgility i saves every switch you changed and shows Automation saved, with one line for each change.
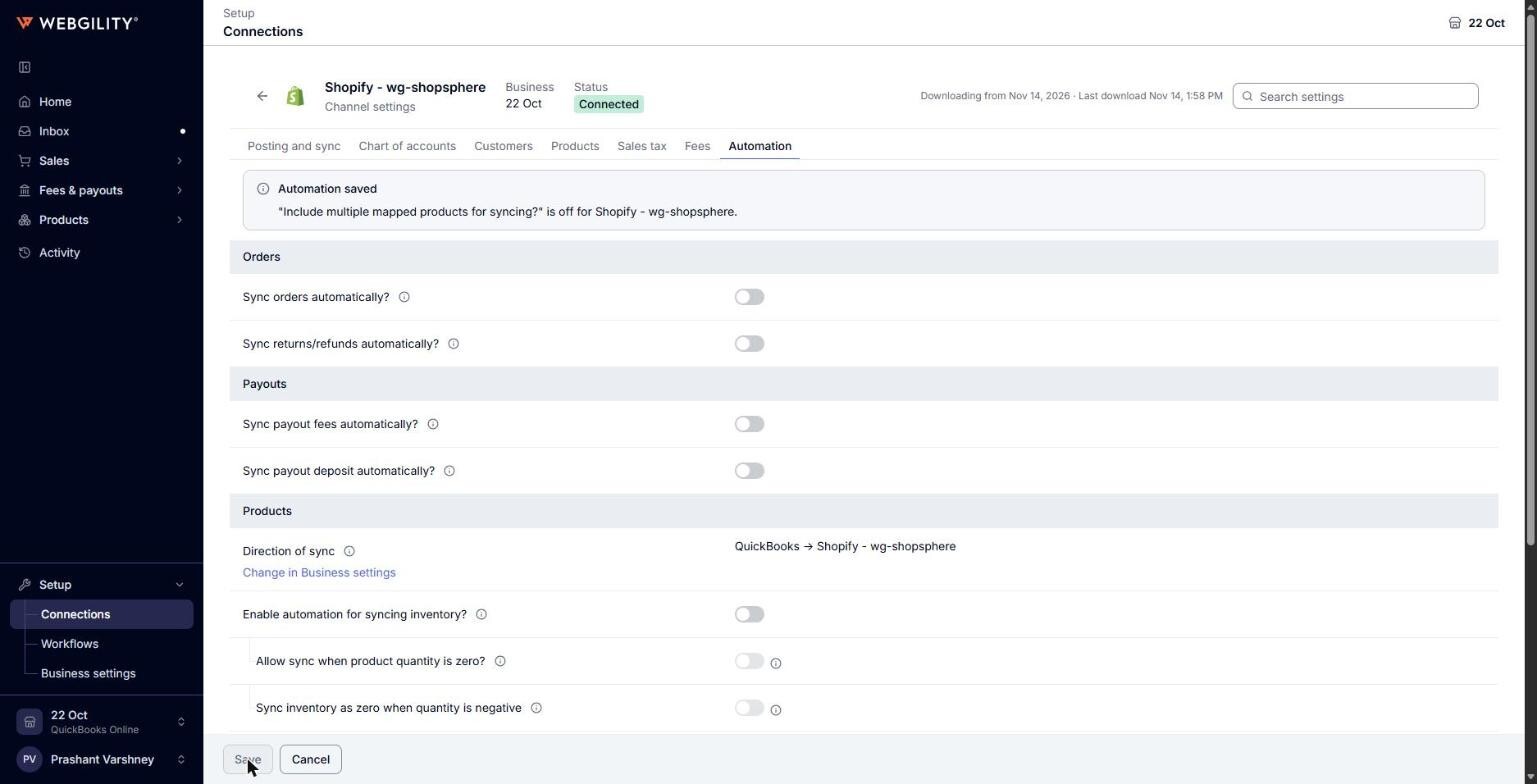
Note: Nothing changes until you click Save. If you leave the tab with unsaved changes, Webgility i asks whether to discard them.
Why there is no frequency setting
You do not choose how often Webgility i posts. You choose how the channel posts, and Webgility i decides when, from that choice:
- Transactional (one document per order): Webgility i posts new orders and refunds shortly after it downloads them. Once a day, at 3:00 a.m. in the channel's time zone, it also runs a check that posts anything still waiting.
- Consolidated (one document per period): Webgility i posts once a day, at 2:00 a.m. in the channel's time zone, one document for the previous day's orders.
You set how the channel posts in How this Channel posts, on the Posting and sync tab. To learn what each choice means for automation, see Understanding Posting Grain and How It Affects Automation.
What each switch does
- Sync orders automatically?: on, Webgility i posts your orders by itself. Off, you post them yourself from the Orders page. On a channel that posts Consolidated, this switch is the Default of Consolidated orders to accounting: turning one on turns on the other.
- Sync returns/refunds automatically?: on, Webgility i posts your refunds by itself, after the orders. On a channel that posts Consolidated, this switch works only while Sync orders automatically? is on.
- Sync payout fees automatically?: on, Webgility i posts the fees of each payout by itself. Off, you post the fees yourself from the Fees page.
- Sync payout deposit automatically?: on, Webgility i posts the deposit of each payout, the transfer of the net amount to your bank, by itself. Off, you post the deposit yourself from the Payouts page.
Note: The payout switches are off until you turn them on. They decide only what Webgility i posts by itself. You can still post fees from the Fees page and deposits from the Payouts page, whatever these switches say.
Note: For payout fees and deposits to post by themselves, also keep Sync orders automatically? or Sync returns/refunds automatically? on for the channel.
The Products section
The Products section shows the Direction of sync for the channel and the switches Enable automation for syncing inventory?, Enable automation for syncing price? and Enable automation for syncing cost?. Each has its own options under it, which you can change only while its switch is on. A switch the channel cannot use is greyed out, and pointing to its info icon shows why. To change the direction of sync, click Change in Business settings.
If a switch shows Not set
Not set means the channel has no automation settings yet, so its switches cannot be saved. Open the Posting and sync tab and click Set up automation settings, then come back to the Automation tab.