
Each row of the page is one payout, with the fees the channel took out of it before the money reached your bank. To learn what a payout is and how the Fees page differs from the Payouts page, see Understanding Fees and Payouts in Webgility i.
Note: Before you post, make sure the channel posts Transactional and the Default of the Payouts to accounting workflow for the channel is set to Post. While the Default is on Hold, Post to QuickBooks does not take the channel's payouts. Also check that Post the payout fees to QuickBooks is on in that Default. While it is off, the channel's payouts show Posting off and cannot be posted from this page.
Steps:
- Go to Fees & payouts > Fees. The page opens on the Not posted tab, which lists the payouts whose fees are not in QuickBooks Online yet.
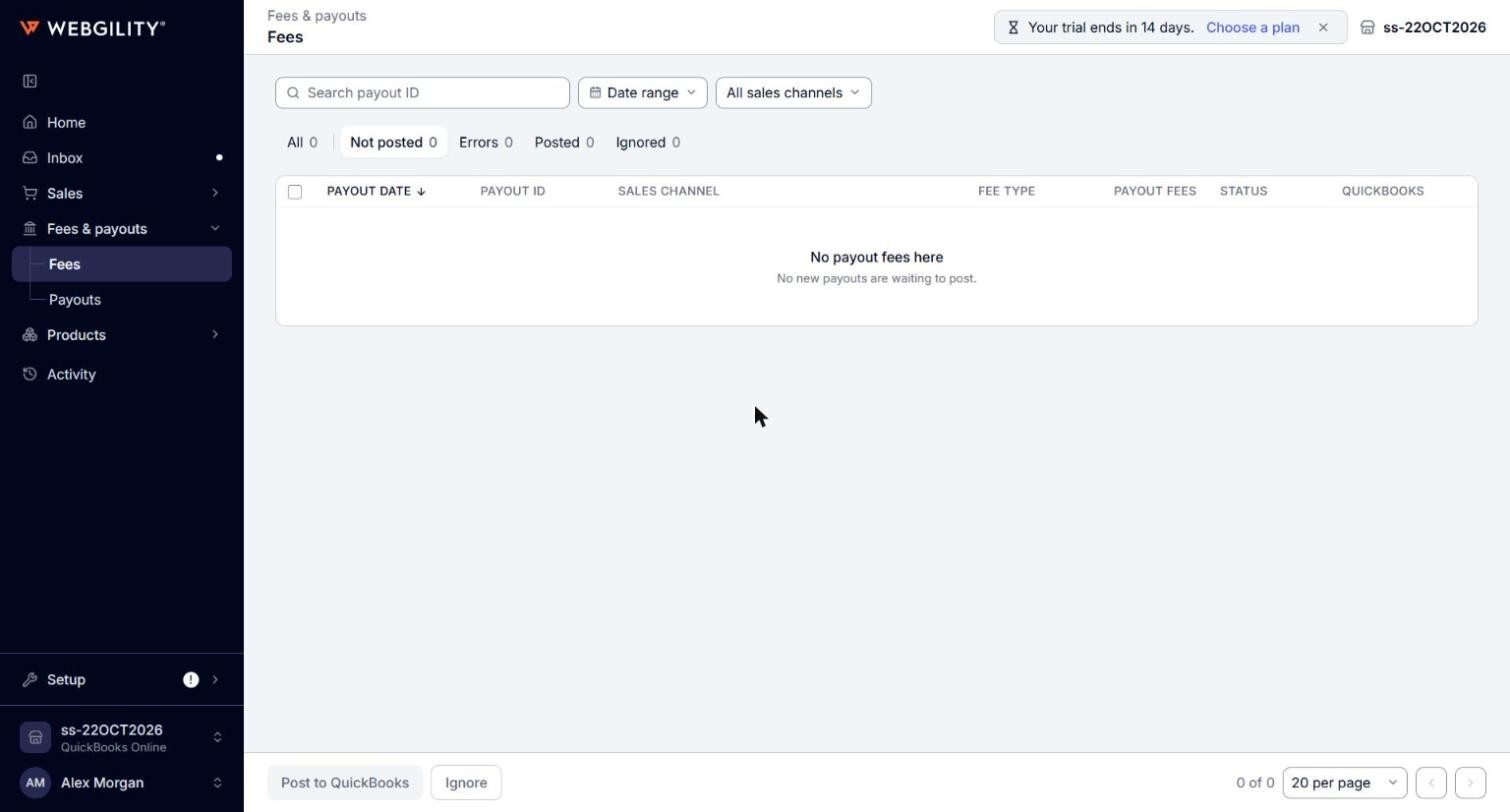
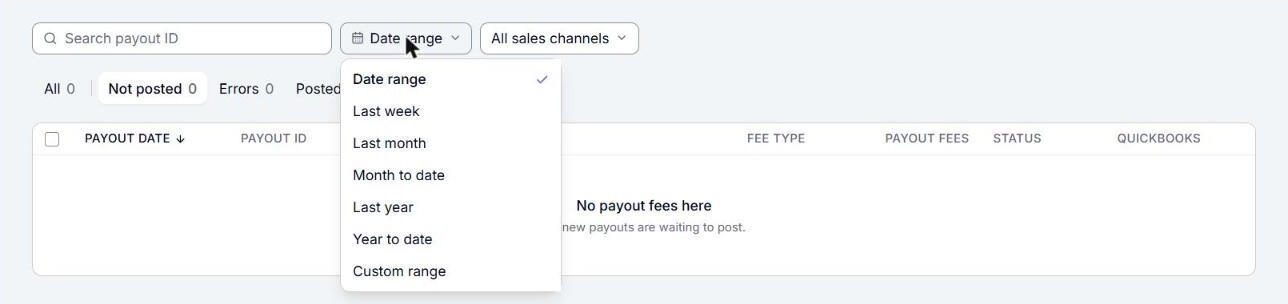
- Narrow the list if you need to. Type a payout ID in Search payout ID, choose dates in the Date range filter, or, when the business has more than one store, choose a store in the All sales channels filter. On the Not posted tab, the Held filter shows only the payouts Webgility i is holding back.
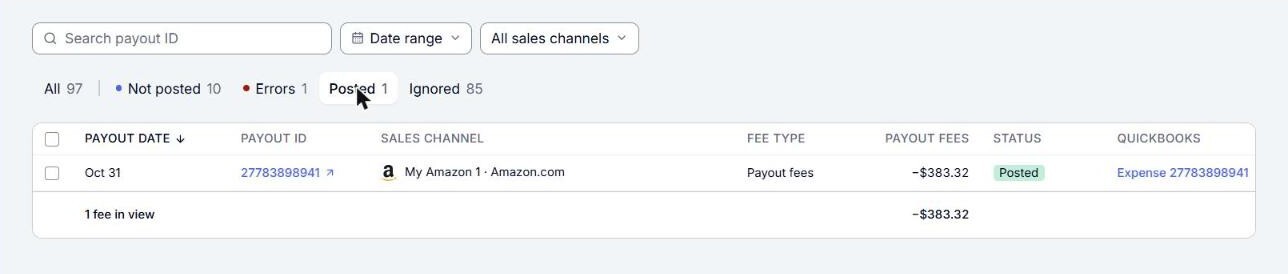
- Review the payouts in the list. Each row shows the Payout date, the Payout ID, the Sales channel, the Fee type, the Payout fees amount, the Status and, once posted, the QuickBooks document. Point to a status to see why the payout is where it is.
- Click a payout's row (not its Payout ID) to open its details on the right. Check What the period came to, which shows the period's fees, income and Net deposit, and What will be created in QuickBooks, which shows the documents Webgility i will create for the fees. If the payout cannot post, the panel shows Errors, Why it is held, Why Post is off or Why this will not post. If some lines of the payout have a type that no fee type matches, the panel lists them under Lines with a new type, and each one posts to Other fees.
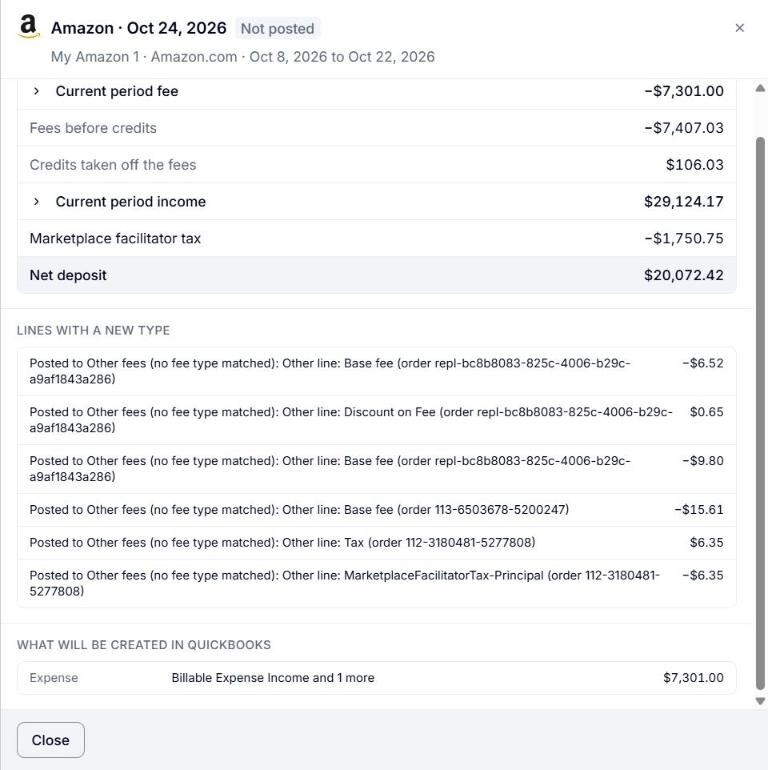
- Use Previous payout and Next payout at the top of the panel to step through the list. Click Close or the close icon when you are done.
- Select the boxes of the payouts you want to post. The footer shows how many fees you selected and their total.
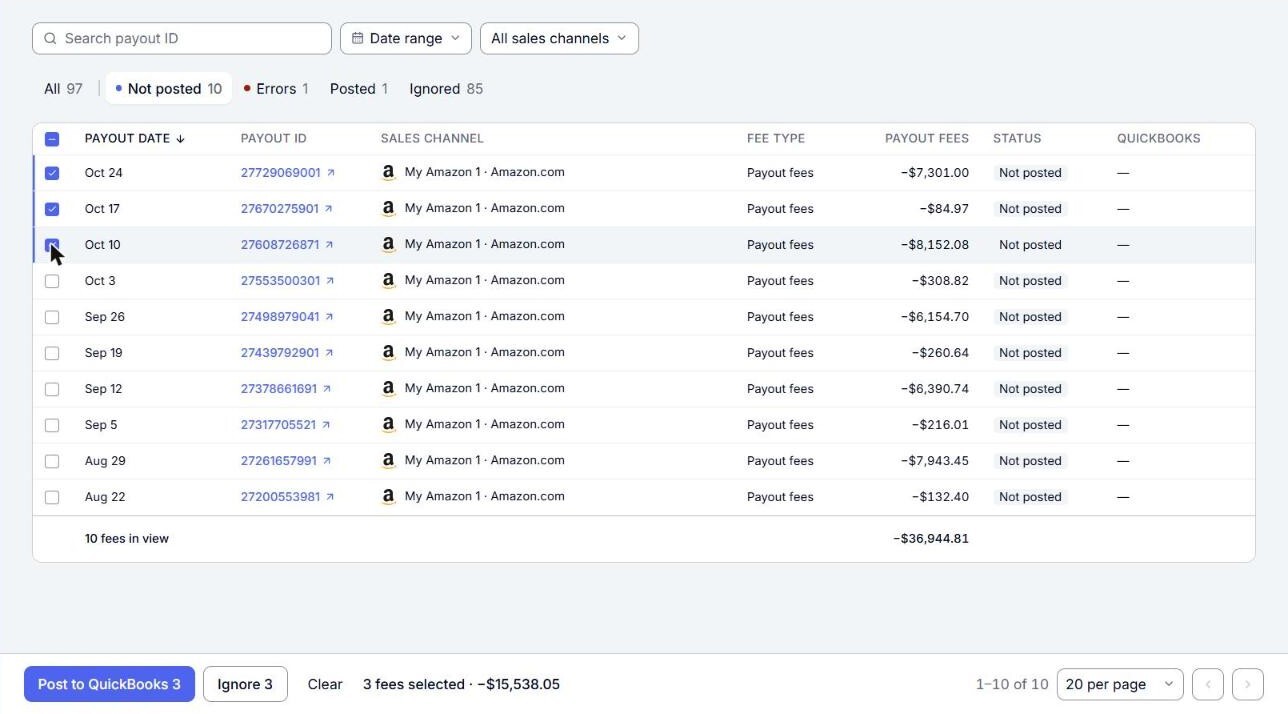
- Click Post to QuickBooks in the footer. The status of each payout you selected changes to Posting.
- Wait while Webgility i posts. When posting finishes, each payout moves to its new status. A message at the top of the page tells you about anything that was not posted.
- Open the Posted tab. Each posted payout shows its QuickBooks Online document in the QuickBooks column. Click the document to open it in QuickBooks Online.
Note: Post to QuickBooks on this page posts only the payout's fees. Post the net deposit from the Payouts page. Until then, the payout shows Held: your call on the Payouts page, unless Sync payout deposit automatically? is on, in which case Webgility i posts it by itself. If a box cannot be selected, point to it to see why that payout cannot be posted.
What each status means
- Not posted: the fees are not in QuickBooks Online yet. A red Not posted status, on the Errors tab, means the last attempt failed or Webgility i is holding the payout until you fix a setting. Point to it to see the reason.
- Posted: the fees are in QuickBooks Online.
- Waiting: Webgility i is waiting for something from the channel, such as the rest of the payout's lines, and posts it when that arrives.
- Held: your call: Webgility i is waiting for you. Point to the status to see why. For example, the payout's deposit was posted from the Payouts page and its fees wait for you to post them. Post it, ignore it, or change the setting the reason names.
- Needs support: nothing you change clears this hold. Post to check again, and if it is held again, contact Webgility support with the payout ID.
- Changed after posting: the payout changed after a document was posted. Unpost it, and it posts again after the unpost.
- Ignored: someone ignored the fees of this payout, and Webgility i does not post them.
- No fees to post: the payout has no fees, so there is nothing to post.
Ignore, restore or unpost fees
- Ignore: select payouts on the All, Not posted or Errors tab and click Ignore, then confirm. Webgility i leaves their fees out of QuickBooks Online and skips them in every posting run until you restore them.
- Restore: on the Ignored tab, select payouts and click Restore, then confirm. Their fees move back to Not posted, where they can post again.
- Unpost: on the Posted or All tab, select payouts and click Unpost, or open a posted payout and click Unpost in its panel. Webgility i removes their fee documents from QuickBooks Online, including the Bill payment and the tax Journal Entry. There is no confirmation step. The payout's deposit stays posted.
Note: For eBay, Walmart, TikTok Shop and Square, Ignore and Restore move the whole payout, fees and deposit together.
Why the amounts can differ
- The Payout fees column shows the fees before any credits the channel gave back in the same payout. The document Webgility i posts takes those credits off, so it can be smaller. The payout panel shows both amounts.
- The Channel and payment fees row on your Home page counts the fees of the orders placed this month. The Fees page lists the fees of each payout by payout date, so the two totals can differ.