
A connection links one store to Webgility i, which then reads the orders and products of that store. You can connect a store from the Welcome to Webgility page when you first sign in, or at any time from Setup > Connections.
Note: Your account starts with one business, named Business 1. A business is one set of books: it connects to one QuickBooks Online company and can hold many stores. Its name shows at the top right of every page and at the bottom of the left menu. When you connect QuickBooks Online, the business takes the name of the QuickBooks Online company. See How to Configure Your Business Settings.
Note: Each store joins the business shown at the bottom of the left menu. Your plan sets how many stores you can connect. While your plan has no room for another store, Sales channel cannot be selected and the panel shows "Your plan has no room for another store. Contact Webgility support to add more stores."
Steps:
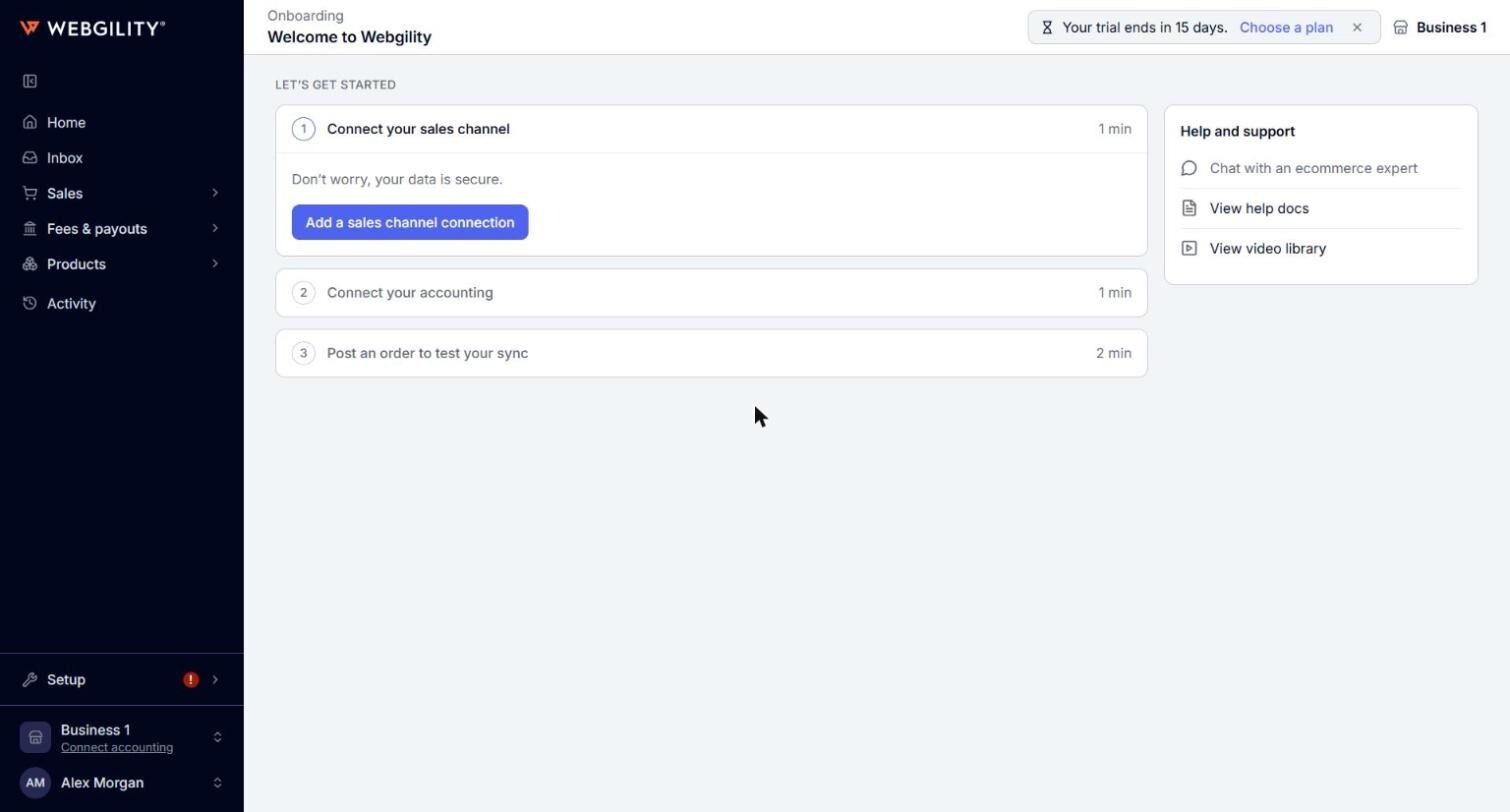
- Sign in to Webgility i. On the Welcome to Webgility page, in step 1, Connect your sales channel, click Add a sales channel connection. The Add connection panel opens on the right.
Note: You can also go to Setup > Connections and click Add connection. The same panel opens.
- Under What are you adding?, leave Sales channel selected. Under Connector, click your sales channel.
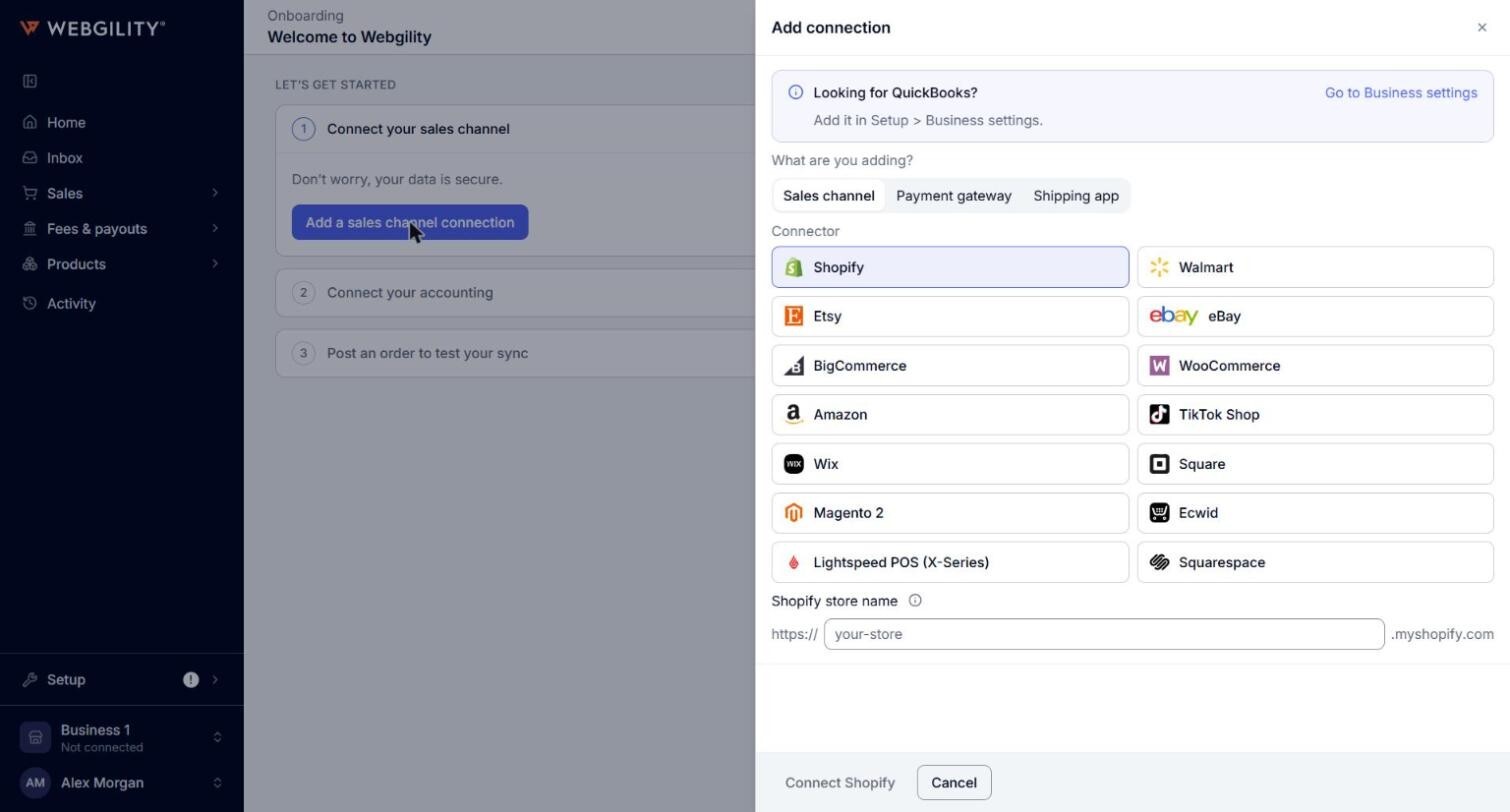
- If the panel asks for details, such as your store name or store address, enter them. See Details each sales channel asks for, below.
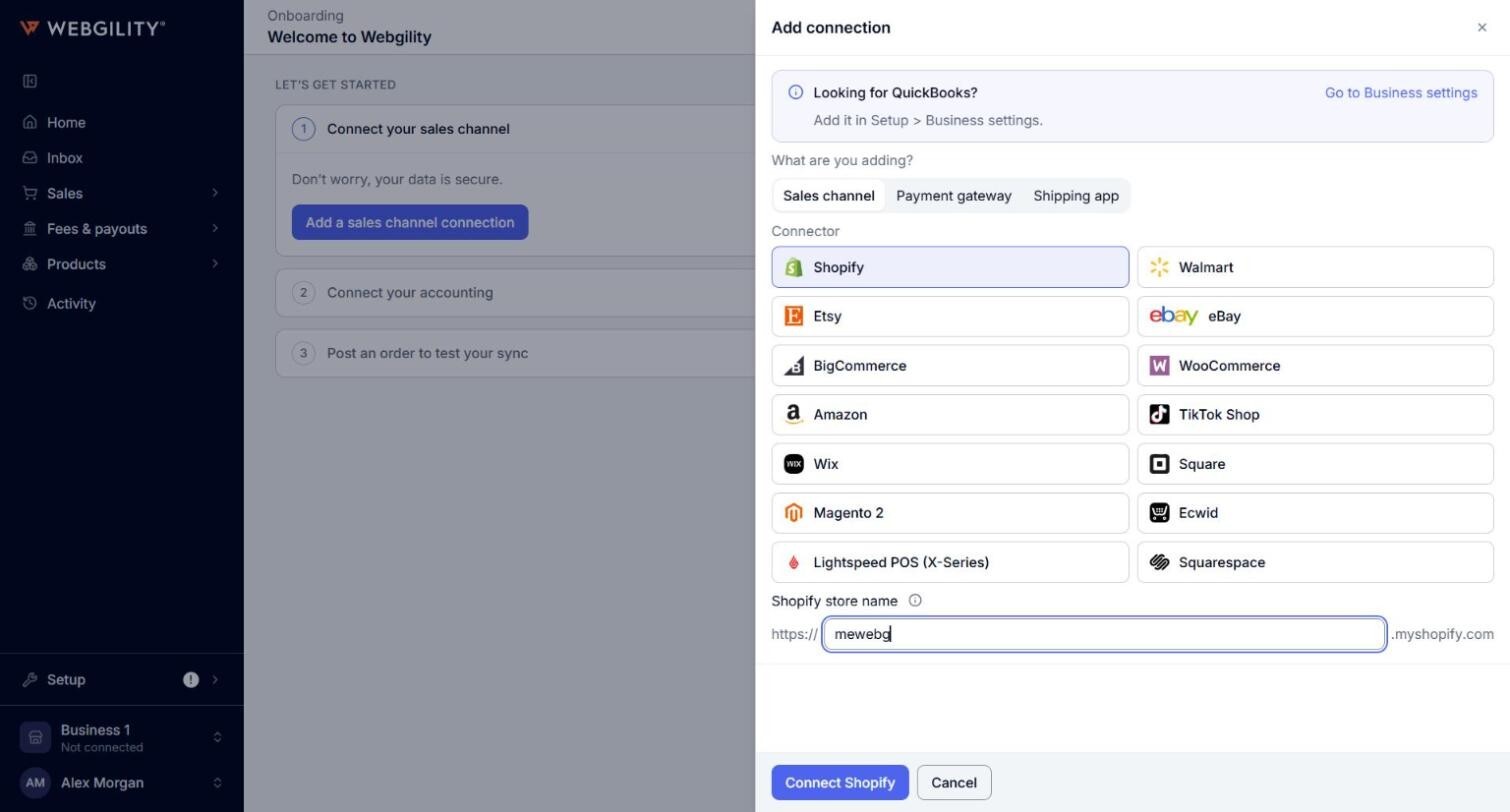
- Click the connect button at the bottom of the panel. It names your sales channel, for example Connect Shopify or Connect Amazon.
- A sign-in window from your sales channel opens. Sign in and approve access for Webgility. Webgility i never sees your sales channel password.
Note: If your browser blocks pop-up windows, the sign-in opens in the same tab instead.
Note: The window closes by itself when the sign-in is done. If it stays open, click Continue in it.
- Wait while Webgility i checks your store and saves the connection. Keep the page open.
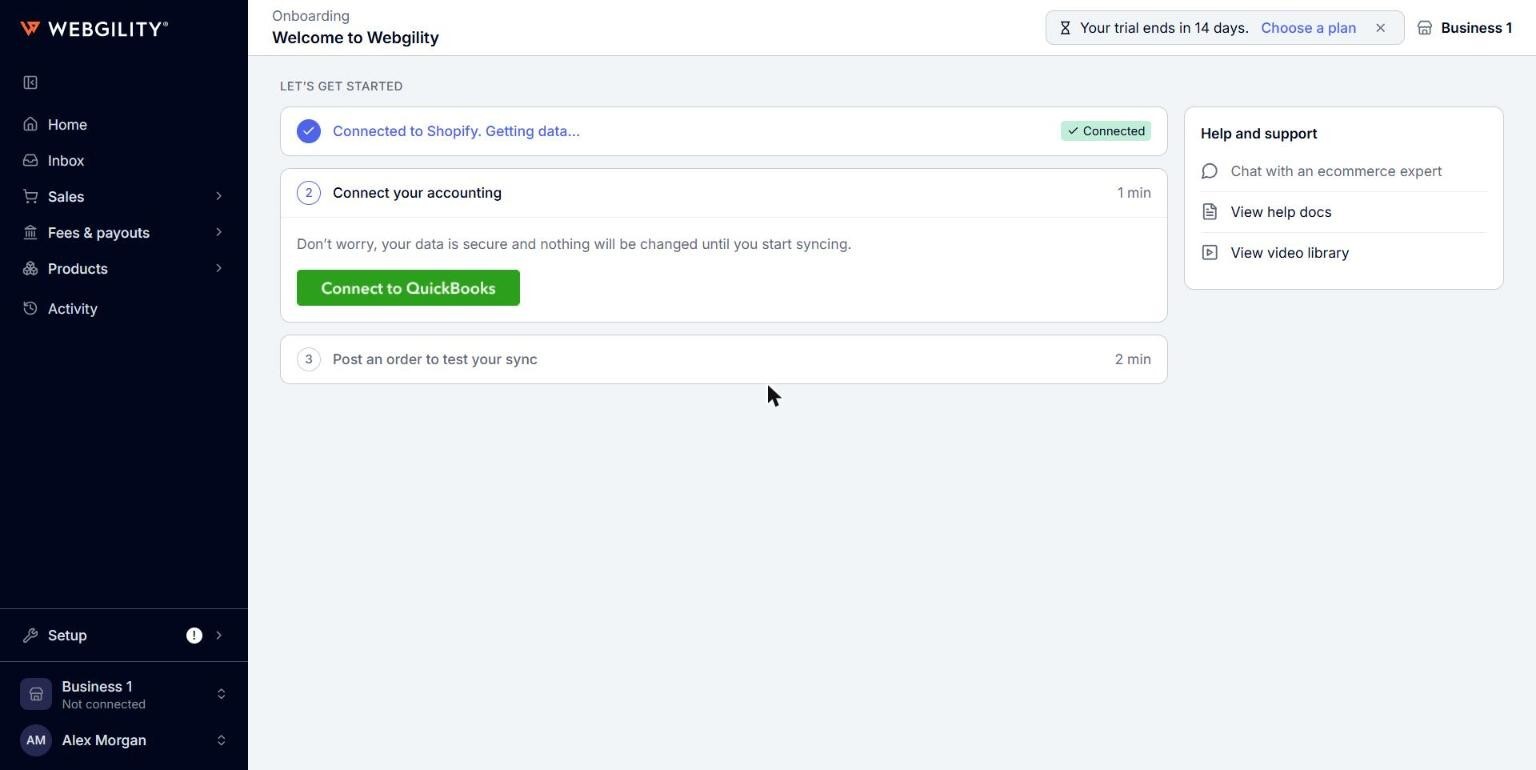
- When the connection is complete, step 1 of the Welcome to Webgility page shows "Connected to" followed by your sales channel, with a Connected tag. If you connected from Setup > Connections, the page shows "Store connected. Webgility is now reading its orders." and the store appears under Sales channels.
Details each sales channel asks for
- Shopify: enter your Shopify store name, the first part of your Shopify address. In your-store.myshopify.com, enter your-store. Then click Connect Shopify and approve access in Shopify.
- Walmart: in Store location, pick the Walmart marketplace of your seller account. Options: United States, Canada. Default: United States. If you do not see Store location, Webgility i connects your United States seller account. Then click Connect Walmart and approve access in Walmart.
- Amazon: in Store location, pick the Amazon region of your seller account. Options: United States, Europe. Europe includes the United Kingdom. Default: United States. Then click Connect Amazon and approve access in Amazon.
- Etsy: click Connect Etsy and approve access for your Etsy shop.
- eBay: click Connect eBay and approve access for your eBay seller account.
- TikTok Shop: click Connect TikTok Shop and approve access for your shop. Webgility i connects one TikTok shop in the United States.
- Wix: click Connect Wix. Wix asks you to install the Webgility app on your site.
- Square: click Connect Square, sign in and allow access. One connection holds every location of your Square account. The account needs at least one active location.
- Ecwid: click Connect Ecwid, sign in and allow access. Your Ecwid plan must allow apps.
- Lightspeed POS (X-Series): click Connect Lightspeed, sign in to your store and allow access. One connection holds every outlet of the store.
- Squarespace: click Connect Squarespace, sign in, pick your site and allow access. The site needs a Squarespace Commerce plan.
- BigCommerce: click Connect BigCommerce, sign in, pick your store and install the Webgility app. Back in Webgility i, the page asks "Is this the store you want to connect?". Check the store and click Connect this store. If it is not the right store, click Cancel and start again.
- WooCommerce: enter your WooCommerce store address, such as yourstore.com or yourstore.com/shop. Webgility i adds https. Click Connect WooCommerce, then sign in to WordPress and approve access for Webgility. The page shows "WooCommerce approved the connection." and updates by itself in a few seconds.
- Magento 2: enter your Magento 2 store address and the Access token of the Webgility integration in your Magento admin, under System, Integrations. On Magento 2.4.4 or later, also set Allow OAuth Access Tokens to be used as standalone Bearer tokens to Yes in Magento. Click Connect Magento 2. If the page asks "Which store view do you want to connect?", pick one in Website and store view and click Connect this store.
Note: Webgility i reads the orders of one Magento 2 store view per connection. To connect another store view of the same store, add another connection.
Some steps happen inside your sales channel, such as creating the Magento integration. See the Webgility help article for your sales channel: Shopify, Amazon, Walmart, Etsy, eBay, TikTok Shop, Wix, Square, Ecwid, Lightspeed POS (X-Series), Squarespace, BigCommerce, WooCommerce or Magento 2.
What to expect after connecting
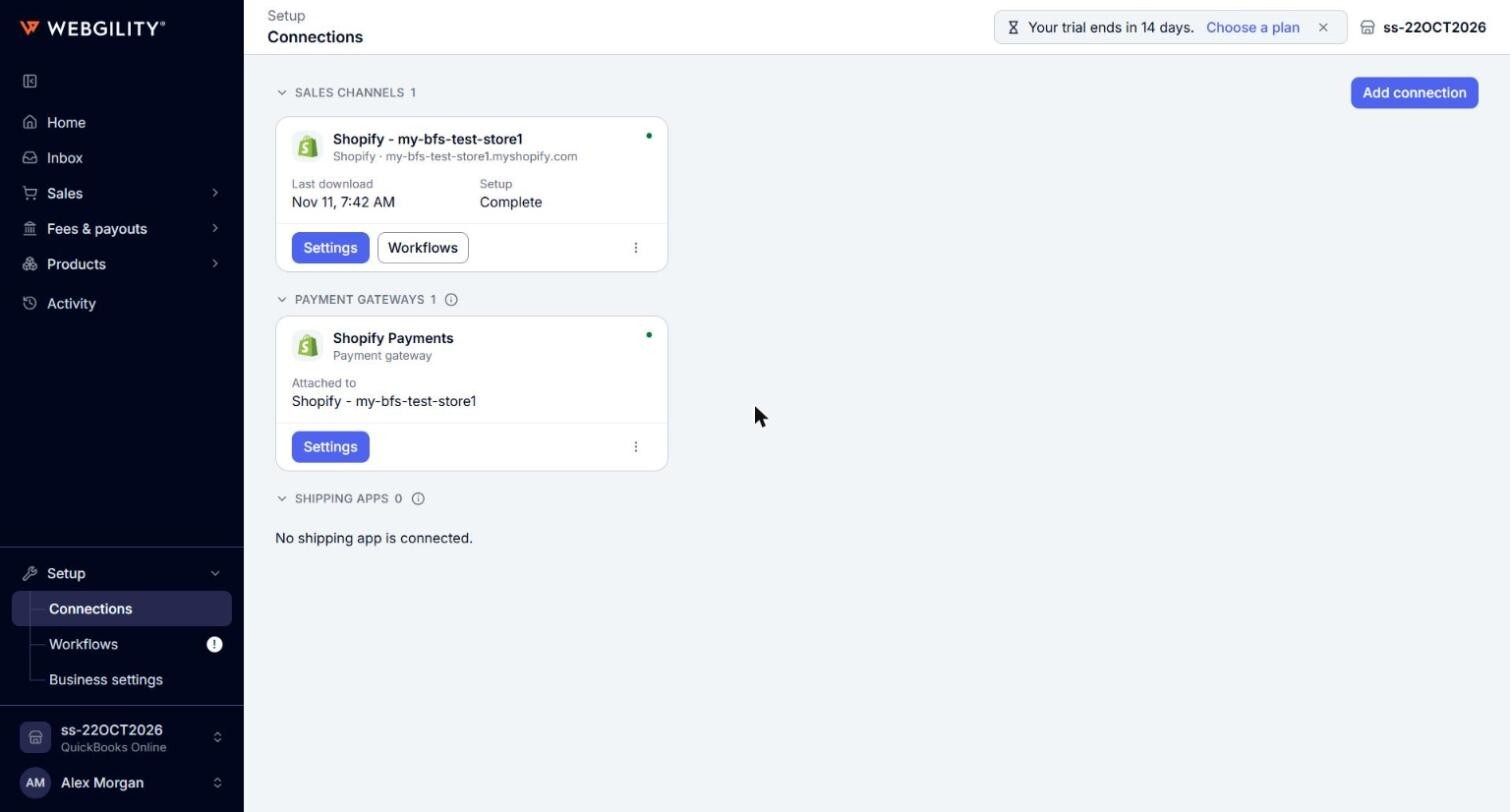
- The store card under Sales channels takes the name of the sales channel and the store, for example Shopify - your-store. It shows Last download, and the buttons Settings and Workflows.
- The Sales channels heading shows how many stores your plan allows and how many you use, for example 1 of 3 stores used.
- A Shopify or Square store can also add a Shopify Payments or Square payments card under Payment gateways. You do not need to connect it yourself. See How to Connect a Payment Gateway to Webgility i.
- Webgility i starts reading the orders of the store. Nothing is posted to QuickBooks Online until you connect QuickBooks Online and start syncing.
If the connection does not complete
- "This store is already connected.": the store already has a connection. Click Reauthorize it instead to sign in to it again.
- "Your plan has no room for another store.": contact Webgility support to add more stores.
- A message that your sales channel did not accept the approval: try again and approve access for the account or store that you want to connect.
- A message that your sales channel did not complete the connection, or the link ran out of time: nothing was saved. Try again.
- "Webgility is still connecting your store.": the connection is taking longer than usual. Open Setup > Connections in a minute to see the result.
- A message with a reference that asks you not to try again: contact Webgility support and share the reference.
Next steps
Continue with step 2 on the Welcome to Webgility page, Connect your accounting. See How to Connect Your QuickBooks Online Account to Webgility i. Then review how Webgility i reads and posts the orders of the store. See How to Configure Your Channel Settings.