
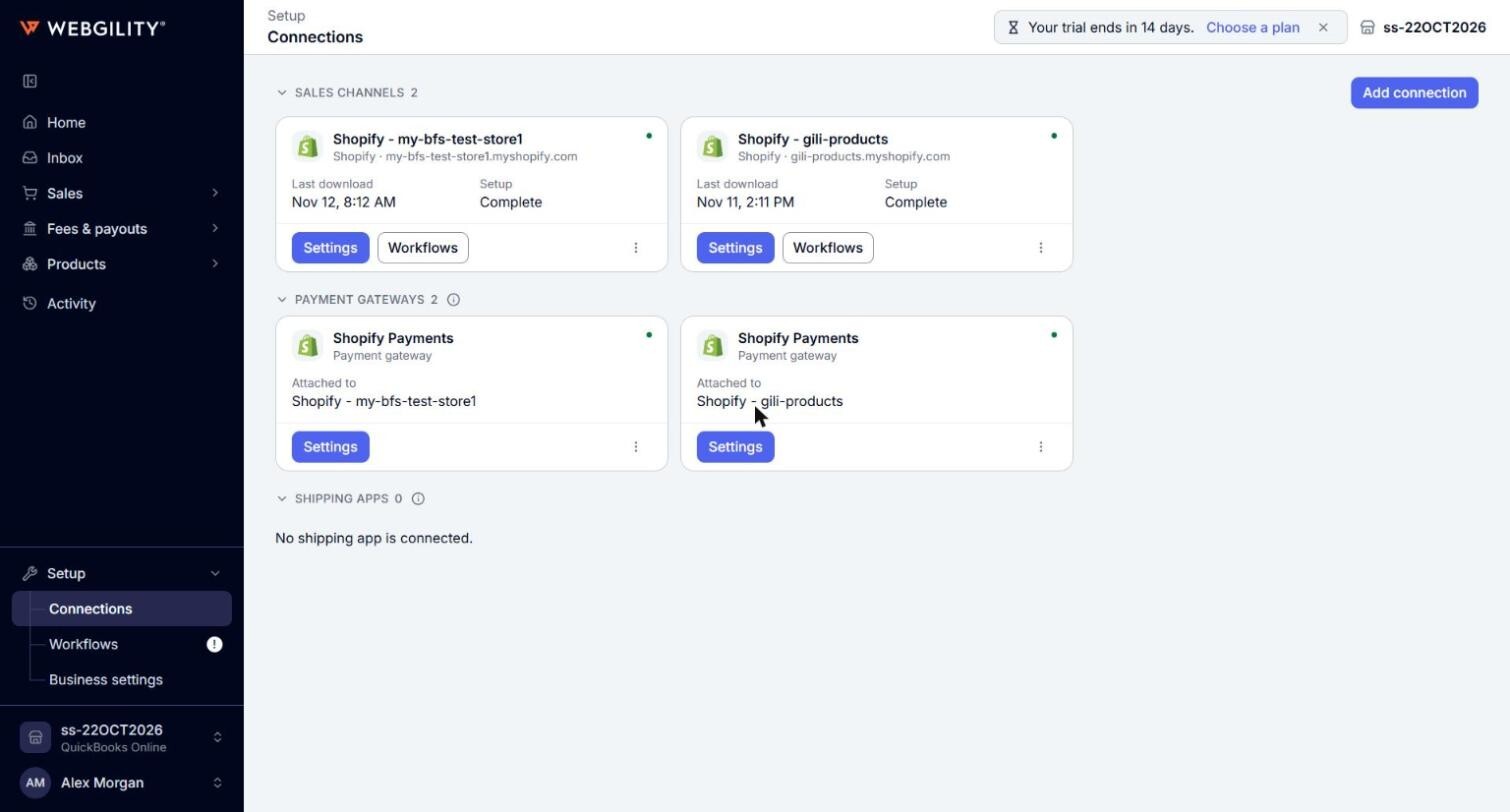
Webgility i then reads the payment fees of the orders of those stores from the gateway, so the fees can post to QuickBooks Online.
Note: A payment gateway belongs to the business shown at the bottom of the left menu, and you attach it to one or more stores of that business. Connect your sales channel first, so there is a store to attach the gateway to.
Supported payment gateways
- PayPal: you connect it with the Client ID and Secret of a REST app of your PayPal business account.
- Stripe: you sign in with Stripe and pick the account.
- Shopify Payments and Square payments: these come with a Shopify or Square store. Webgility i shows their card under Payment gateways once the store is connected, so there is nothing to connect.
Steps: Connect PayPal
- Go to Setup > Connections and click Add connection. The Add connection panel opens on the right.
Note: You can also open this panel from the Welcome to Webgility page. Click Add a sales channel connection, then click Payment gateway.
- Under What are you adding?, click Payment gateway. Under Connector, click PayPal.
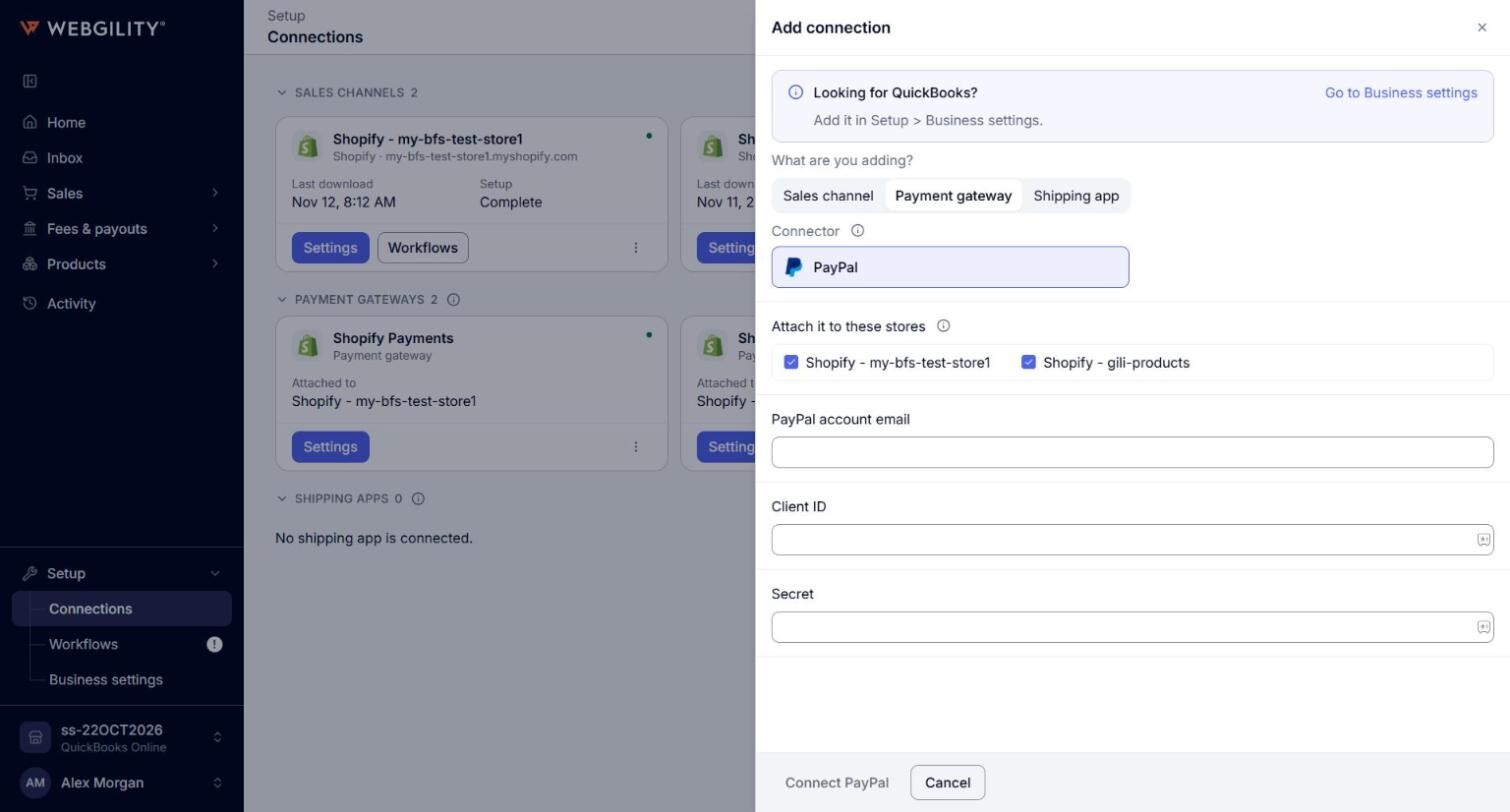
- Under Attach it to these stores, keep ticked each store whose payment fees Webgility i should read from this gateway. Every store of the business is ticked at first.
- Enter the PayPal account email, and the Client ID and Secret of your PayPal REST app. The REST app needs Transaction Search turned on in its features at developer.paypal.com. PayPal can take a few hours to turn Transaction Search on.
- Click Connect PayPal. Connecting takes up to a minute.
- When the connection is complete, the page shows "The payment gateway is connected. Its fees arrive with the next orders." The gateway appears under Payment gateways, with the stores it is attached to under Attached to.
Some steps happen inside PayPal, such as creating the REST app. See the Webgility help article for PayPal.
Steps: Connect Stripe
Note: Stripe is available only on accounts where Webgility has turned it on.
- Go to Setup > Connections and click Add connection.
- Under What are you adding?, click Payment gateway. Under Connector, click Stripe.
- Under Attach it to these stores, keep ticked each store whose payment fees Webgility i should read from this gateway.
- Click Sign in with Stripe. In the window that opens, sign in to Stripe, pick the account and approve access for Webgility.
- When the connection is complete, the page shows "The payment gateway is connected. Its fees arrive with the next orders." Webgility i reads the payment fees of the account from the last 15 days on.
Set how payment fees post
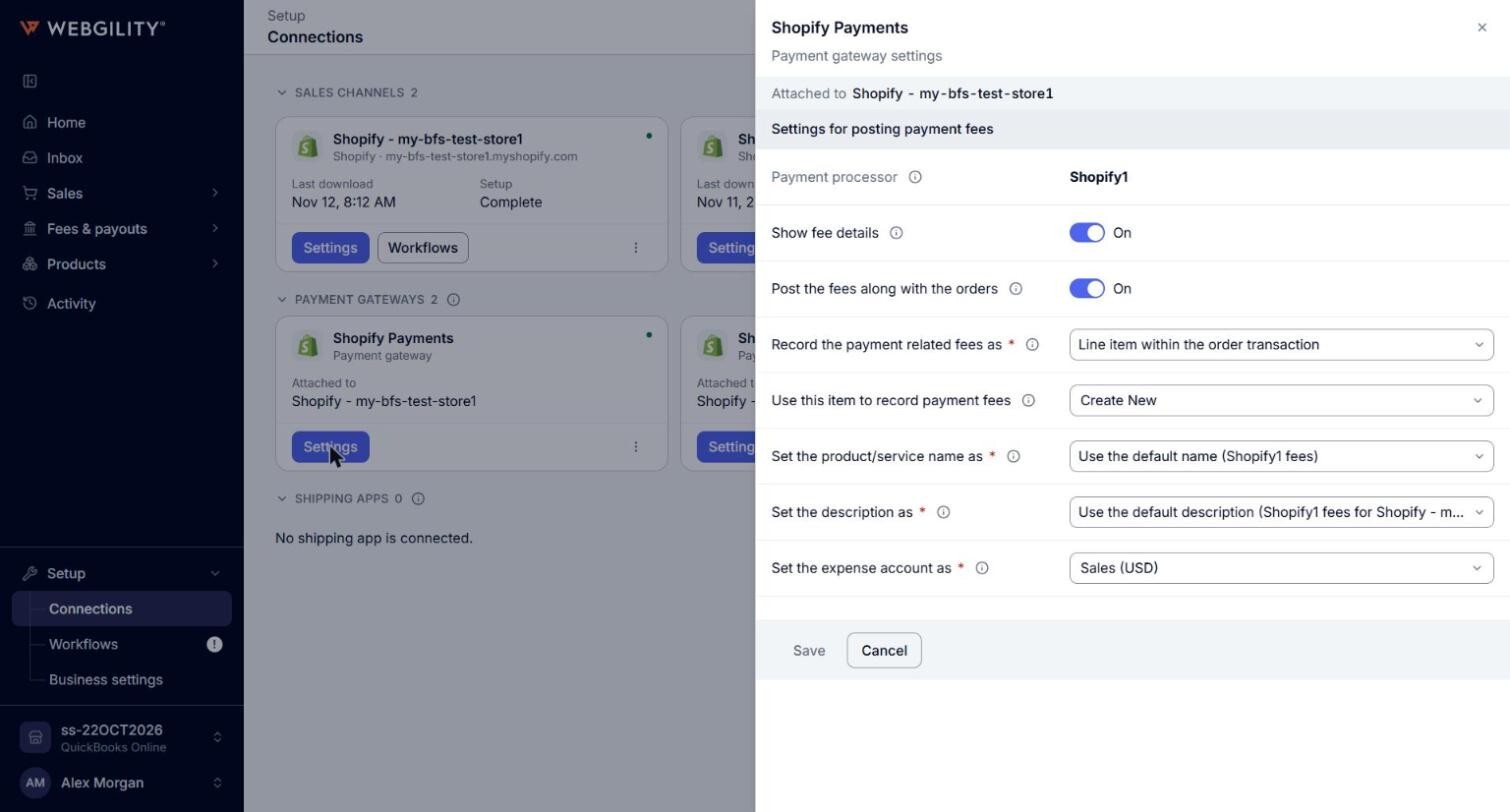
- Go to Setup > Connections. On the gateway's card under Payment gateways, click Settings. The panel opens with Payment gateway settings under the gateway's name.
- If the gateway is attached to more than one store, pick the store under Channel. Each store keeps its own fee settings.
- Set the options under Settings for posting payment fees and click Save.
Note: For a Shopify store, the panel also shows Multi-currency fee payments. When it is on, a fee in a currency posts with the vendor and accounts of that currency's row in Set the expense account per currency, in the Settings of the store's first payment gateway. Add a row for every currency you pay fees in.
Reauthorize or remove a payment gateway
- Reauthorize: open the ⋮ menu on the gateway's card and click Reauthorize. For PayPal, enter the Client ID and the new Secret of the same app. For Stripe, sign in with the account of this connection. When a gateway stops working, its card also shows a Reauthorize button.
- Remove: open the ⋮ menu on the gateway's card and click Remove, then Remove in the panel. Webgility i stops reading the gateway. The fees it already read stay.
Note: A Shopify Payments or Square payments card has no Remove. It goes with its store, and its Reauthorize signs in to the store again.
If the connection does not complete
- "Pick at least one store.": tick at least one store under Attach it to these stores.
- "Transaction Search is off for this PayPal app.": turn it on in the app's features at developer.paypal.com, wait for PayPal to apply it, then try again.
- "The gateway did not accept the sign-in. Check the account and try again.": check the email, Client ID and Secret, or the Stripe account, and try again.
- "This account is already connected. It is listed under its Business.": the gateway account is already connected to a business.
- "Another payment gateway change is running. Try again in a minute.": wait a minute and try again.
- "This is taking longer than usual. It goes on by itself: check the list in a minute.": open Setup > Connections again in a minute.
- A message with a support reference: contact Webgility support and share the reference.