
Webgility i then reads the shipments of the account, with the postage the shipping app charged for each one, so your shipping fees can post to QuickBooks Online.
Note: Shipping apps are available on plans that include them and during a trial. On other plans, the Shipping apps section shows "Upgrade your plan to connect a shipping app." and the connect button stays off.
Note: A shipping app belongs to the business shown at the bottom of the left menu.
What the shipping app provides
- Shipments: each shipment of your ShipStation or ShippingEasy account from the day you choose, with the postage the app charged for it.
- Shipping fees: the postage of each shipment, which Webgility i posts to QuickBooks Online using your shipping fee settings. See Set how shipping fees post, below.
Once the app is connected, its shipments show on Sales > Shipping fees.
Steps:
- Go to Setup > Connections and click Add connection. The Add connection panel opens on the right.
Note: You can also open this panel from the Welcome to Webgility page. Click Add a sales channel connection, then click Shipping app.
- Under What are you adding?, click Shipping app. Under Connector, click ShipStation or ShippingEasy.
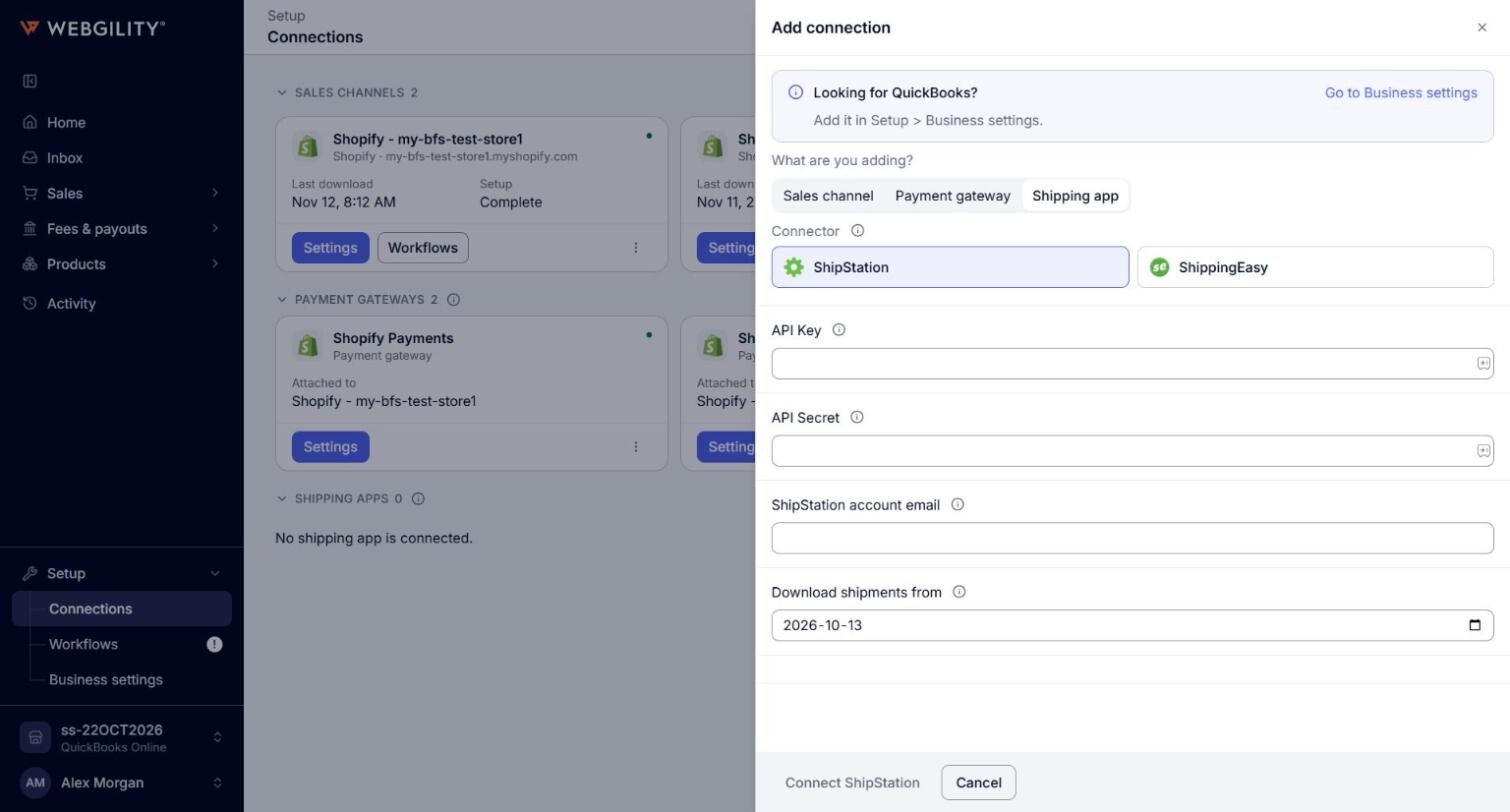
- Enter the API Key and API Secret of your shipping app account. You find them in the API settings of your ShipStation or ShippingEasy account.
- For ShipStation, enter the ShipStation account email. ShippingEasy does not need an email, so leave the box empty.
- In Download shipments from, choose the first day whose shipments Webgility i reads. The day cannot be in the future. Default: 30 days before today.
Note: ShippingEasy shares the shipments of the last 89 days only.
- Click Connect ShipStation or Connect ShippingEasy. Connecting can take up to a minute.
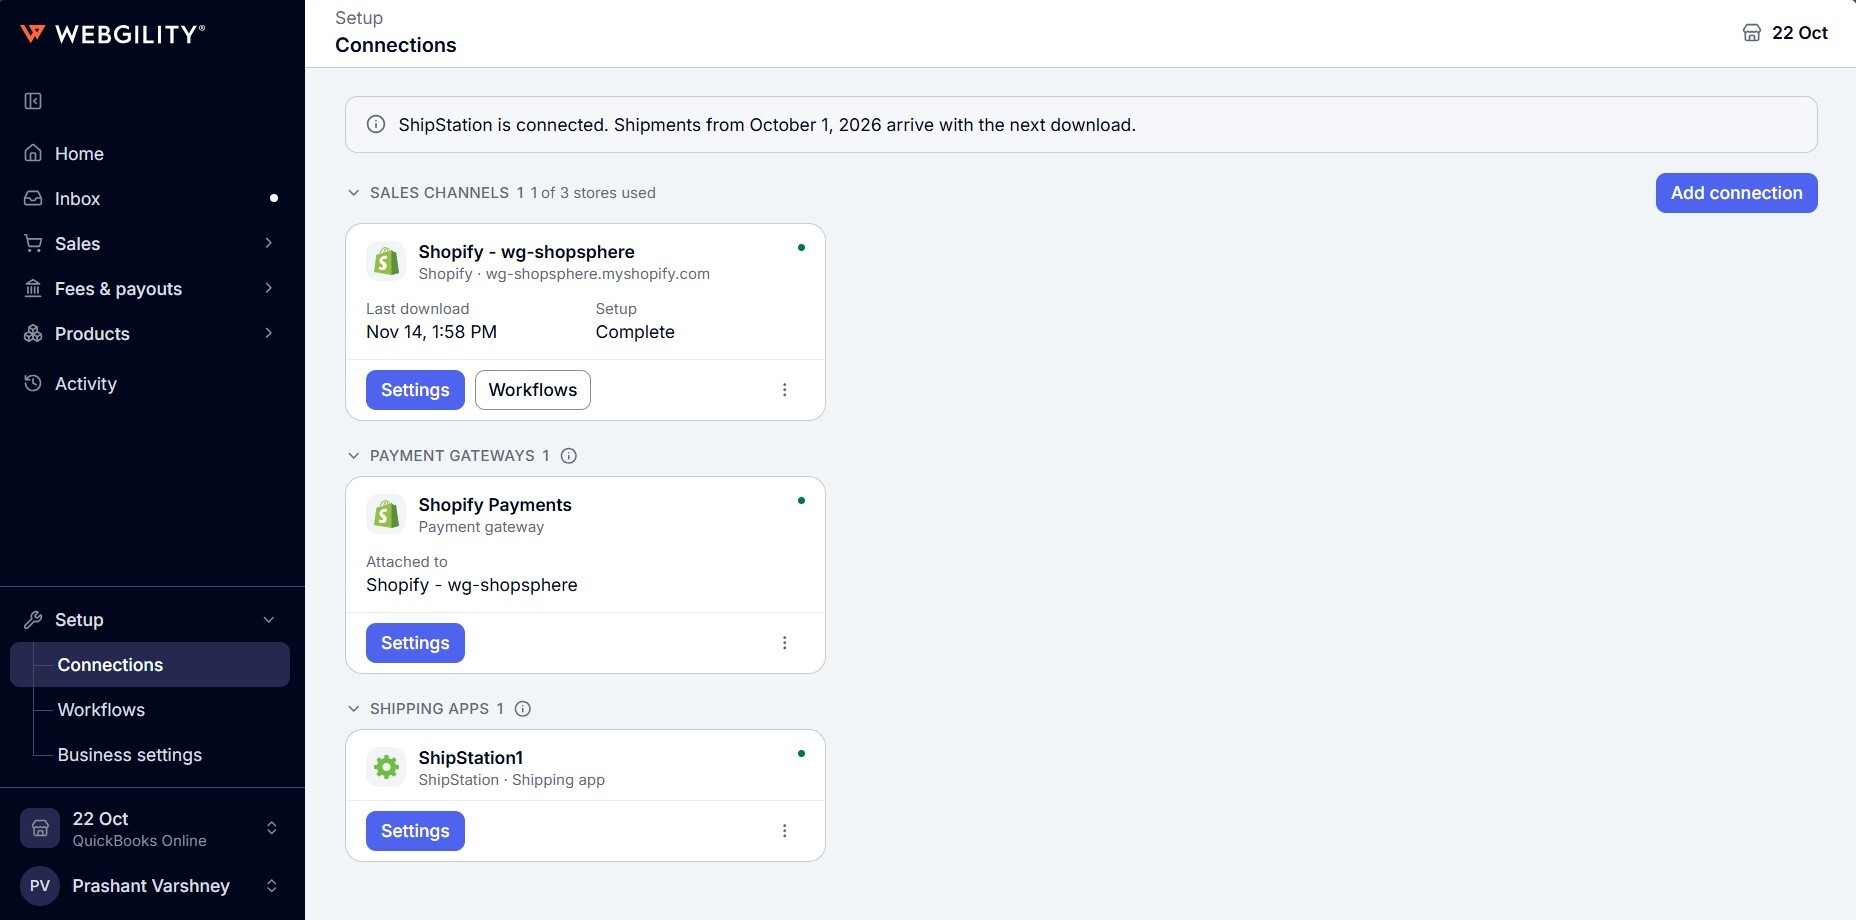
- When the connection is complete, the page shows that the app is connected and that shipments from the day you chose arrive with the next download. The app appears under Shipping apps, for example ShipStation · Shipping app.
Some steps happen inside ShipStation or ShippingEasy, such as finding your API keys. See the Webgility help article for ShipStation or ShippingEasy.
Set how shipping fees post
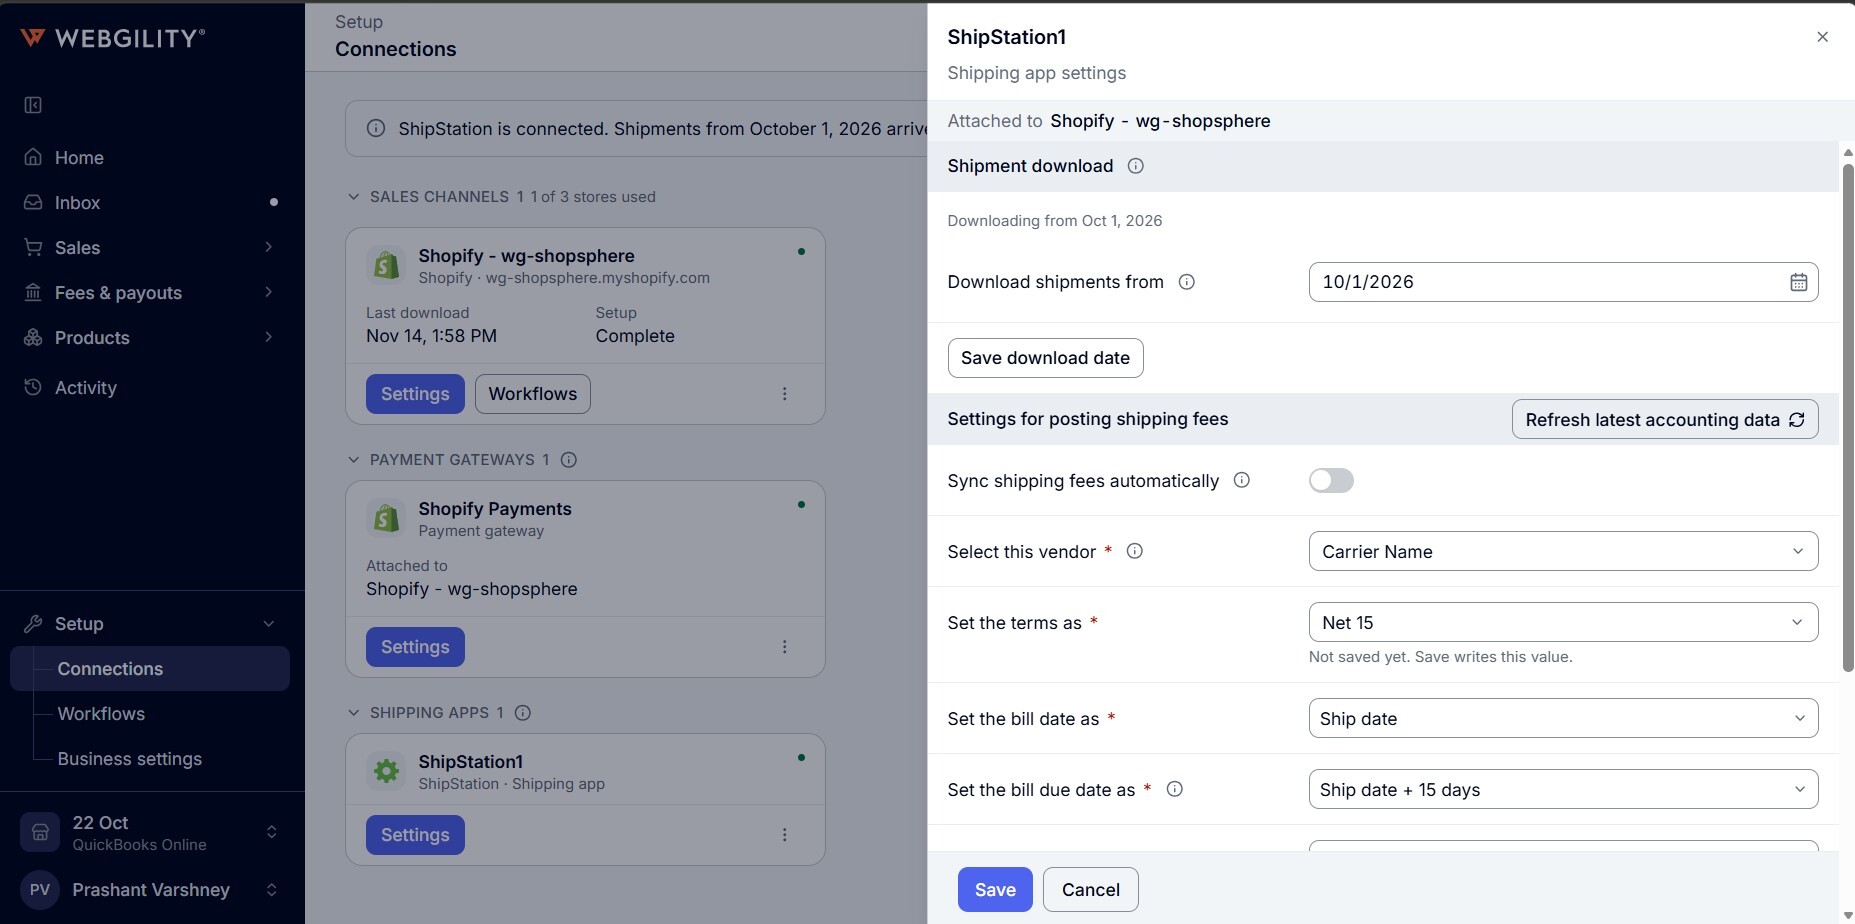
- Go to Setup > Connections. On the shipping app's card, click Settings. The panel opens with Shipping app settings under the app's name.
- If the business has more than one store, pick the store under Channel. Each store keeps its own shipping fee settings.
- Set the options under Settings for posting shipping fees and click Save. See How to Configure Your Channel Settings.
Change the keys or remove a shipping app
- Reauthorize: if your API Key or API Secret changed, the card shows Needs new keys and a Reauthorize button. Click it, or open the ⋮ menu and click Reauthorize. Enter the new API Key and API Secret and click Save keys. The shipments stay, and Webgility i reads new ones from where it stopped.
- Remove: open the ⋮ menu on the card and click Remove, then Remove shipping app. Webgility i stops downloading shipments from the app and removes the shipments it downloaded from Shipping fees. Orders already posted keep their tracking numbers.
If the connection does not complete
- A message that the app did not accept this API Key and API Secret: check both and try again.
- A message that this account is already connected: the account is already connected, in this business or another one.
- A message that this account has no store: add a store in your shipping app, then try again.
- "Another change to your shipping apps is running. Try again in a moment.": wait a moment and try again.
- "Still connecting the shipping app": open Setup > Connections again in a minute to see the result.
- A message with a reference that asks you not to try again: contact Webgility support and share the reference.