Overview:
Webgility Desktop offers two ways to bring in order data, first through an Application Programming Interface (API) and second via CSV file import. While the API enables automated, real-time data syncing with minimal manual effort, the CSV import option provides flexibility for quick, one-time uploads or bulk data updates without needing any technical setup. Having both options ensures users can choose the method that best fits their workflow and technical comfort level.
Prepare your CSV file with the required mandatory columns and their respective values - order number, order date, order total, SKU, and product name and then upload it through the Import Orders feature.
Map the fields when importing orders for the first time, and Webgility Desktop will save those mappings for future use.
Steps to import orders via CSV:
1. Go to Orders in the Menu options, Import > From CSV to start importing orders.
2. A new window will pop up; click Next to proceed.
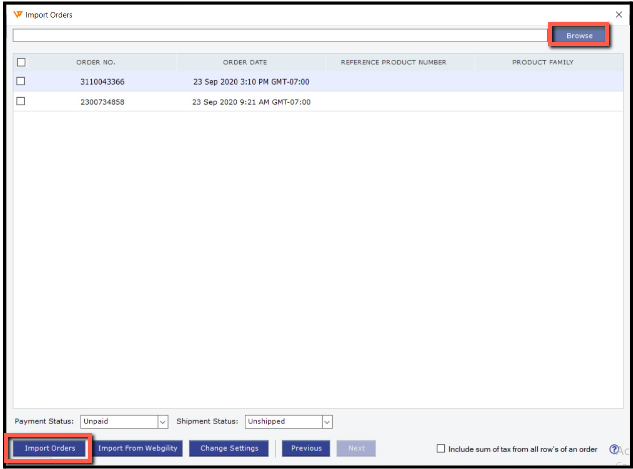
3. Find the CSV file you want to import by browsing your files, then click Next.
4. Match the fields from your CSV to the required order details; make sure to pay attention to the bolded required fields.
5. Choose your mapping preferences from the drop-down options. Once you've mapped all the necessary fields, click Next. You'll see a success message confirming your mappings are saved.
Note: If you accidentally duplicate a field, the settings won't save.
6. Review the list of orders from your CSV file. Select one or multiple orders at a time, then click Import Orders. You may also set the payment or shipment status for those orders during the import.