How To Map Products via .CSV File in Webgility Desktop
How To Map Products via .CSV File in Webgility Desktop
Overview
For a smooth workflow in transaction posting and product syncing, it's important to match items between your Online Stores and QuickBooks. Importing product mappings via a .csv file is crucial when items don't automatically match based on set criteria. You can manually map and match products using this method.
How to import product mappings:
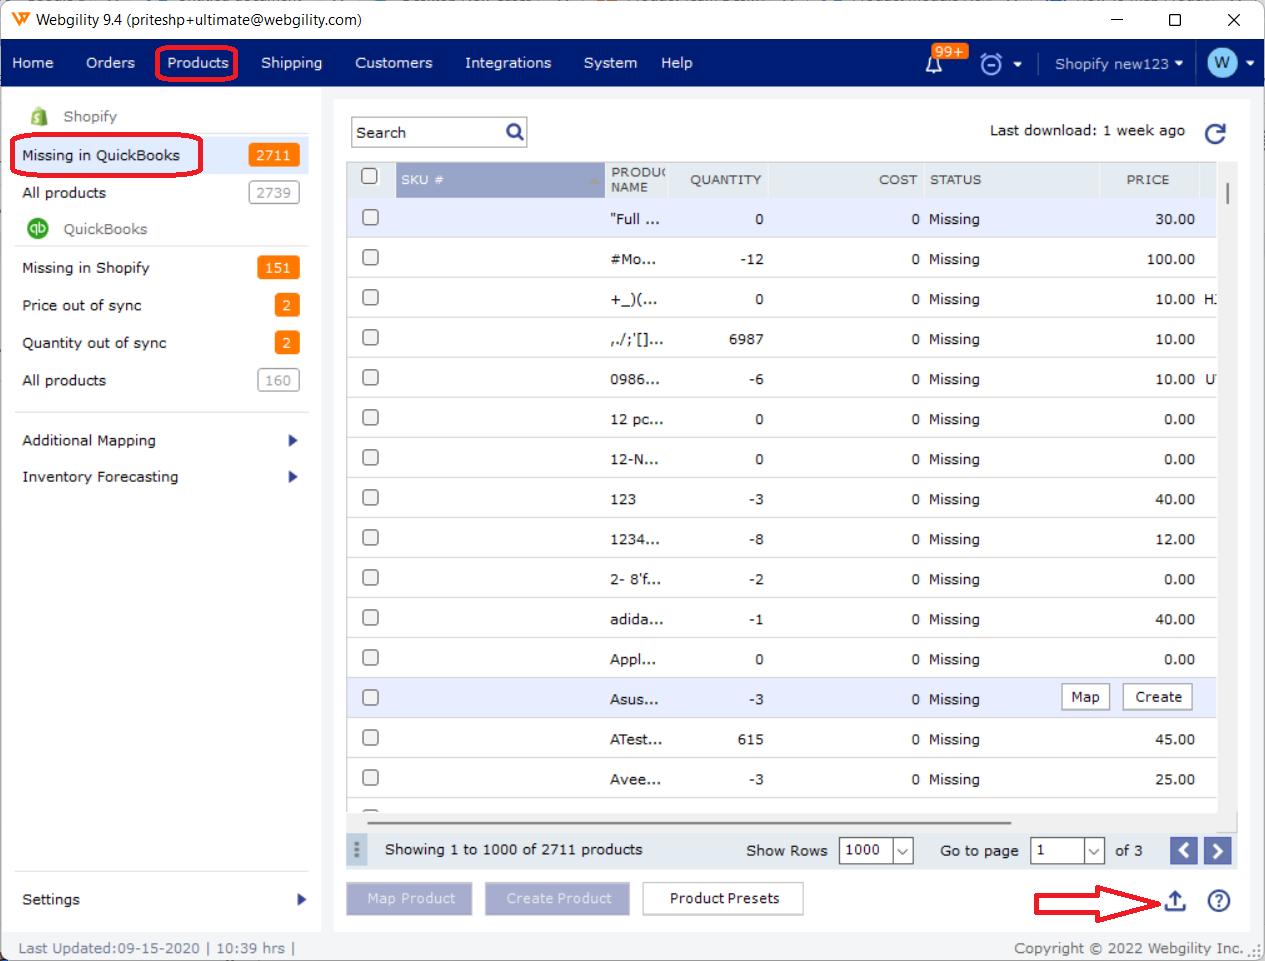
1). Click on Products> Missing in QuickBooks or Missing in Store.
2). Export the list of non-matching products using the Export icon in the bottom right corner.
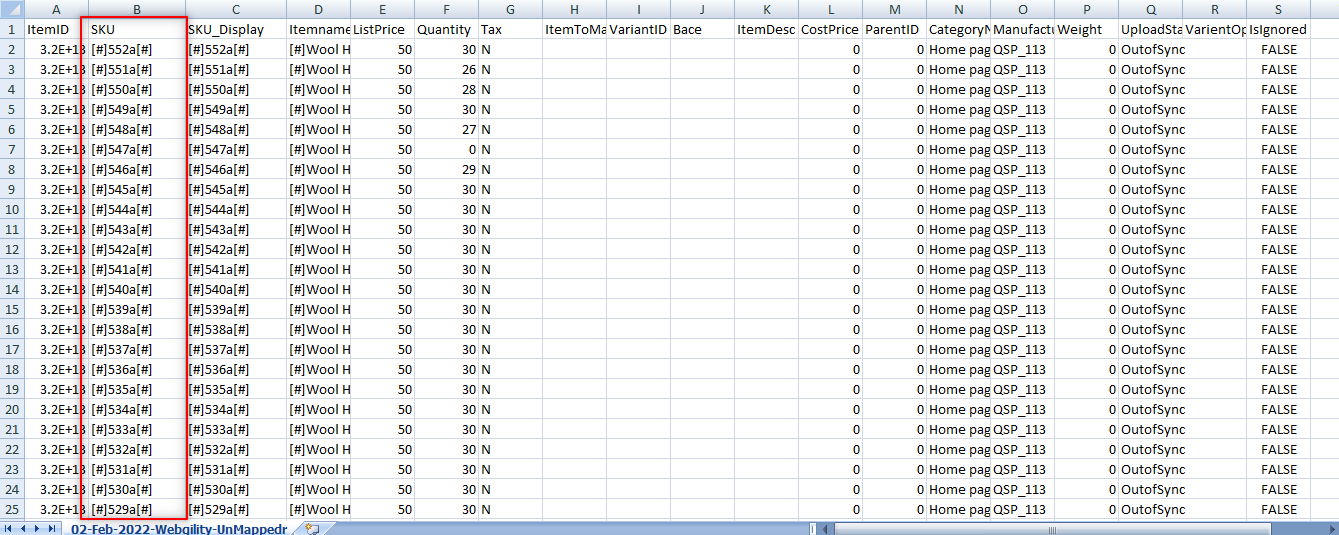
3). Open the exported file in Microsoft Excel or a similar spreadsheet program.
4). Copy all the SKUs under the SKU column in the exported file.
5). Open the product mappings template located at C:\Webgility\UnifyEnterprise\Templates
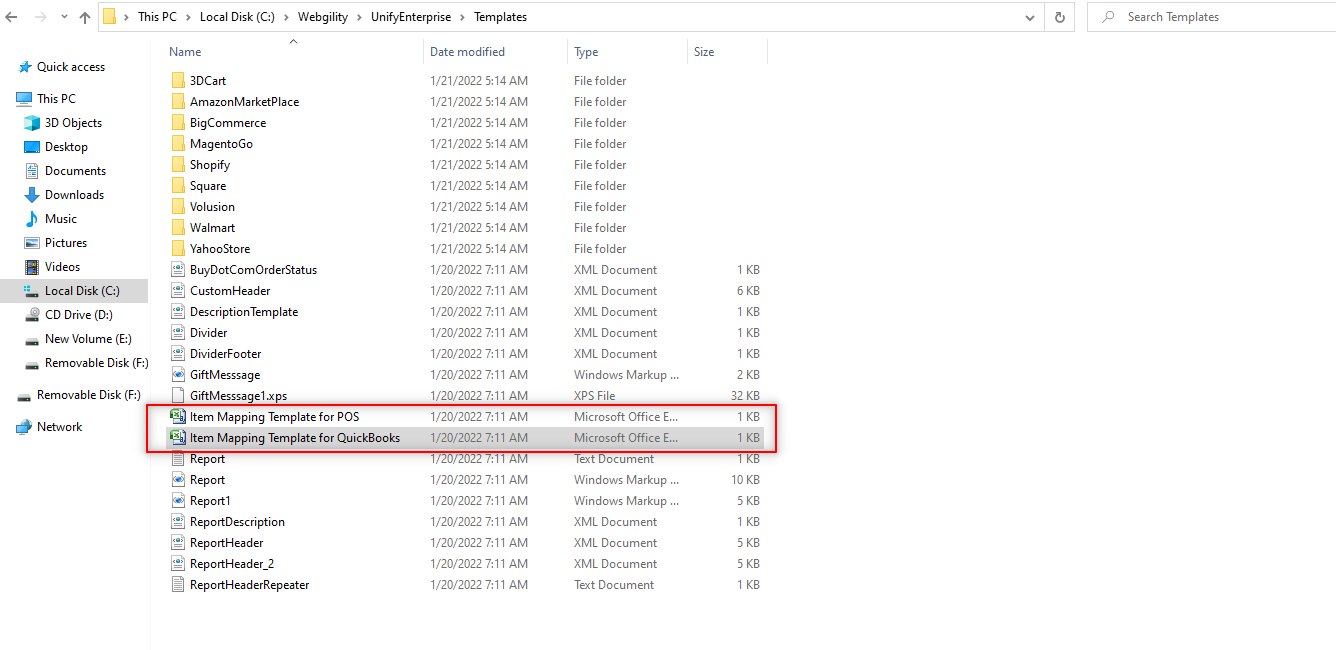
Note: There are separate templates for POS and QuickBooks. Choose the appropriate template based on your QuickBooks app.
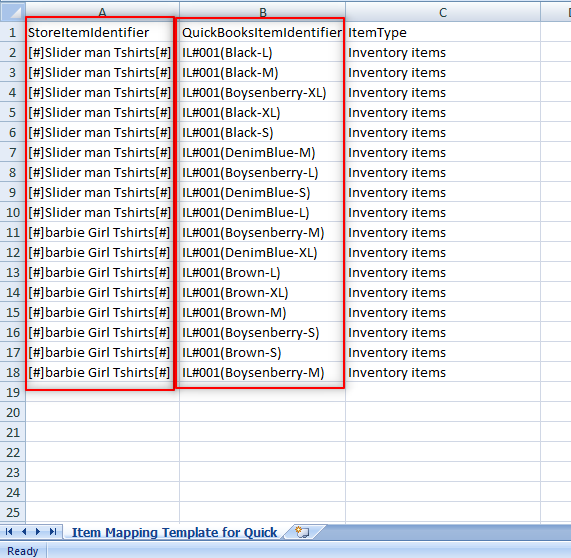
6). Paste the copied SKUs under the Store Item Identifier column in the template.
7). Enter the QuickBooks item name that you would like to map with the SKU, then select Save and Close.
8). Go to Products> All Products> Mapped and click on the Import icon located at the bottom right.
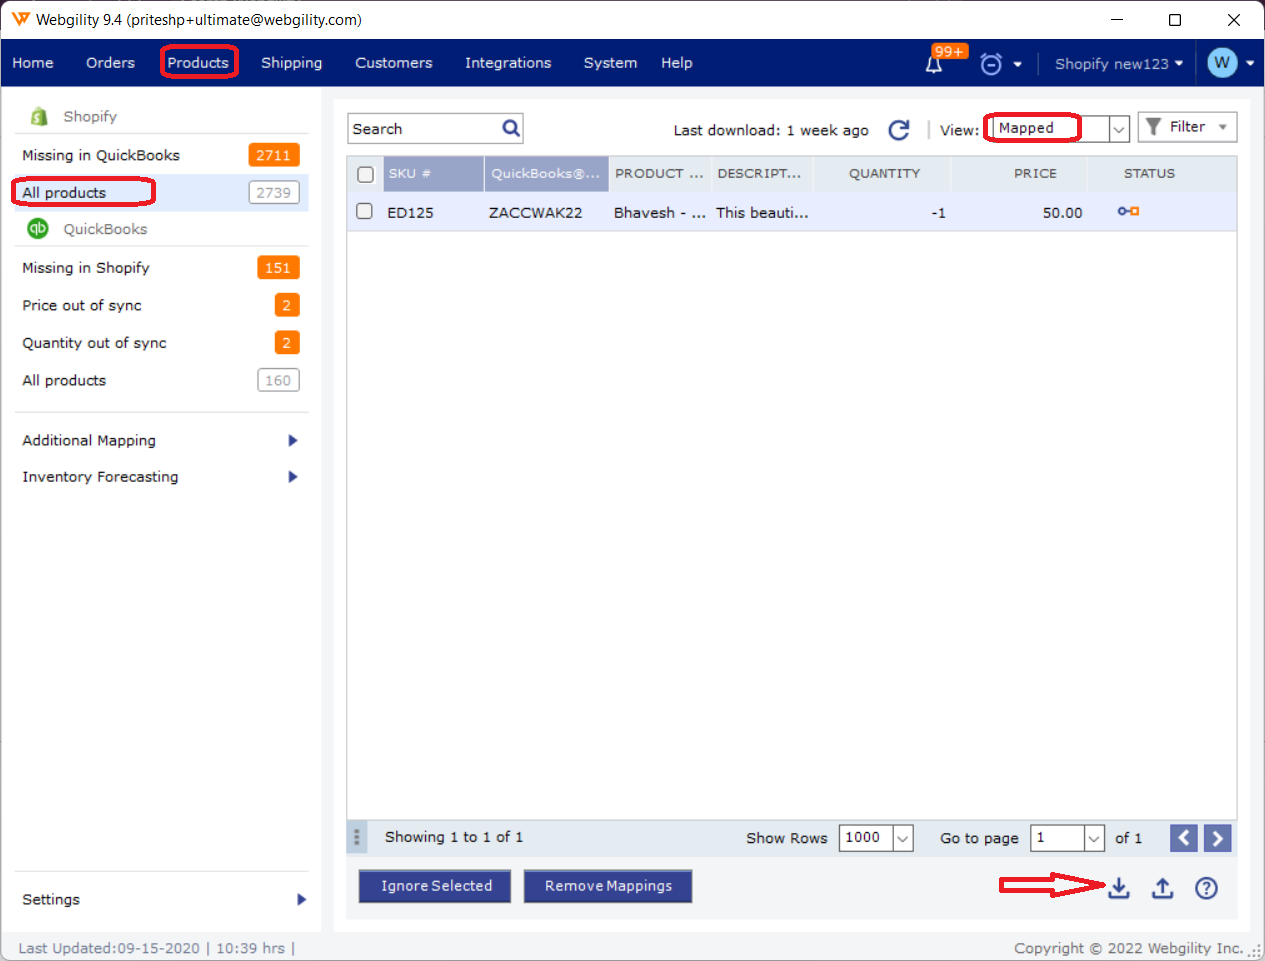
9). Browse for the saved file and import all the mappings.
10). You will receive a confirmation message upon successful import.
11). Verify the mappings by going to Products> Product Catalog> Mapped Products.
Conclusion:
By completing the mappings, you can ensure accurate transaction posting, synchronization, and seamless automation between your Online Stores and QuickBooks.