Customer Setup in Webgility Online.
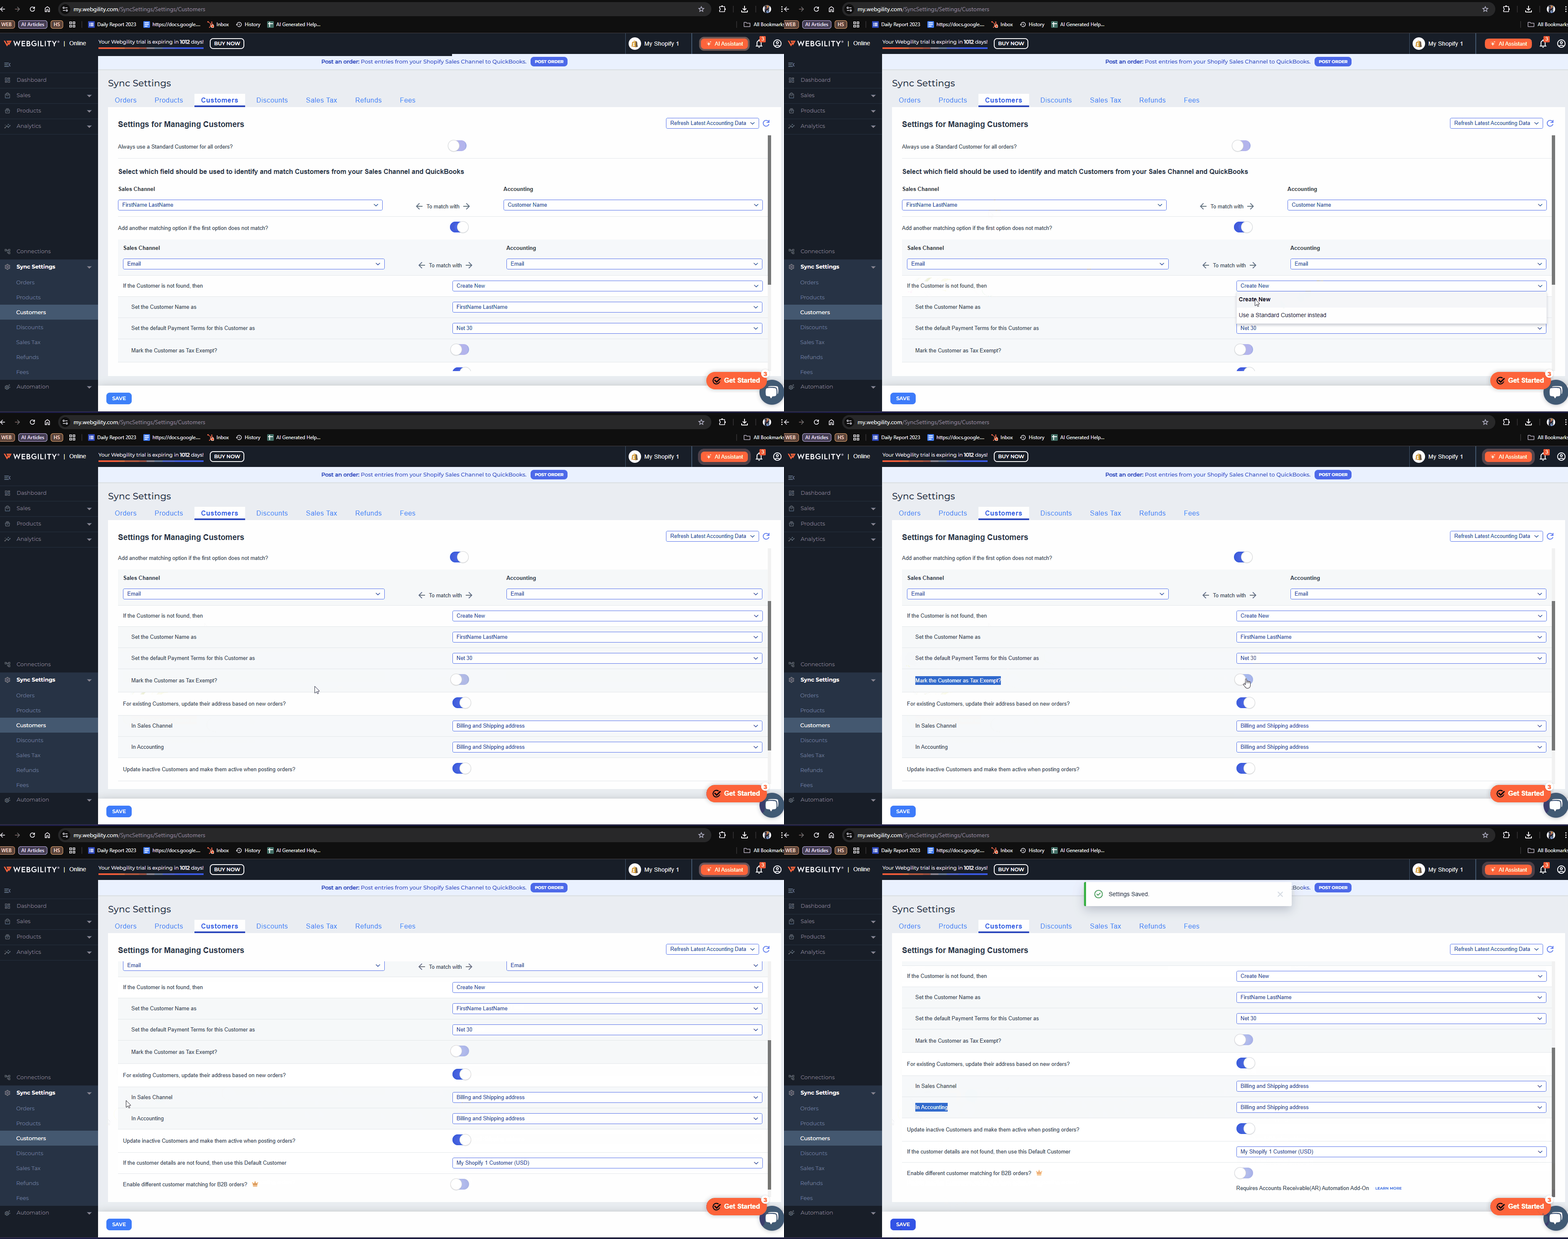
This article helps Webgility Online users configure customer record matching in Webgility Online for syncing with QuickBooks Online. It explains how to set up two customer matching criteria to improve accuracy when posting orders from connected sales channels.
Steps for setup:
1. Access Customer Sync Settings.
In Webgility Online on the left-hand side navigation panel click on Sync Settings, then select Customers to begin setup.
2. Define Matching Criteria:
Choose two criteria to help match customer records. For example:
-
First Name Last Name → Customer Name
-
Email → Email
The customer matching process will yield one of two outcomes: the customer will either be matched in QuickBooks Online or not matched at all.
If the Customer Is Not Found:
A. Create New
-
Automatically create a new customer in QuickBooks
-
Set the customer name format
-
Choose default sales terms
-
Optionally mark the customer as tax-exempt
-
Reactivate inactive customers if needed
-
Use a fallback default customer if details are missing

B. Use a Standard Customer Instead
-
Assign all orders to a predefined standard customer.
-
Optionally ignore matching criteria and always use this standard customer.
- Update their address based on New Orders by Sales Channel & Accounting
-
Reactivate inactive customers as needed.
-
If the customer details are not found, then use this Default Customer.


