
With Shipping on, the shipping charge of an order posts on the shipping line of the QuickBooks Online transaction. With Shipping off, an order with a shipping charge does not post, unless its store records shipping as a line item.
Note: Webgility i turns this setting on for you when you connect QuickBooks Online with Turn on Shipping in QuickBooks selected. Follow these steps only if you cleared that box, or if Webgility i shows the message that Shipping is off in your QuickBooks company. See How to Connect Your QuickBooks Online Account to Webgility i.
Steps:
- Sign in to QuickBooks Online as an admin of the company that is connected to Webgility i.
- Click the Settings (gear) icon, then select Account and settings.
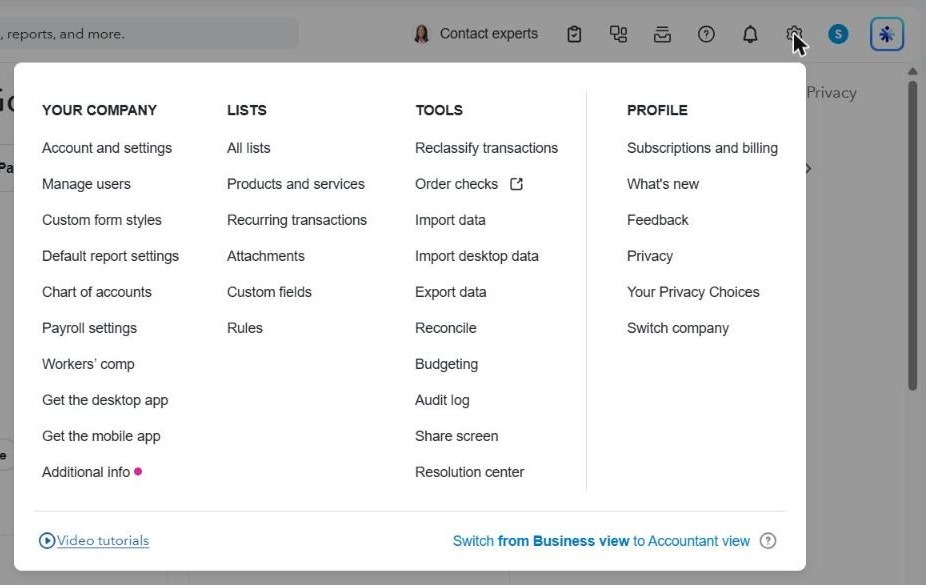
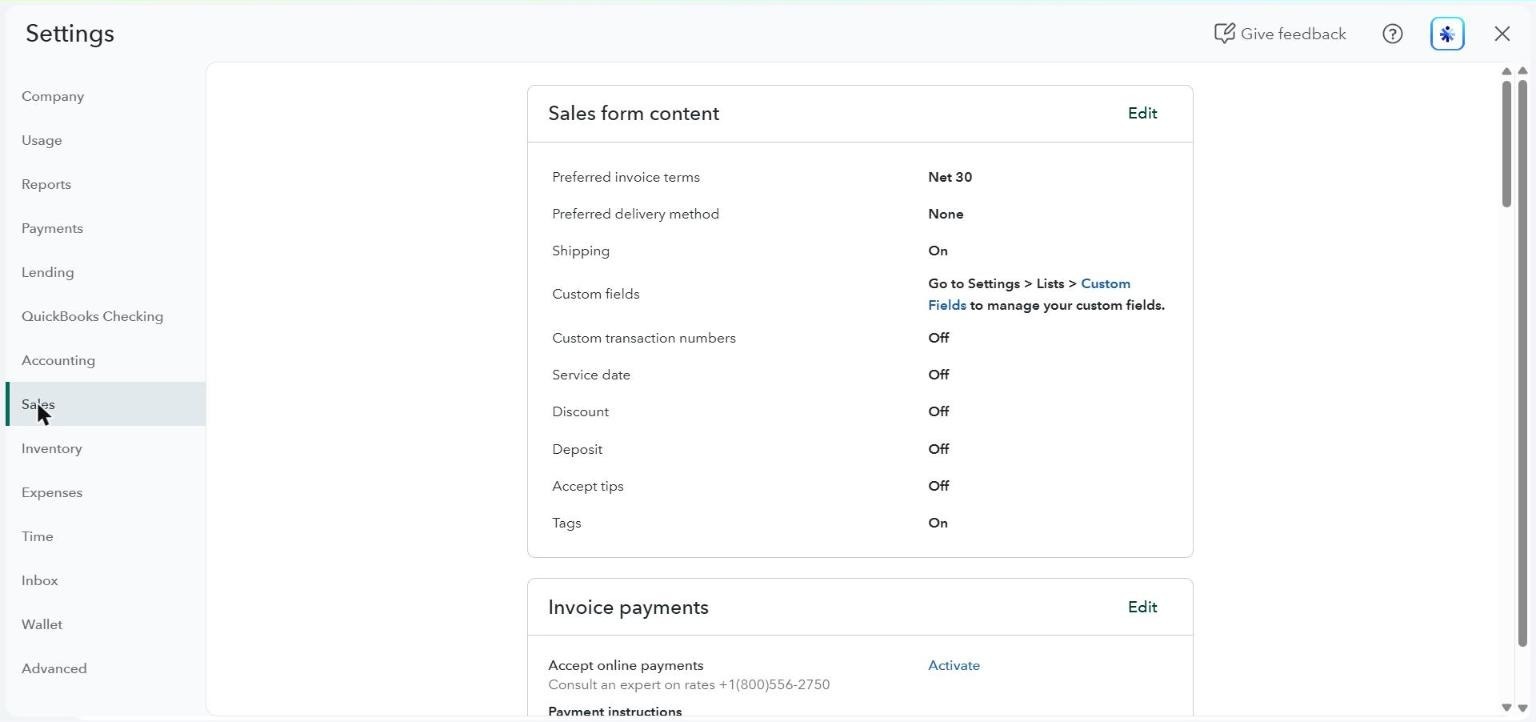
- On the Settings page that opens, select Sales in the left menu. The Sales form content section shows whether Shipping is On or Off.
- In the Sales form content section, click Edit and turn on the Shipping switch.
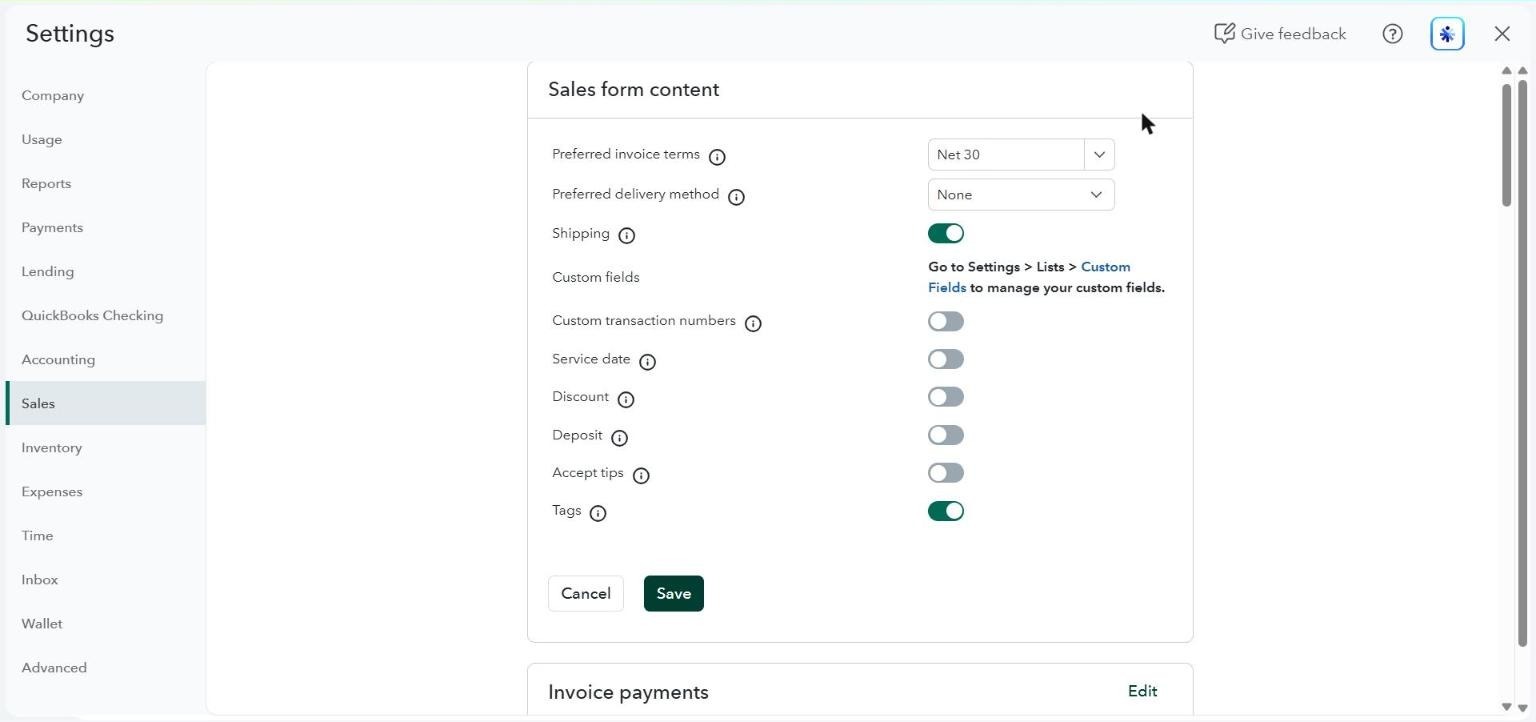
- Click Save, then close the Settings page.
What to expect after turning on Shipping
- New orders with a shipping charge post to QuickBooks Online with the charge on the shipping line.
- Orders that did not post while Shipping was off can now be posted from the Orders page in Webgility i. See How to Post Orders to QuickBooks.
Note: These steps describe QuickBooks Online, which is an Intuit product. Intuit can change its screens and labels. If what you see is different, search for "shipping" in QuickBooks Online Help.