
Overview
If your Shopify orders all post the same way, Webgility Online may be using one set of posting settings for the entire store. A tag is a label on a Shopify order, such as Wholesale or Retail. You can give each tag its own posting rule.
If you’re setting up for the first time, follow these guides. Connect Shopify · Connect QuickBooks Online
Set up posting rules by tag- Tag your orders in Shopify. Open an order and add
Wholesale,Retail, or the label you want to use in the Tags field. New tags appear in Webgility Online after the store connection refreshes. - Choose Shopify Tags as the rule type. In Webgility Online, select your Shopify store in the upper-right corner and go to Sync Settings → Orders. Under How should your orders be posted?, select Apply different settings based on custom rules. In the next dropdown, select Shopify Tags.
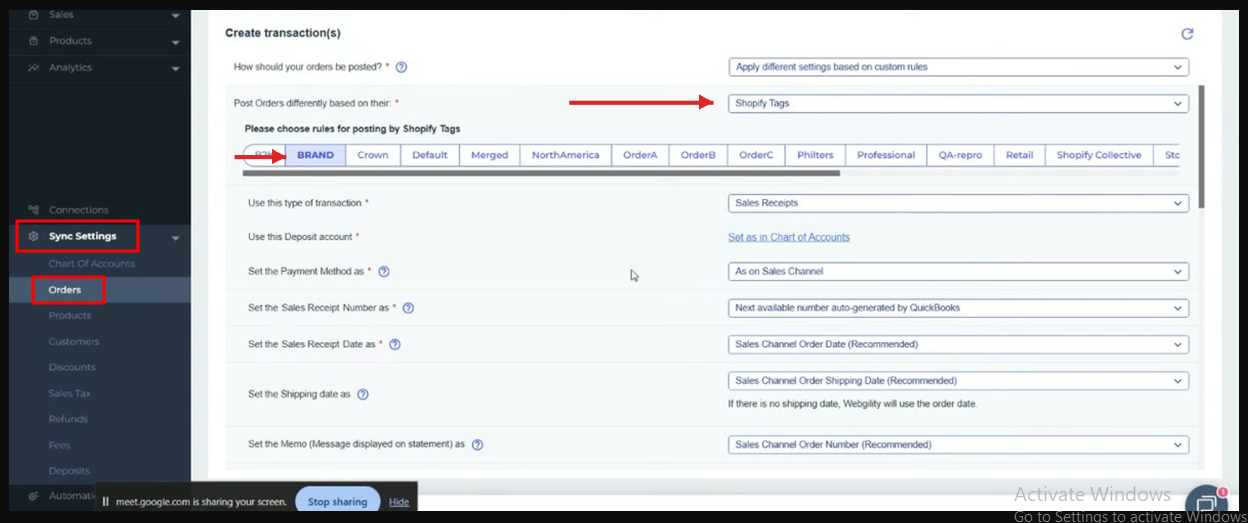
- Set and save each rule. Select
Wholesale, set Transaction Type to Invoice, and save. Then selectRetail, choose Sales Receipt, and save. You can also assign a QuickBooks class or location to each rule. Configure class and location tracking
Webgility uses the Default rule for orders without a matching tag. If an order uses the wrong rule, check that the tag is on the order in Shopify, that it’s selected under Order Source Settings → Shopify Tags, and that its rule is saved.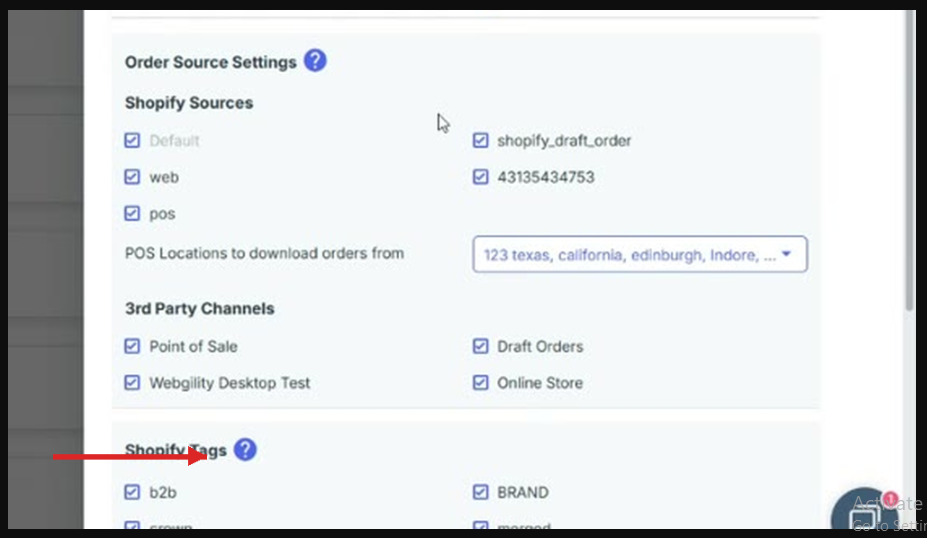
If you have any questions or need more help, please contact our support team.