
Webgility i matches most listings to your QuickBooks Online products on its own. For a listing it could not match, you can map it to an existing QuickBooks product, create a new product in QuickBooks Online from it, or set it aside by ignoring it.
Note: Webgility i calls each product on a sales channel a listing, and each item in QuickBooks Online a QuickBooks product.
Before you start
The Sales channel listings tab of the Catalog page shows every listing with a status:
- Auto-mapped: Webgility i matched the listing to a QuickBooks product, or created the QuickBooks product for an order.
- Manually mapped: a person mapped the listing, or asked Webgility i to create its QuickBooks product.
- Unmapped: the listing has no QuickBooks product yet.
- Needs review: Webgility i found more than one possible match, or a match it is not sure of, and waits for you. See How to Use the Needs Review Tab in Sales Channel Listings.
- Ignored: a person set the listing aside.
The orders of an Unmapped listing follow the If a matching is not found, then setting on the Products tab of the channel's settings: they get a new QuickBooks product, post to your standard item, stop with an error, or wait until you map the listing.
Steps: Map a listing to an existing QuickBooks product
- Go to Products > Catalog and click the Sales channel listings tab. Then click the Unmapped tab.
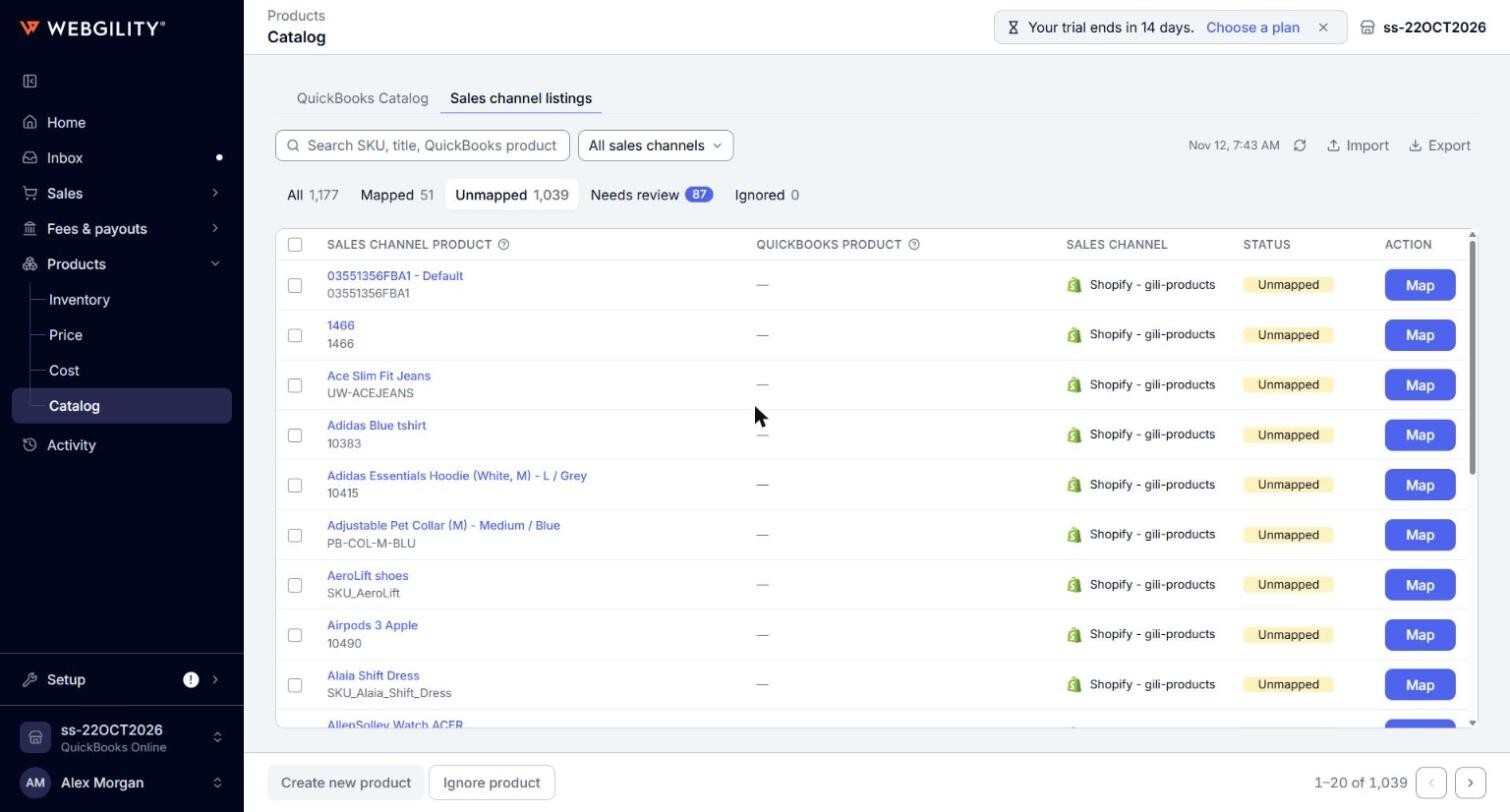
- Find the listing. You can type its SKU or title in the search box, or select its channel in the All sales channels filter.
- Click Map in the listing's row, or click the listing's title. A panel opens on the right with the listing's title, status, store and SKU.
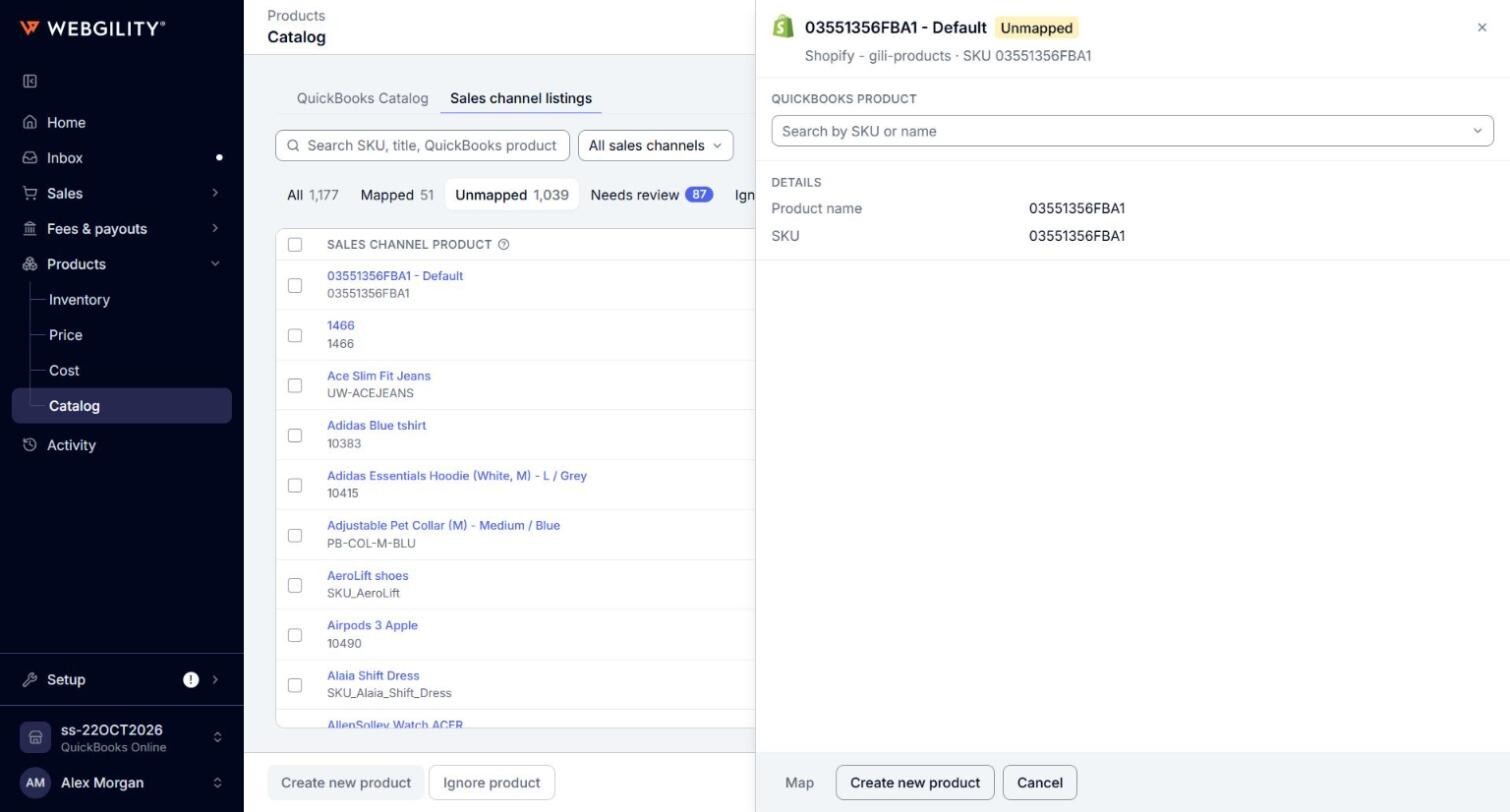
Note: You can also open this panel from an order that stopped because a product has no QuickBooks product. After you map it, click Next product to go to the order's next unmapped product.
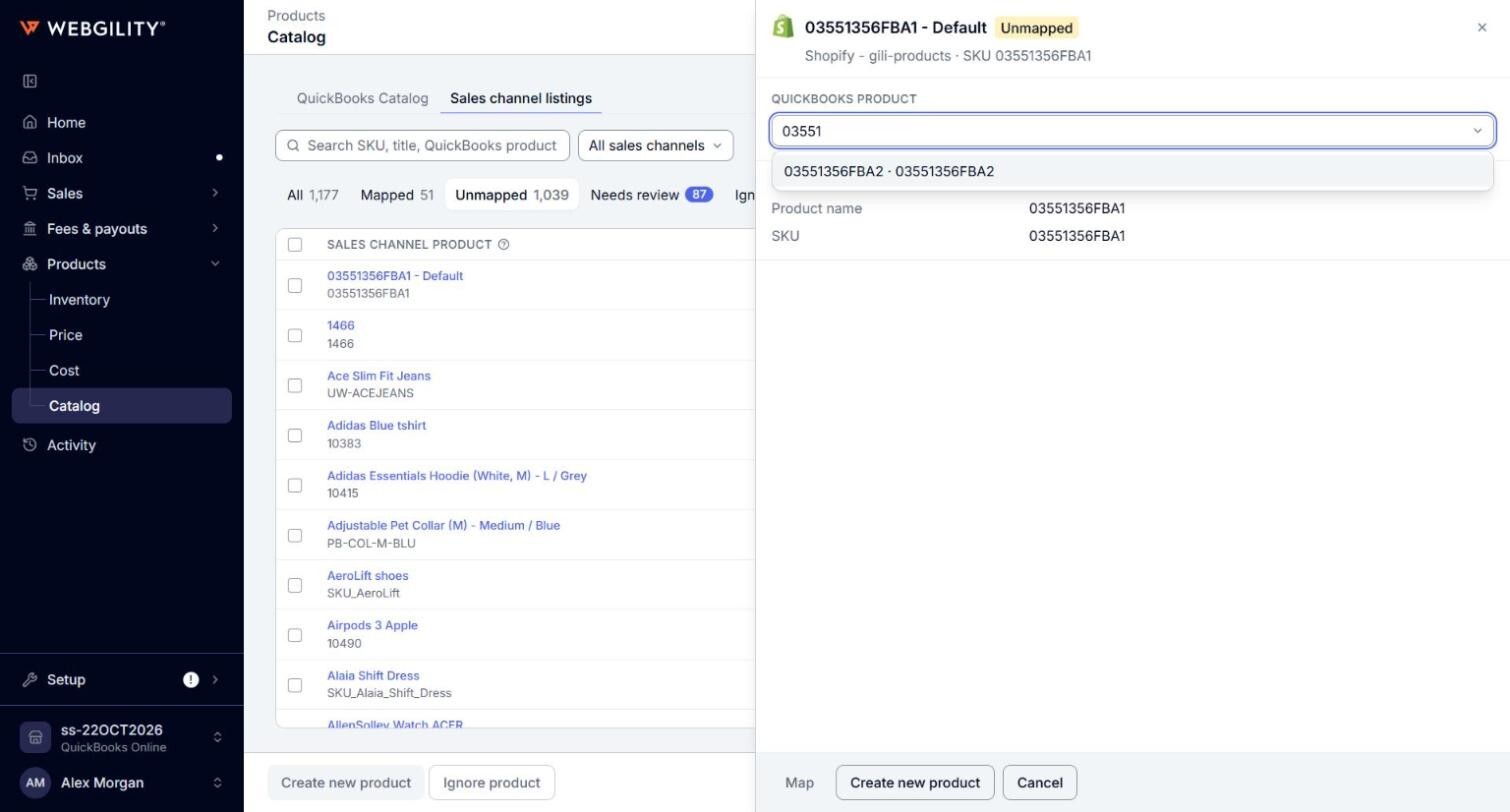
- Under QuickBooks product, click the search box and type the SKU or name of the QuickBooks product. Select the product from the list. The Map button becomes available.
Note: The list shows the active products of your QuickBooks Online company. If you see "Your QuickBooks products are still loading. Try again in a few minutes.", Webgility i is still reading your QuickBooks Online products.
- Click Map. A confirmation opens, for example "Links Blue Tee on My Shopify to TEE-BLU in QuickBooks. Nothing is created."
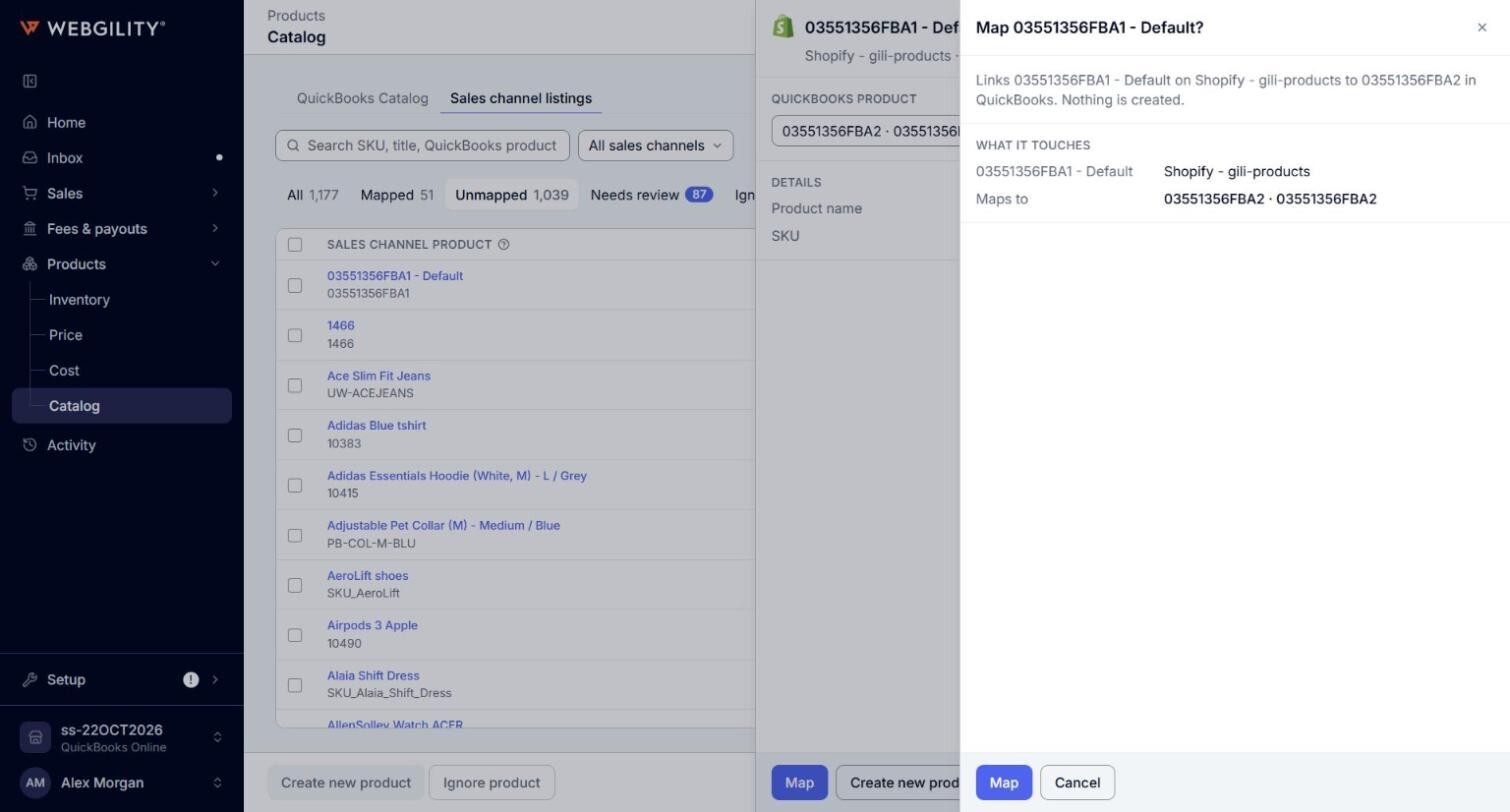
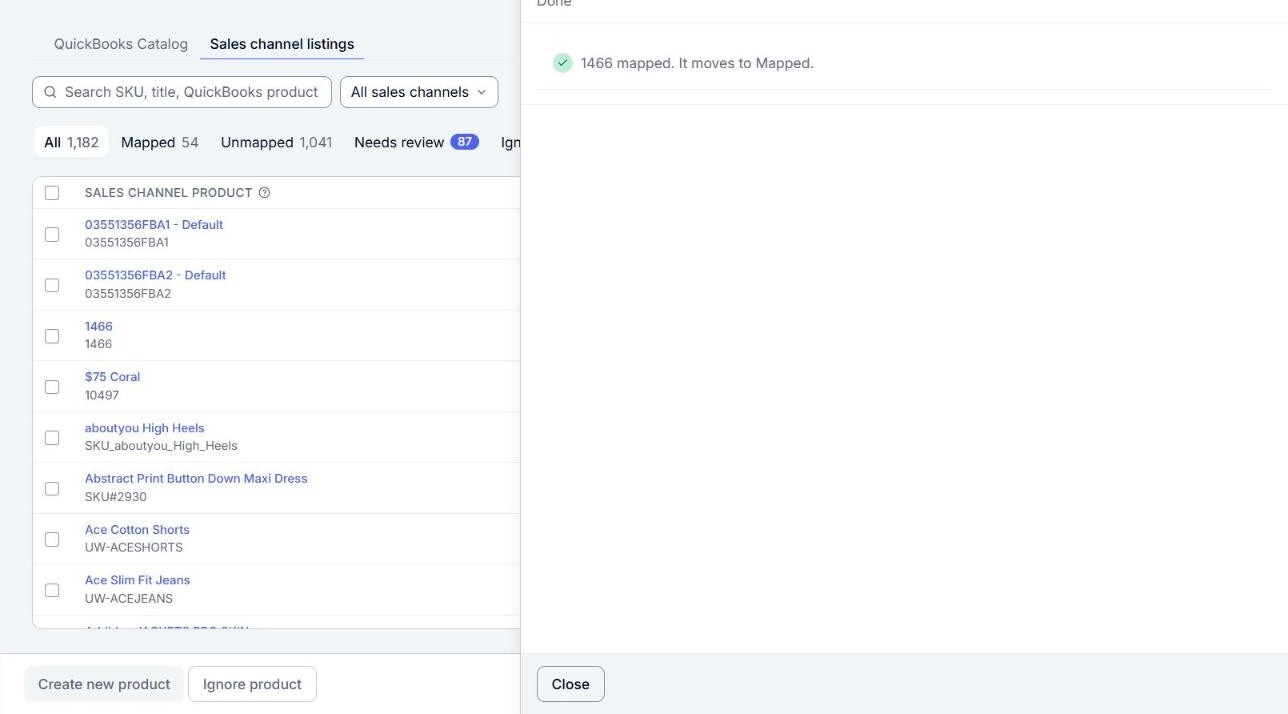
- Click Map to confirm. The panel shows that the listing is mapped and moves to Mapped. Click Close.
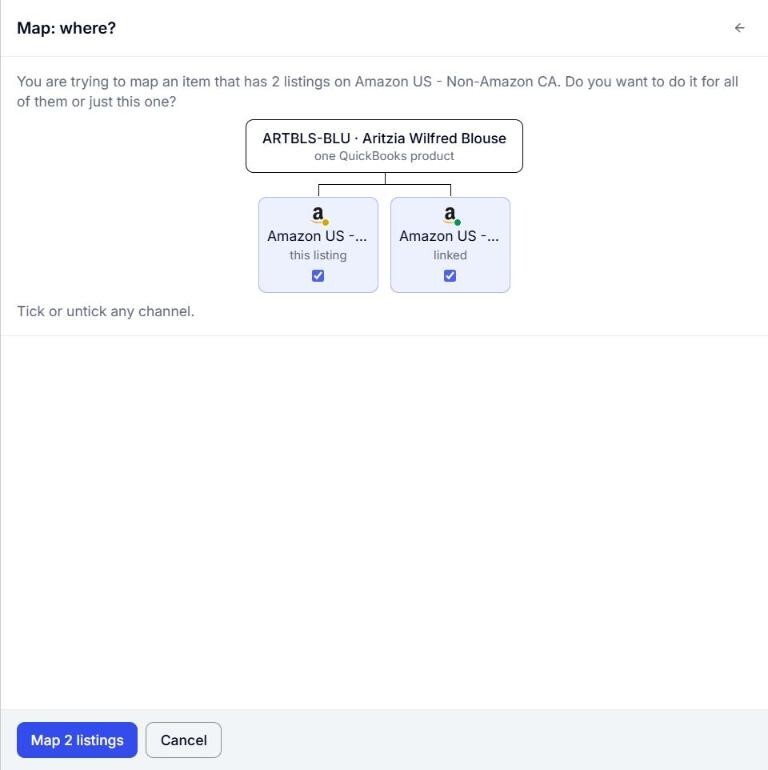
Note: If the same product is also listed on another sales channel, or more than once on the same channel, the confirmation asks where to map it, under the title Map: where?, for example "You are trying to map an item that has 2 listings on Amazon US. Do you want to do it for all of them or just this one?" Each listing shows as a box under the QuickBooks product, all selected. Clear the box of any listing you do not want to map, then click the button, for example Map 2 listings. A listing you clear keeps its current status.
Steps: Create a new product in QuickBooks Online from a listing
Use this when the product does not exist in QuickBooks Online yet. It is offered only for an Unmapped listing.
Note: Webgility i gives the new product the accounts and other values set in Create new item(s) in products & services, on the Products tab of the channel's settings. Set an income account there before you create a product. The income account in the product matching settings is not used for this.
- Open the listing's panel from the Unmapped tab, as in steps 1 to 3 above.
- Click Create new product. A confirmation titled Create followed by the listing's name opens, with What gets created: the Name and SKU the new QuickBooks product will get.
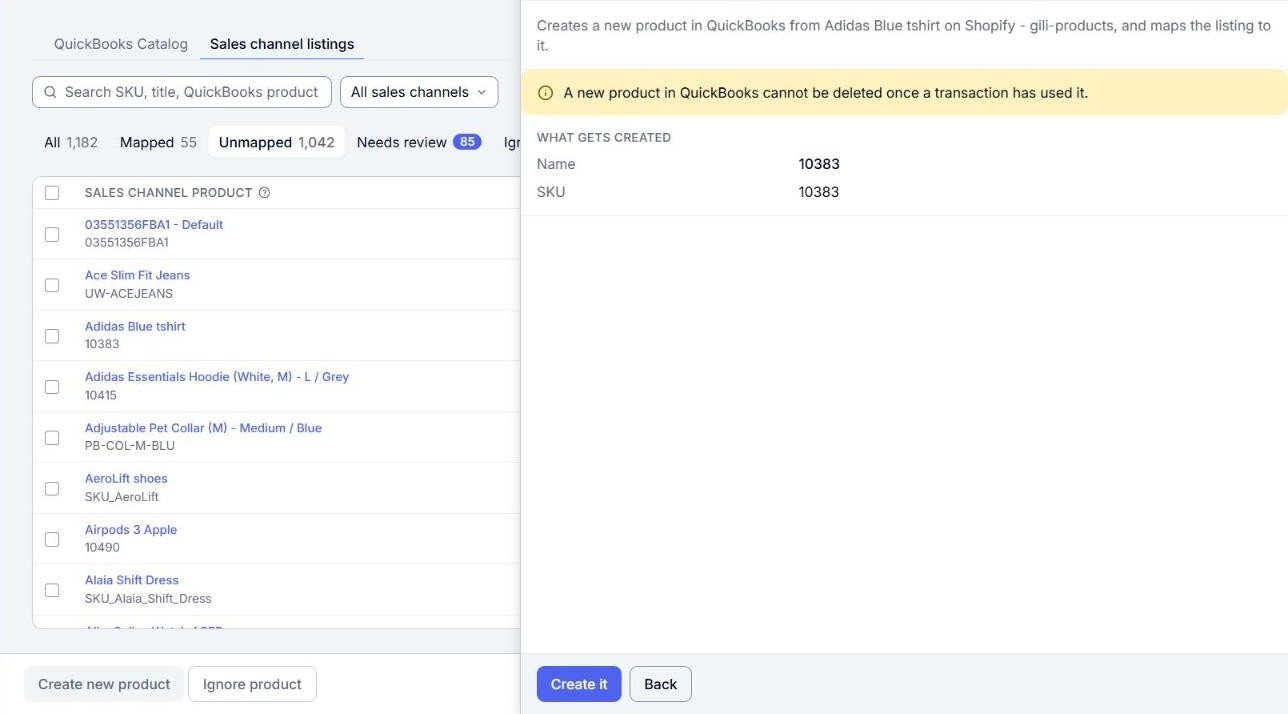
- Check the name and SKU, then click Create it, or click Back to return to the listing. The new product is created in QuickBooks Online, and the listing is mapped to it. Click Close.
Note: A new product in QuickBooks Online cannot be deleted once a transaction has used it. Create a product only when it does not already exist in QuickBooks Online.
Note: If QuickBooks Online already has a product with that name, the confirmation says so and offers Map it or Map to that product instead, and nothing new is created.
To create products for several listings at once, select their boxes on the All or Unmapped tab and click Create new product at the bottom of the page. Review the list in the confirmation and click the button to confirm. A listing whose product is also listed on another sales channel is left out: create its QuickBooks product from the listing's panel instead.
Steps: Ignore a listing
Ignoring sets a listing aside: it moves to the Ignored tab and leaves the counts and the working lists.
- On the All, Unmapped or Mapped tab, select the box at the start of each listing you want to ignore.
- Click Ignore product at the bottom of the page. A confirmation opens.
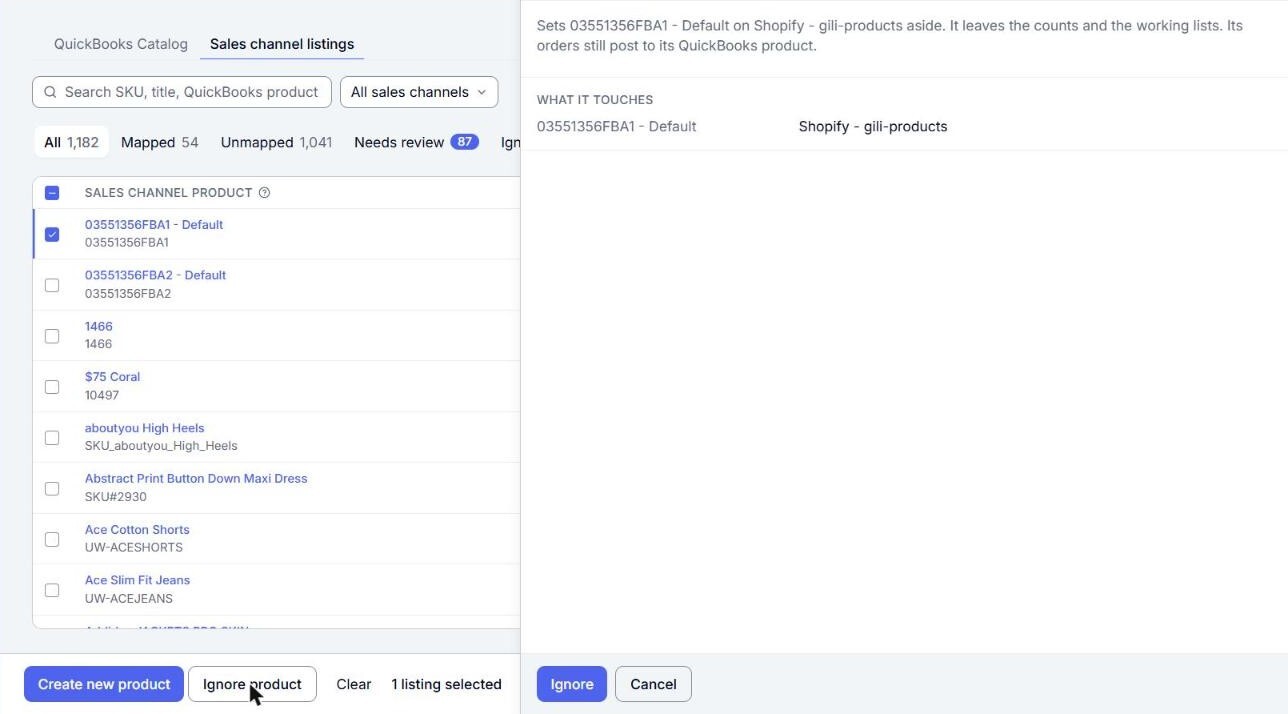
- Click Ignore to confirm. If the same product is listed elsewhere, the confirmation asks where, under the title Ignore: where?. Clear the box of any listing you want to keep, then click the button, for example Ignore 2 listings.
Note: Ignoring does not stop orders from posting. The orders of an ignored listing still post as they do now: to its QuickBooks product if it has one, or by the channel's If a matching is not found, then setting if it has none.
To bring a listing back, go to the Ignored tab and click Restore in its row, or select the listings and click Restore at the bottom of the page. The listing goes back to where it was.
Change or remove a mapping
- Change the QuickBooks product: on the Mapped tab, click the listing's title. Search for and select another QuickBooks product, then click Save mapping. The confirmation shows the product the listing Leaves. Click Map to confirm.
- Remove the mapping: on the Mapped tab, click Unmap in the listing's row and confirm. The listing moves to Unmapped.
If the mapping does not complete
- "Matching has not taken this listing yet, so try again later.": Webgility i has not finished matching the listings of a newly connected channel. Try again later.
- "That QuickBooks item is no longer active. Pick another.": the product was made inactive or deleted in QuickBooks Online. Select another product.
- "This listing changed since you opened it. Check its QuickBooks product and pick again.": the listing changed while the panel was open. Check it and select the product again.
- "This catalog has no QuickBooks company to map to.": connect your QuickBooks Online company first. See How to Connect Your QuickBooks Online Account to Webgility i.
- "It seems your create item setting is not yet configured. Set the income account in Channel settings, Products, under Create new item(s) in products & services.": set the income account under Create new item(s) in products & services on the channel's Products tab, then try again.