
QuickBooks Online does not use an inactive item on a new transaction. When an order needs an inactive item, Webgility i does not post it and shows that the QuickBooks item is inactive, with the item's name.
Note: You can also let Webgility i make such items active for you. In Channel settings, turn on Set inactive items to "Active" when they appear on a new order. See How to Configure Your Channel Settings. Or map the listing to another QuickBooks product. See How to Map a Sales Channel Listing to a QuickBooks Product.
Steps:
- Sign in to QuickBooks Online.
- Go to Sales & Get Paid > Products & services. You can also click the Settings (gear) icon and, under Lists, select Products and services.
- Inactive items are hidden. Click Filters, set Status to Inactive, and click Apply.
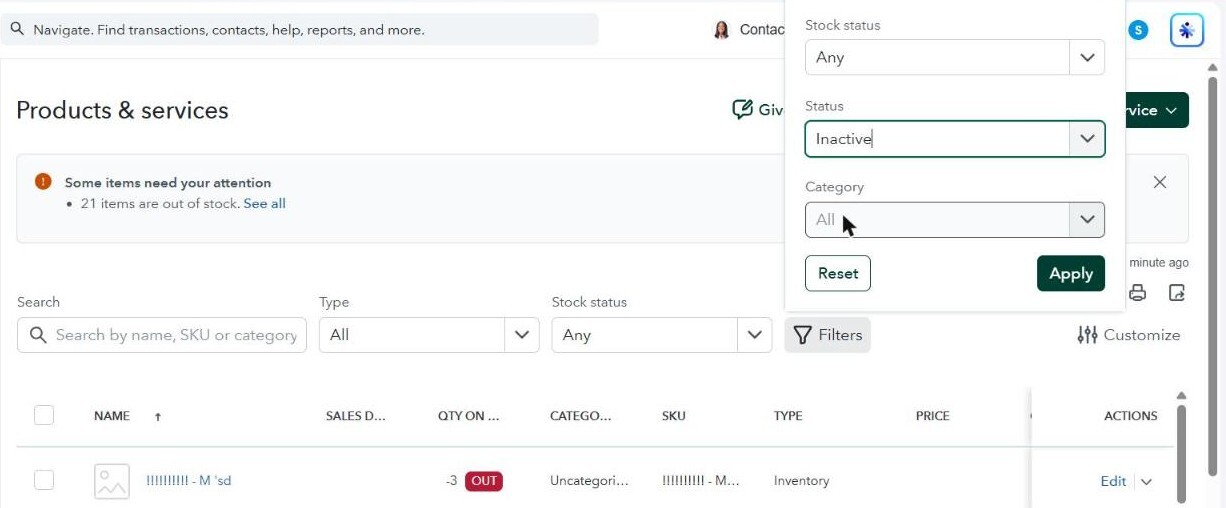
- Find the item that Webgility i named. You can type its name or SKU in the search box.
- In the ACTIONS column of the item, click the arrow next to Edit, then click Make active.
- Go to Orders > Errors in Webgility i, tick the order and click Post to QuickBooks. If automatic posting is on for the sales channel, the order can also post on its own.
Note: If the inactive item was picked in Channel settings or in a workflow rule, such as the shipping or discount item, make it active the same way, or choose another item there.
Note: These steps describe QuickBooks Online, which is an Intuit product. Intuit can change its screens and labels. If what you see is different, search for "make an item active" in QuickBooks Online Help.