
You import orders into Webgility Desktop from a CSV file. Your products come in variants, such as an Adult and a Child version of the same tour or a Small and a Large version of the same item. After posting, QuickBooks shows the same item on every order line, even though the CSV clearly lists different variants.
Why This HappensWebgility matches each CSV order line to a QuickBooks item by its SKU. When the SKU column holds only the base product name — for example "Walking Tour" for both Adult and Child — every variant looks identical to Webgility, so all of them map to the same QuickBooks item. A SKU that includes the variant, such as "Walking Tour Adult" and "Walking Tour Child", gives each line its own match.
Steps to Give Each Variant a Unique SKUStep 1: Open your order CSV in Excel and find the column that tells the variants apart, such as a Customer Type, Size, or Option column.
Step 2: Build a unique SKU by combining the product column with the variant column — for example, the formula =B2&" "&E2 turns "Walking Tour" and "Adult" into "Walking Tour Adult" — and use that combined value in the SKU column for every row.
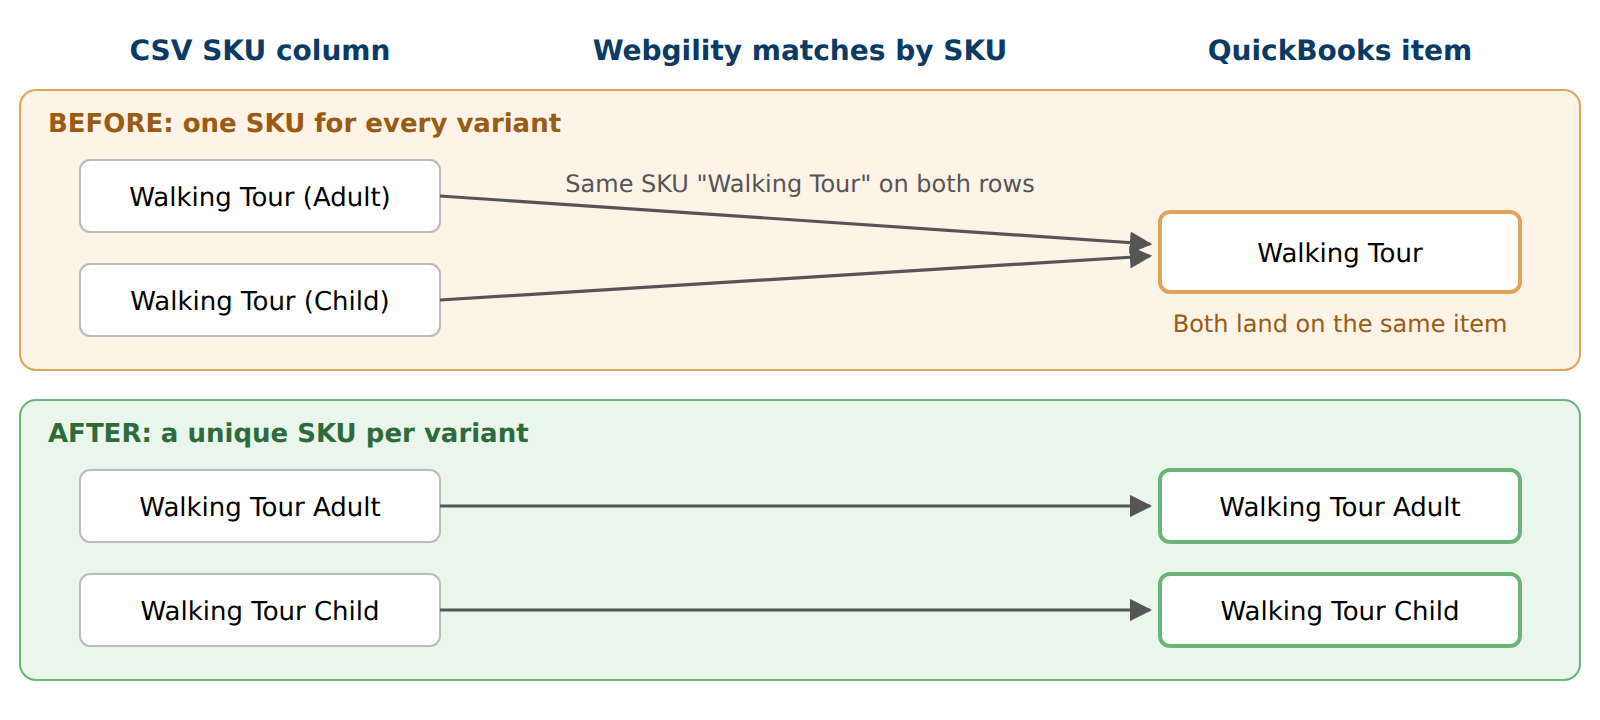
Step 3: In QuickBooks Desktop, confirm an item exists for each combined SKU (for example "Walking Tour Adult" and "Walking Tour Child") so each one has a match to post to.
Step 4: Unpost any orders that already posted with the wrong item, using How to Unpost Transactions from Webgility Desktop with Undo Sync. Then delete those orders and empty them from Trash, using How to delete orders permanently in WD, so the re-import brings them in fresh.
Step 5: Re-import the corrected file from Orders > Import > From CSV, following Importing Orders via CSV in Webgility Desktop.
Step 6: If Webgility asks you to map a new SKU, map it to the matching QuickBooks item using How to Map Products While Posting Orders. Post the orders, and each variant now lands on its own QuickBooks item.
Key RecommendationKeep the same SKU format in every future CSV export so each variant keeps matching the same QuickBooks item. If your booking or order system can export the combined value directly, set it up once and skip the spreadsheet formula going forward.
Additional SupportIf orders still map to the wrong item after re-importing, share one affected order's CSV row, the SKU you used, and the QuickBooks item it should match with Webgility Support.