How to Map Products While Posting Orders
This article helps Webgility Desktop users map products during the order posting process from Webgility Desktop to QuickBooks Desktop. It explains how to enable the recommended sync setting to prompt product creation or mapping when item mismatches occur. The article also guides users through resolving unmatched items by either creating new products or mapping them to existing ones from QuickBooks Desktop, ensuring accurate and seamless order posting.
Steps:
- In Webgility Desktop navigate to Connections go to Accounting and click on Sync settings.
- Click on Products and select the option Prompt to create or map the product at the time of posting (recommended). Then click Save & Continue and exit the settings.

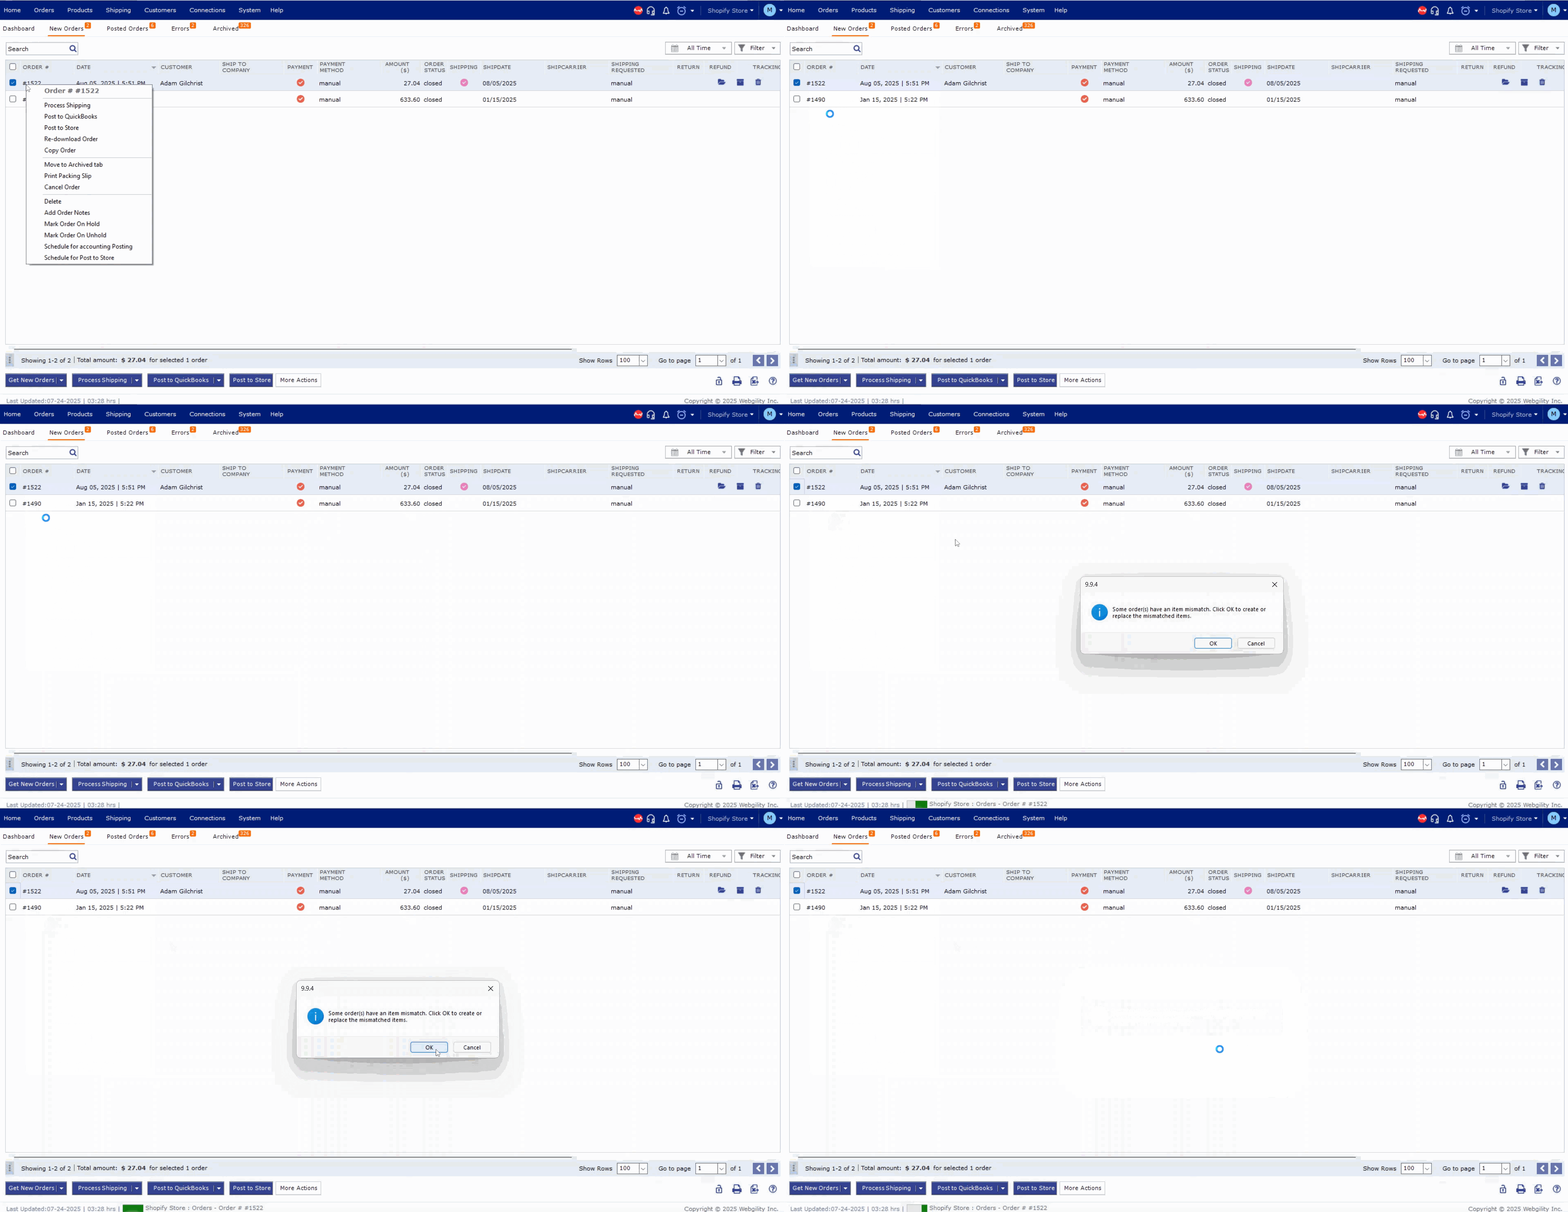
- While posting orders from Webgility to QuickBooks Desktop, if items in the order are not found in QuickBooks Desktop, then the order posting process will show a dialogue box with the following message: Some order(s) have an item mismatch. Click OK to create or replace the mismatched items. Click OK.

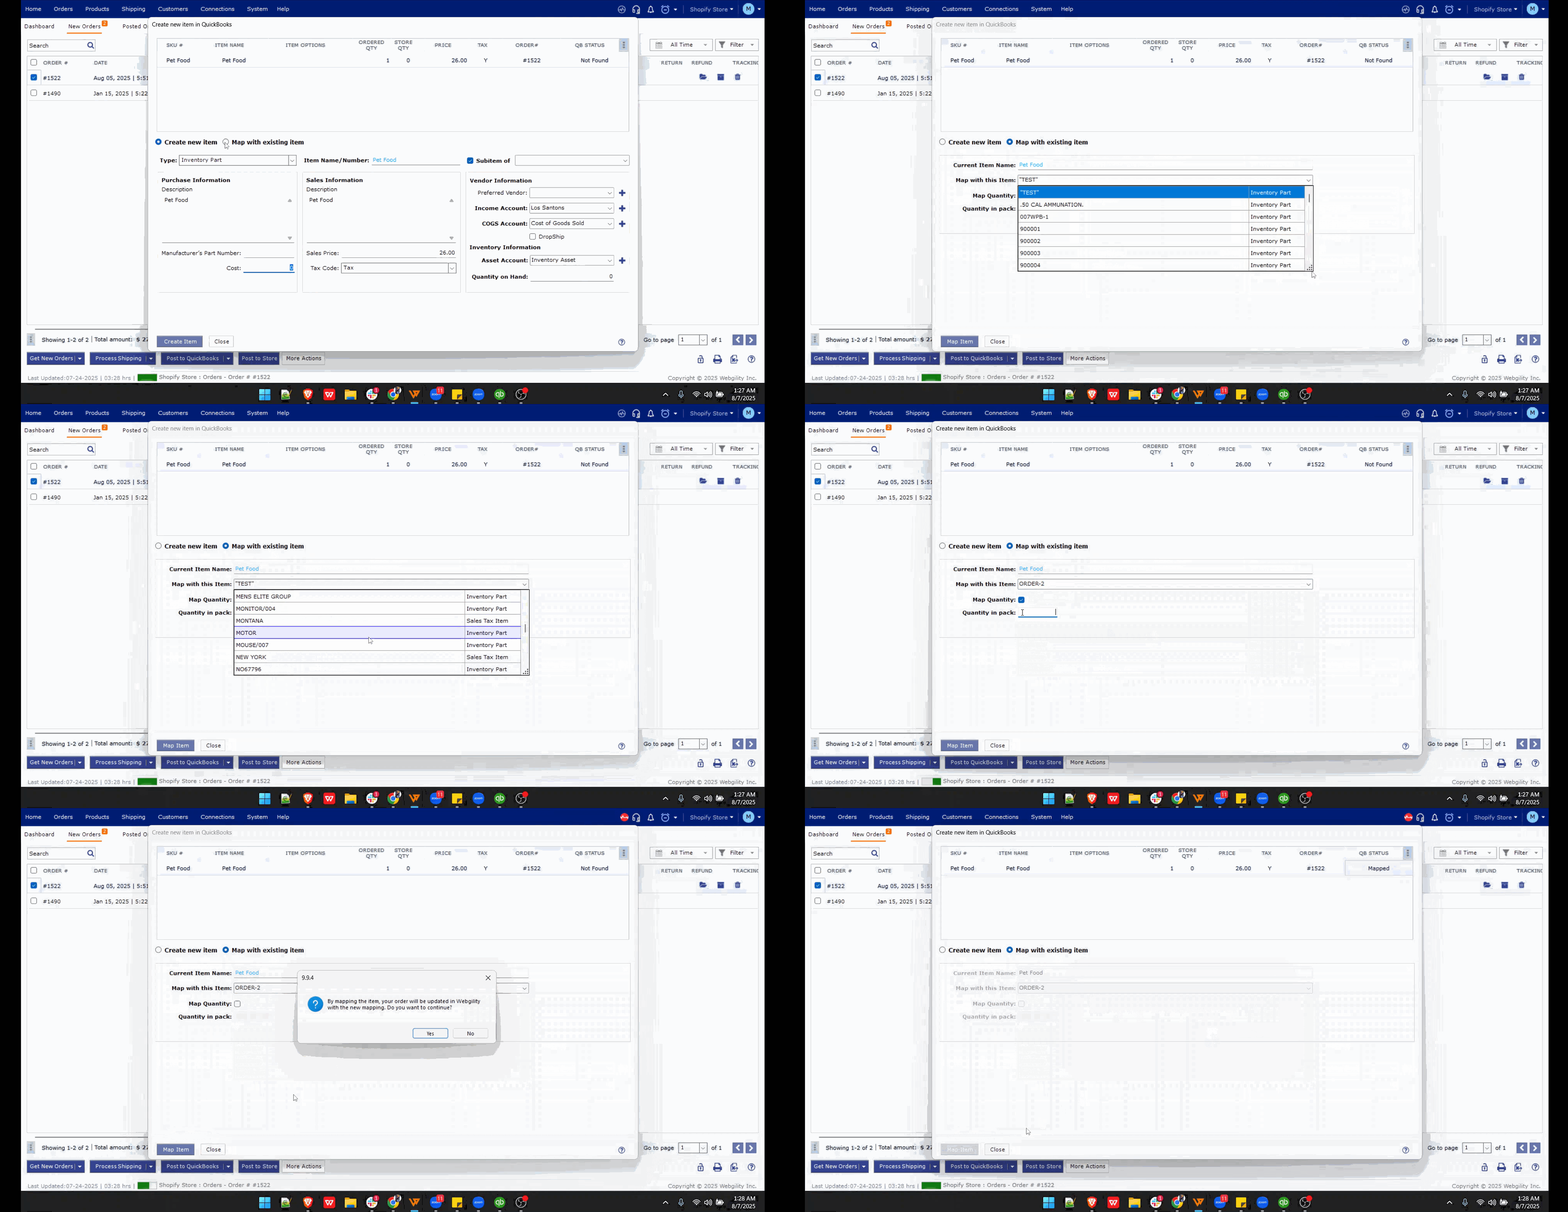
- This will open another window, with options to either create this item in QuickBooks Desktop or map it to an existing one.
- To use the Create new item option, items in the order must not exist in QuickBooks Desktop. You will need to create them in QuickBooks Desktop.
To use the Map with existing item option, you must map the order item/s to an existing item in QuickBooks Desktop, then select the item option to map.
- Under Map with this item, select the QuickBooks Desktop item name of the product you want to map the item to. Then click Map Item.

- Another small pop-up window will open, click OK.
- Once all the unmatched items from your orders are mapped, click Close.
- Once all the mappings are complete, select the order again and click Post to QuickBooks Desktop.
