
Webgility Online stops posting a refund when the QuickBooks Online account selected for the refund is no longer active. Updating the account in your refund settings clears the error and lets the refund post.
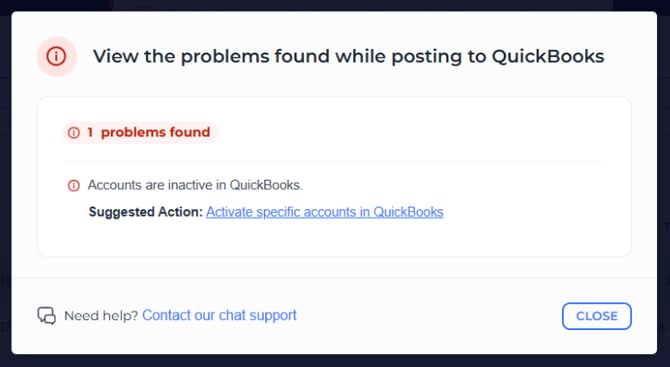
When This AppliesUse this article when you are trying to post a refund from Webgility Online to QuickBooks Online and you see the message "Accounts are inactive in Quickbooks".
Why This HappensWebgility Online posts each refund to a specific QuickBooks Online account that you choose in your refund settings. If that account is later marked inactive in QuickBooks Online, Webgility can no longer post to it. The dropdown in your refund settings hides inactive accounts, so your previously saved selection becomes blank or defaults to another account, and the next refund posting fails with the inactive-account message. The same account-made-inactive condition is covered more generally in Error: Invalid Reference ID: Something you're trying to use has been made inactive.
Steps to Fix the Error
Step 1: Open your Refund Settings in Webgility Online, following the navigation in Setup Refunds in Webgility Online.
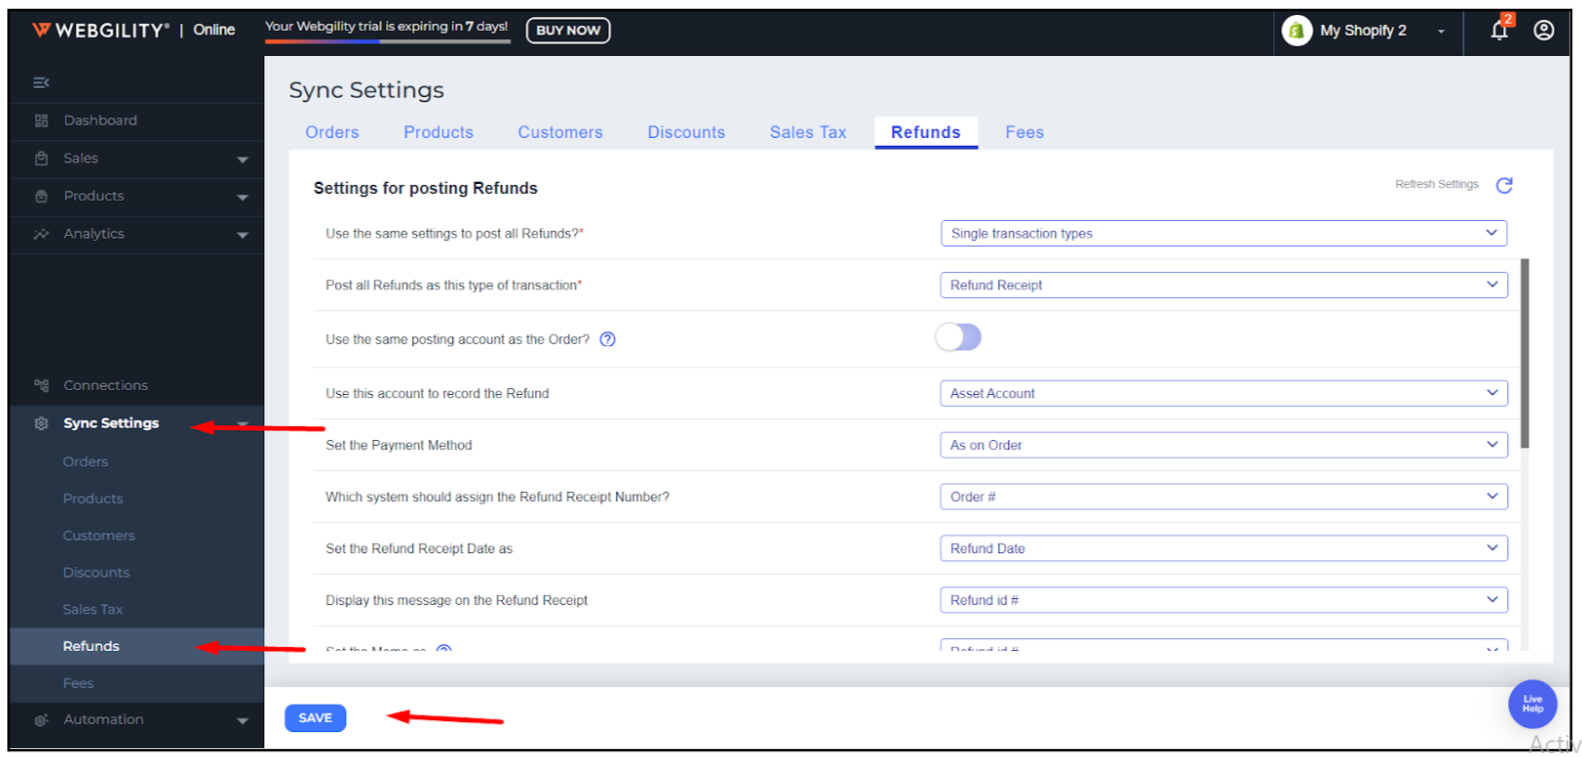
Step 2: Review the account chosen for refund posting. If the field is blank, pick an active QuickBooks Online account from the dropdown. If you need to restore the earlier account, first reactivate it in QuickBooks Online by following How to make an account active in Chart of accounts at your QuickBooks Online, then come back to Webgility Online Refunds tab and click on the Refresh Button.

Step 3: Click Save on the Refund Settings page.
Step 4: Retry posting the refund.
Important Note
Note: Inactive QuickBooks Online accounts are hidden from the Webgility Online dropdowns on purpose, so once an account is marked inactive you cannot choose it again until it is reactivated in QuickBooks Online.
Before marking any account inactive in QuickBooks Online, confirm it is not currently selected in your Webgility Online refund, fee, or deposit settings. Reviewing those settings first prevents the next posting from failing.
Additional SupportIf the error continues after you select an active account and save, contact Webgility Support with the refund ID and the account name you selected.