Overview:
This article will guide you on configuring Webgility refund settings to individually post each order as a Sales Receipt in QuickBooks online.
Here is your step-by-step guide:
1) Enable transactional posting:
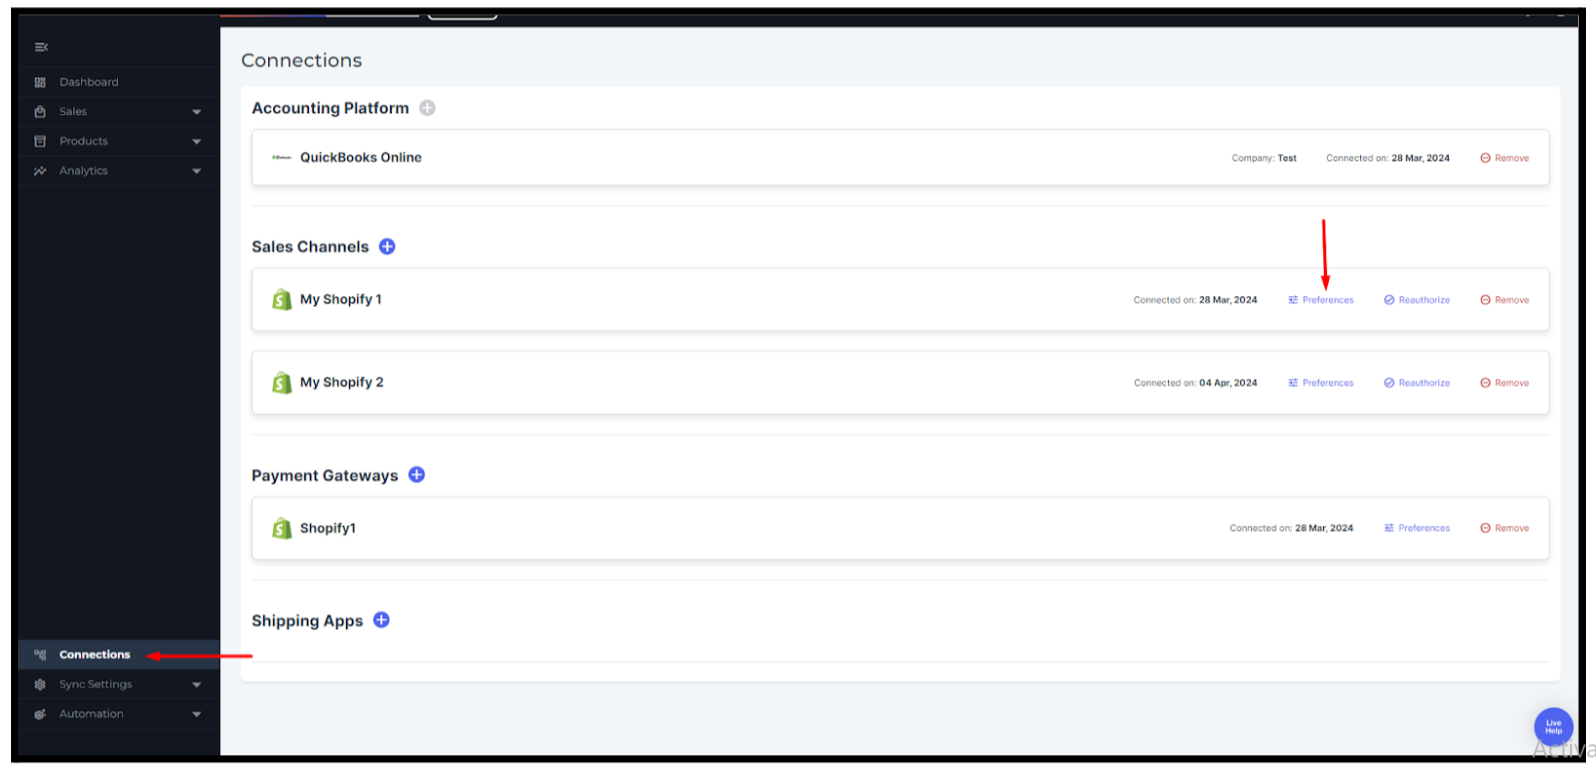
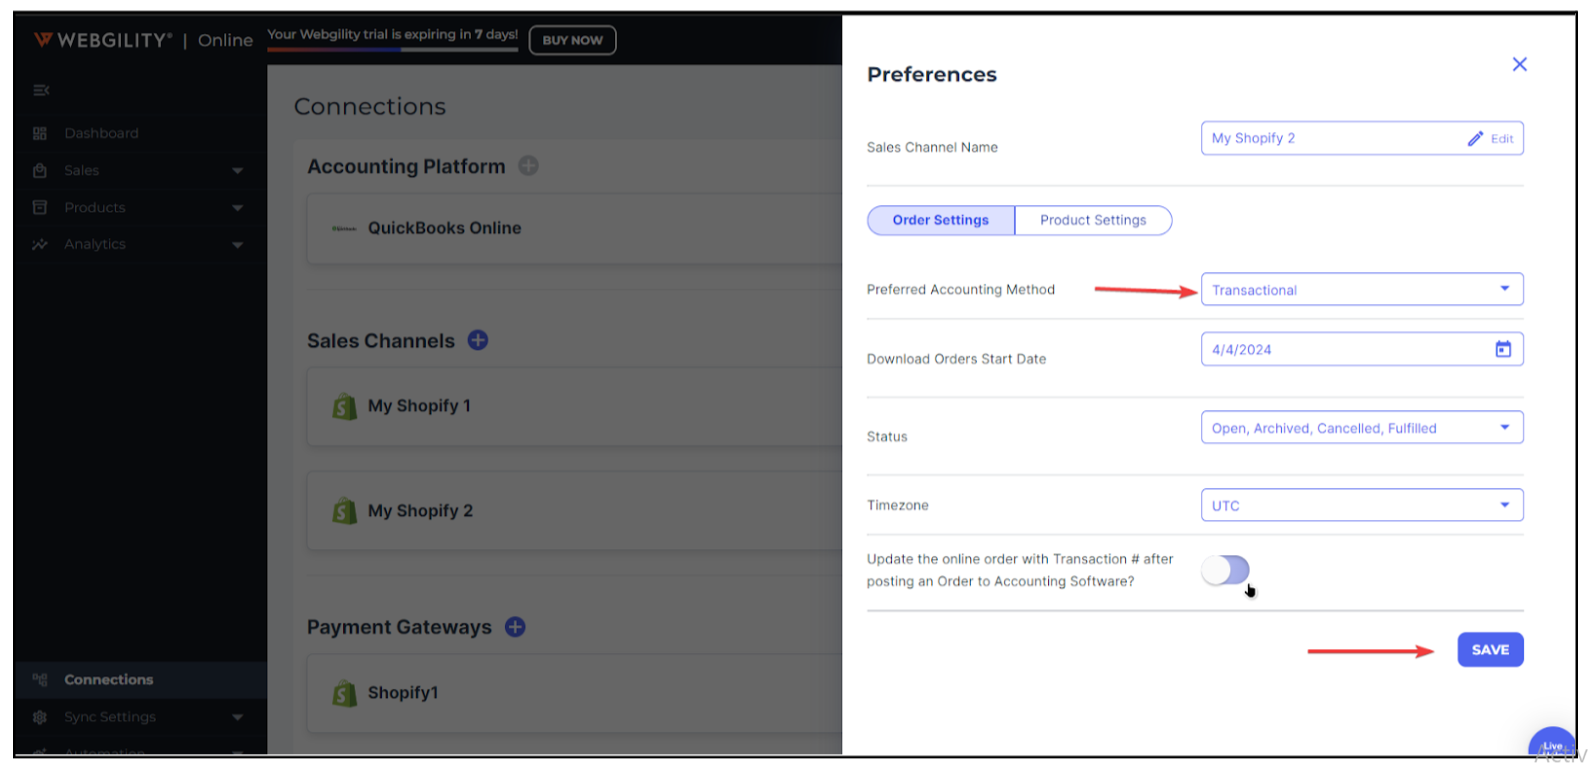
Go to Connections > Sales Channel > Preferences and select "Transactional” under the preferred accounting Method. Click "save" on the to confirm the change
02) Configure Refund Settings:
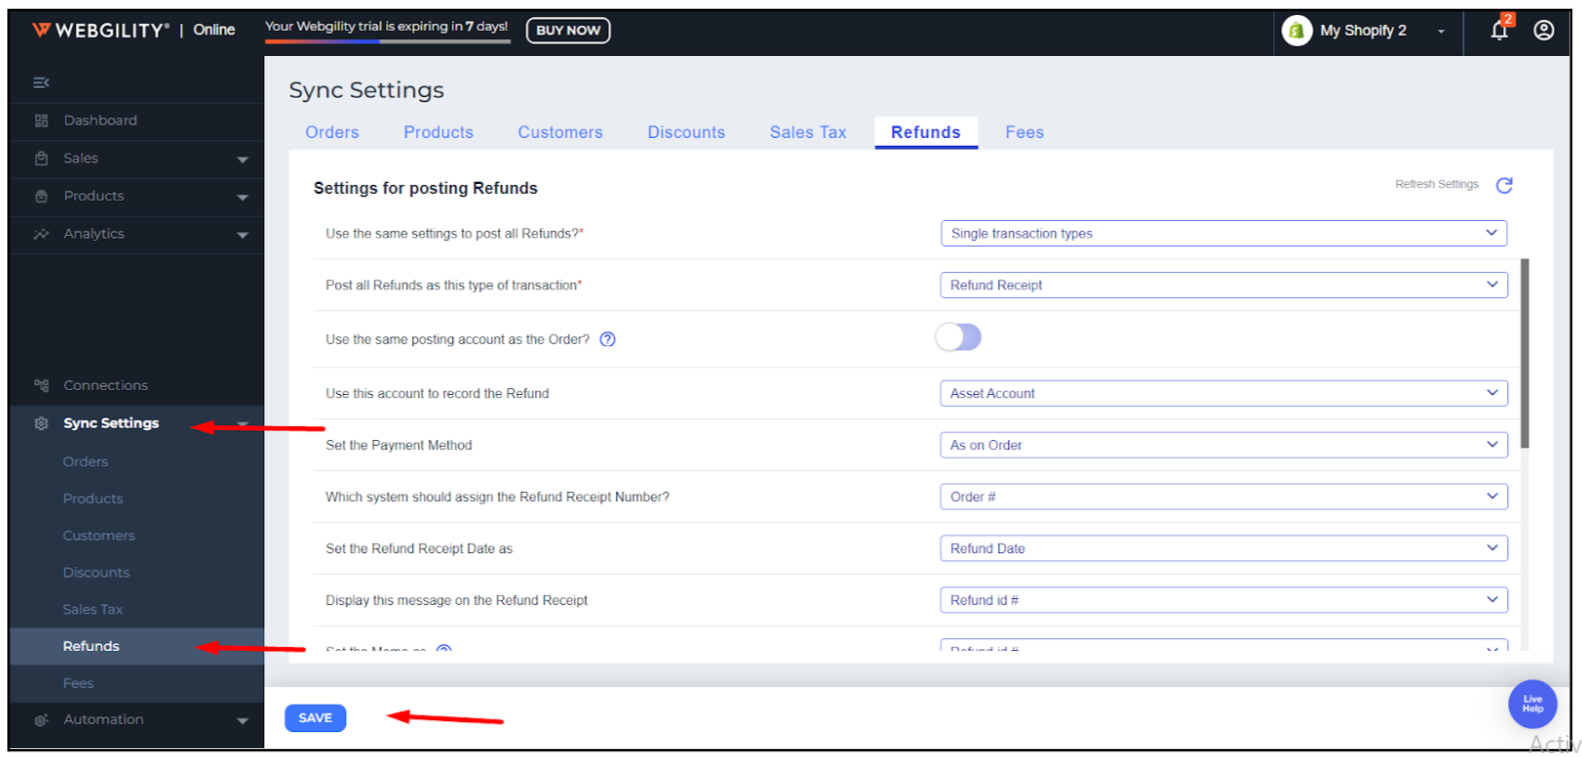
Refunds Settings allow you to specify how your refund transactions will manifest in QuickBooks Online. The below-recommended settings will create a refund receipt and pay it out of the clearing account. The other selections on this screen are optional and are not usually adjusted in most cases. Save the settings when you are done.
Note: This setting area will not appear in Webgility settings if your sales channel platform is not supported for refunds with Webgility Online.
To learn more about the refund posting workflow in Webgility Online, please refer to the help article How to Process Returns and Refunds with Webgility Online