How to Test Your Store Connection in Webgility Desktop
This helpful article provides step-by-step instructions on how to test the connection of various types of online stores within the Webgility Desktop application. The process ensures that the integration between Webgility and the online store is established and functioning correctly.
How to check connection:
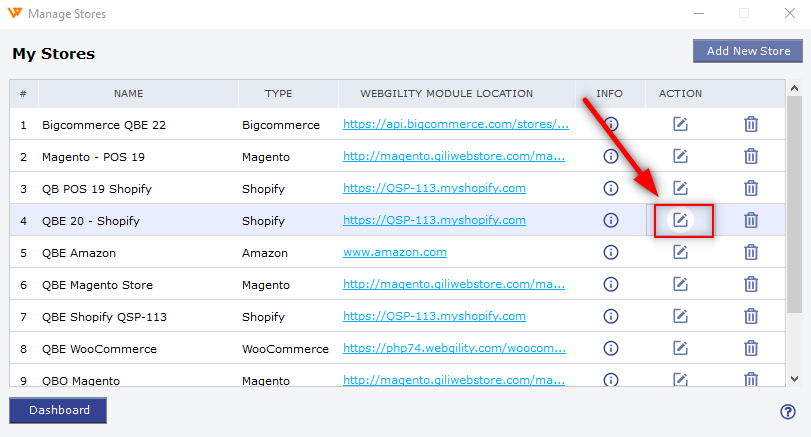
1. In Webgility Desktop, navigate to Connections> Sales channels > Manage Sales Channels.

2. If you have multiple stores added, click Edit in the Action column for the store that you want to check the connection, update credentials or update store details.
Shopify:
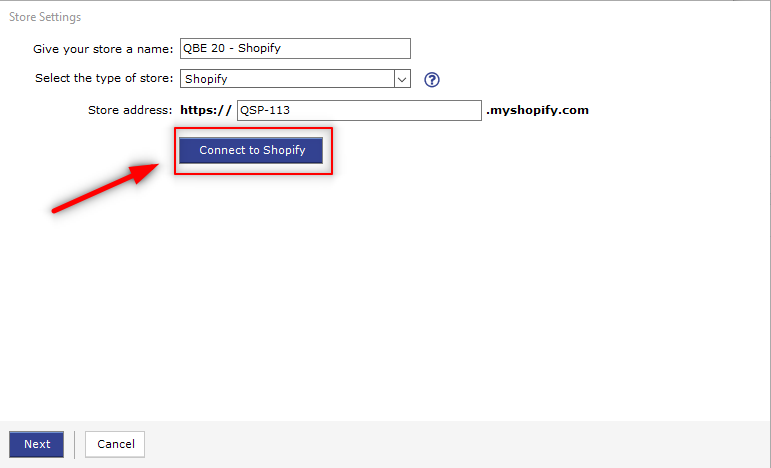
3. If you are updating a Shopify store, click Connect to Shopify. Based on the store type, this screen may look different.
4. After you click on Connect, it will take you to the browser window for the Shopify store to log in. Make sure you use updated admin credentials to connect it. Sometimes it will show successfully connected without entering credentials if it is already logged in on your browser (URL auto logged in with saved passwords on the browser)
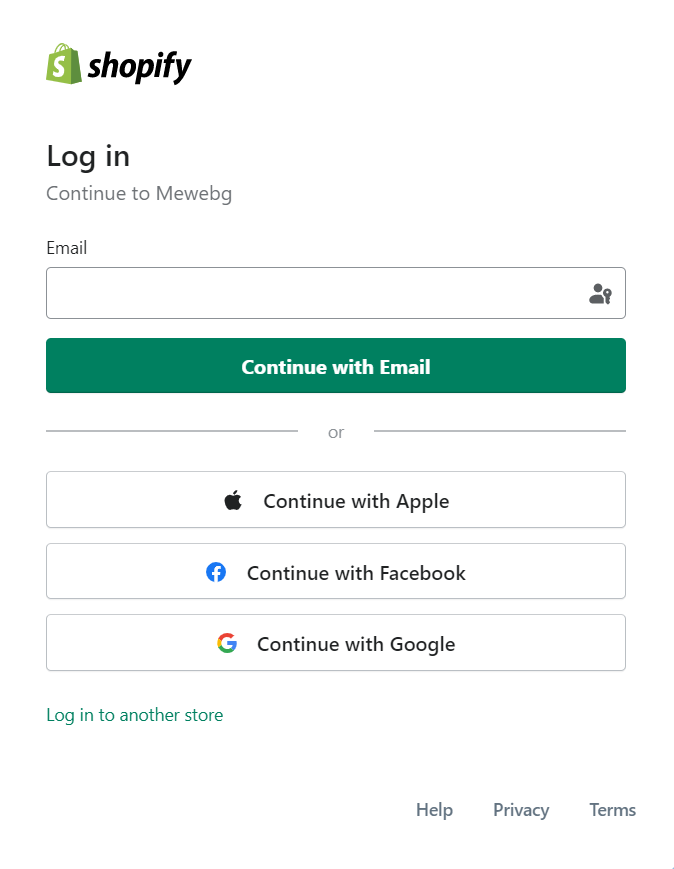
5. After the Successfully Connected message, click on OK and Next in Webgility.
6. Update your store address and click Save. This address will be used as your Ship From and Packing Slip Address. Note: This is only if you use Webgility to process shipping or generate packing slips.

Amazon:
7. If you are updating an Amazon store, click on Test Store Connection. Based on the store type, this screen may look different.
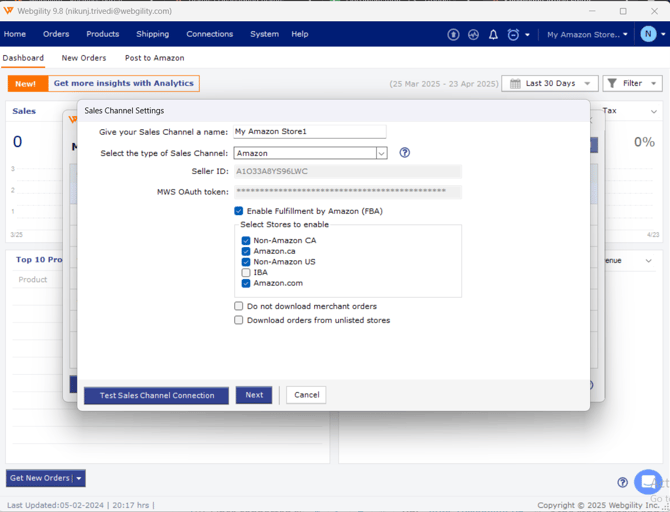
8. After clicking on Test Store Connection, it will redirect you to the browser page to test the connection. If your credentials are already updated on the browser (logged in earlier on your Amazon account on the browser page), you will get a successfully connected message and if not, then you will get the below page to enter credentials to log into your online store account.
Login to your Amazon Seller Central account with admin account credentials.
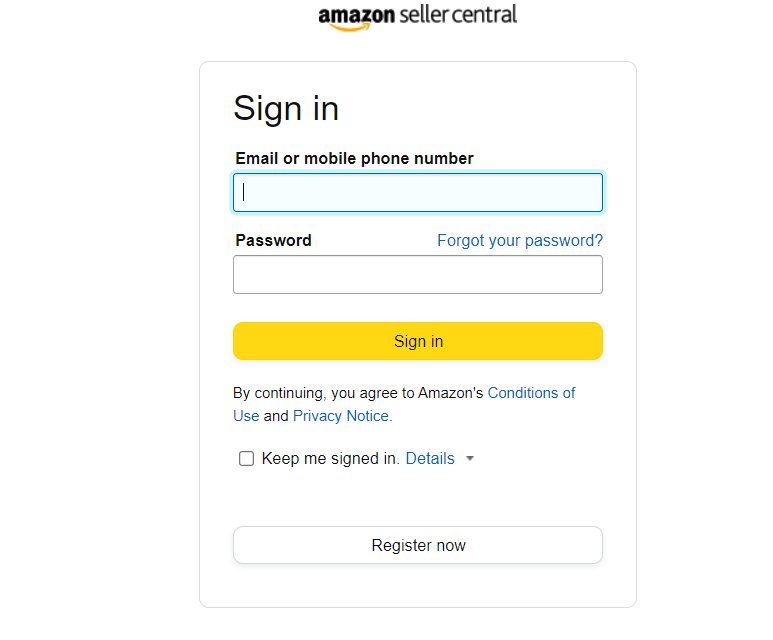
9. After the Successfully Connected message, click on OK and Next in Webgility
Note: If you want to enable and disable any sales channel to download the orders in Webgility please select the required checkboxes in the below page before clicking on Next.
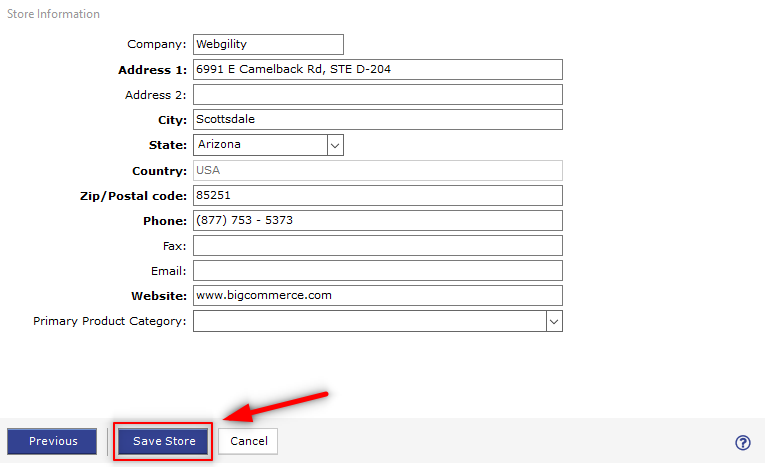
10. Once connected successfully, it will give you the next window to enter the store details and save it.
Magento:
11. If you need to Test Store Connection for a Magento store, after selecting the Edit icon you will be shown the store credentials window. Enter your updated store credentials (only if they have been changed) here and click on “Test Store Connection”.
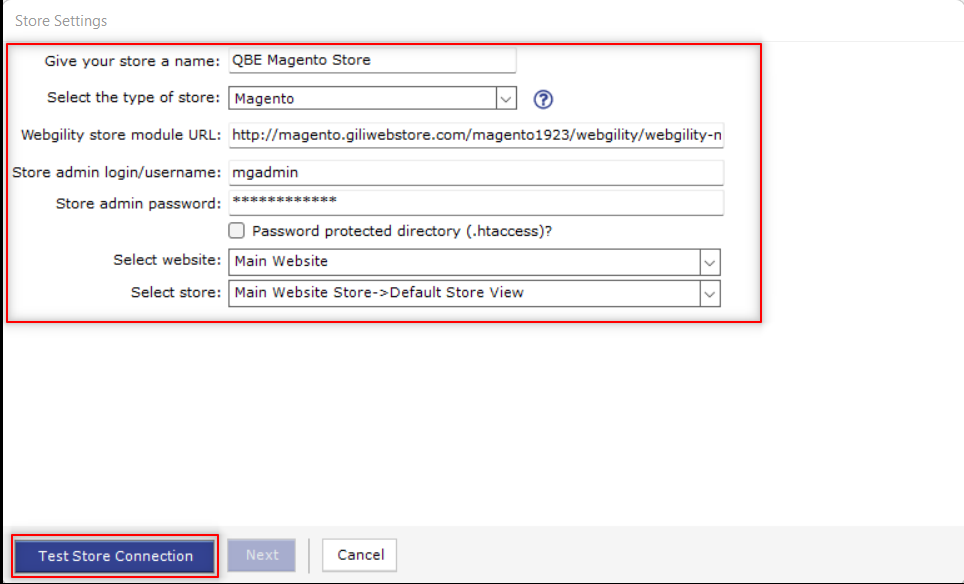
11. After the Successfully Connected message, click on OK and Next in Webgility
12. Once connected successfully, it will give you the next window to enter the store details and save it.

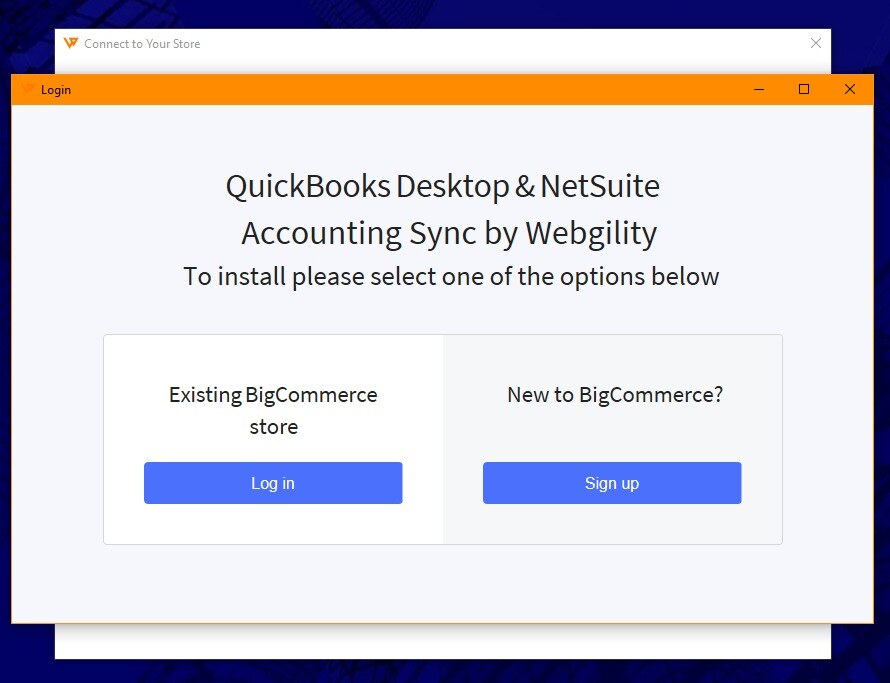
Bigcommerce:
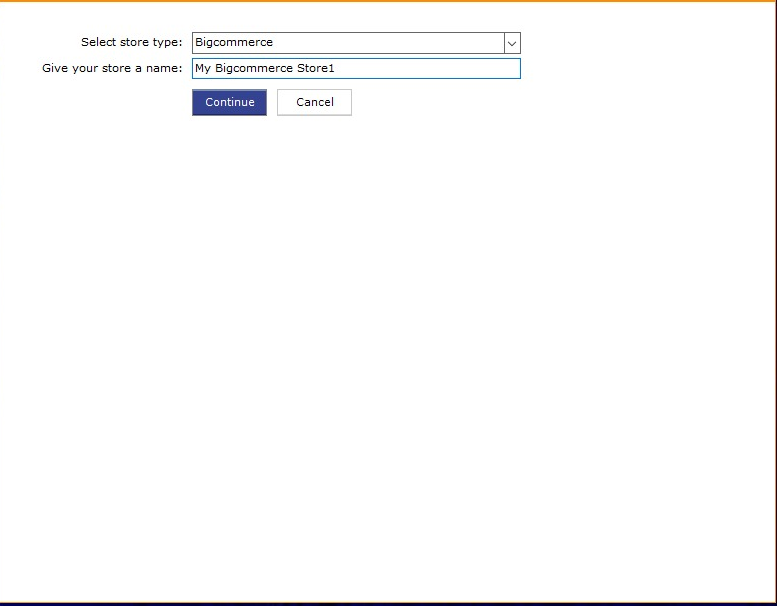
13. If you are updating a Bigcommerce store, click on Continue. Based on the store type, this screen may look different.
14. In the Login screen, under Existing BigCommerce store, click Log In.
15. On the Log In to Your Store screen, type in your admin login credentials and click Log In.
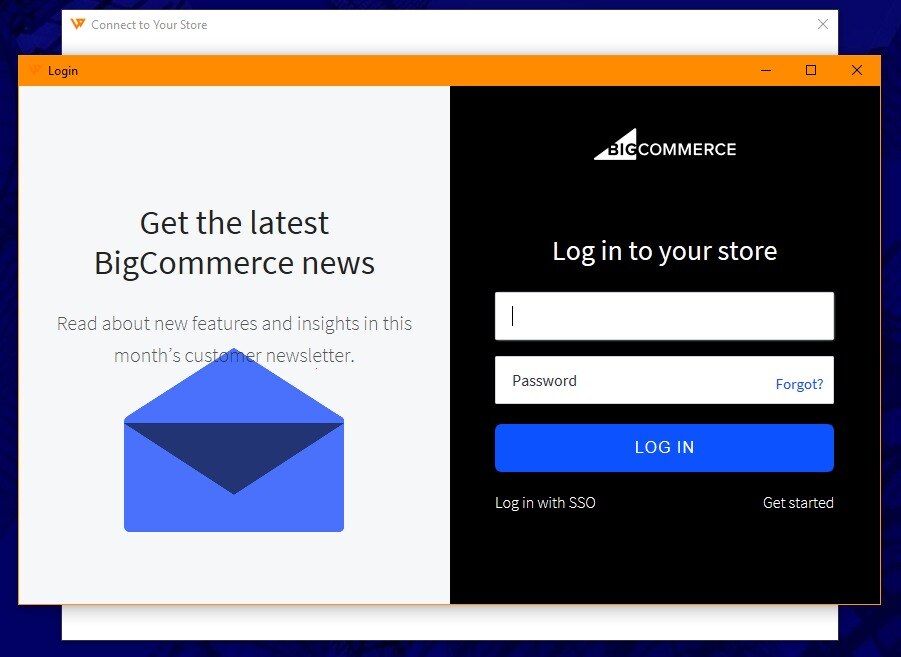
16. After the Successfully Connected message, click on OK and Next in Webgility
17. Once connected successfully, it will give you the next window to enter the store details and save it.

Note:
The above-mentioned test store connection process works for all store types, marketplaces, and sales channels connected to Webgility Desktop.