Overview:
Product Sync is the ability to synchronize one or more items within Webgility Desktop to match between the sales channel and the accounting platform. It's important that you have synchronization for product quantity, product price, and product cost across your systems.
You can choose to use QuickBooks data as your master data set for your product sync or Store data as your master data set. Within Webgility Desktop, we call this your Master Catalog.
Additionally, there are 2 types of product sync settings for you to choose from:
-
Automated product sync settings
-
Manual product sync settings
Automated Sync Settings
To set up automated product sync settings, navigate to Products, then go to Settings and click on Sync Settings.

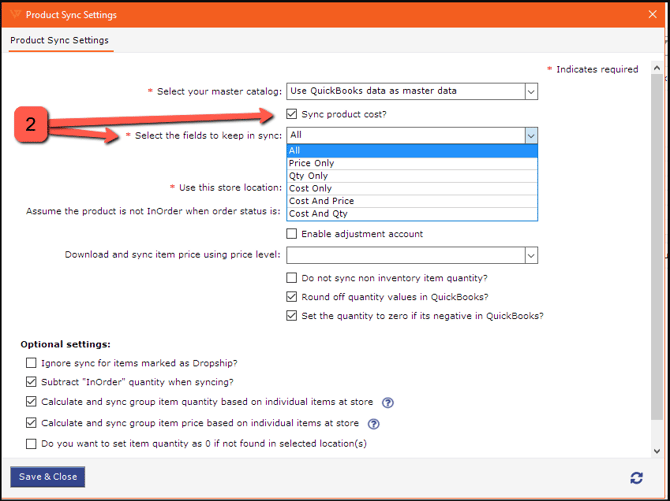
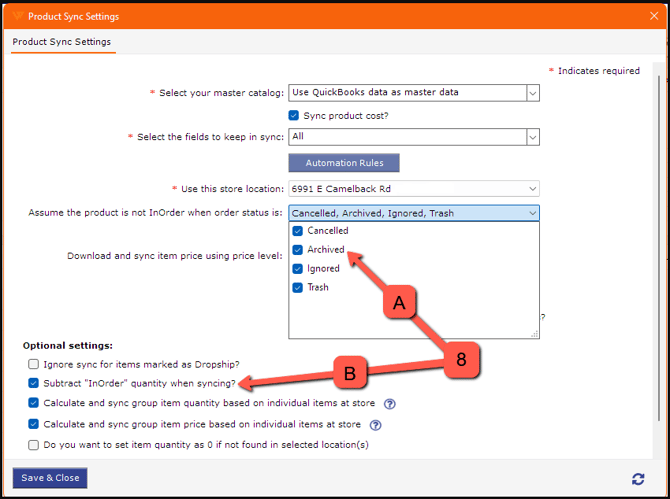
1. Select your master catalog for product sync. Select either store data or QuickBooks data to use.
2. Select the fields to keep in sync. You can select one or more items: quantity, price, and cost. Note: cost is not available for all sales channel connections; it is available for BigCommerce, Shopify, Magento, and Magento 2 and higher.
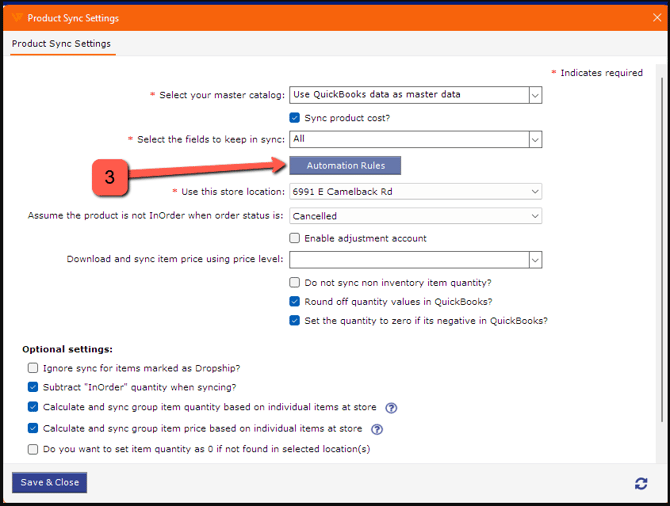
3. Under Automation Rules, you can select more advanced automation sync settings.
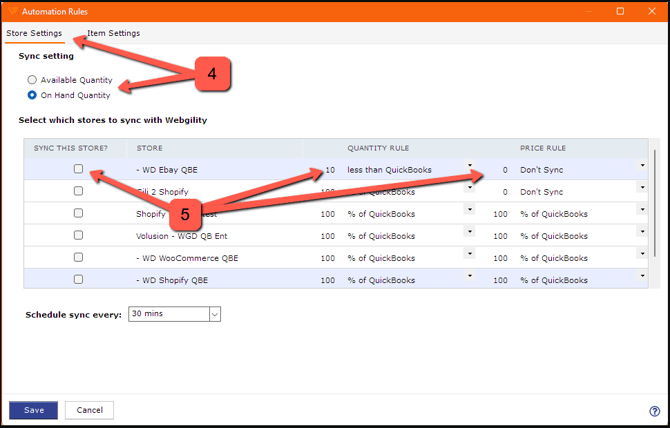
4. Under Store Settings, you can select either Available Quantity or On Hand Quantity to sync from QuickBooks to the store.
5. For Select which stores to sync with Webgility, you can provide a custom rule for the product sync that affects the whole sales channel or sales channels.
6. Under Item Settings, you can make selections more granular by-product sync setting rules for quantity, price, or both.

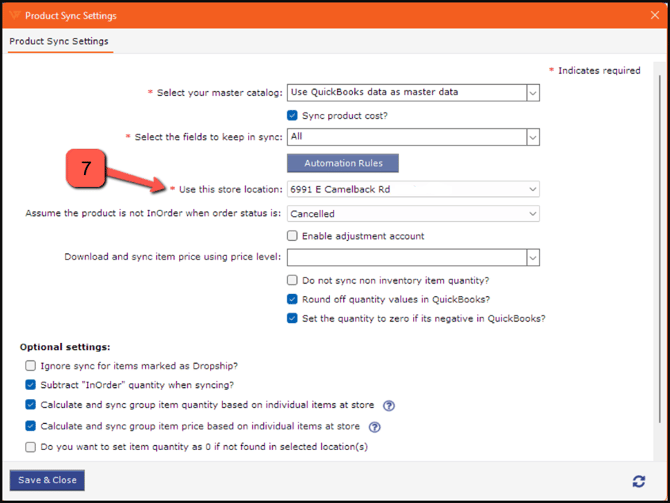
7. Use this store location to select the online sales channel location to use for sync. Only one location can be selected.
8. InOrder settings allow you to sync or not sync quantity, price, or cost, if the product is currently located in an unposted order. This works for both automated Scheduler sync and manual sync.
-
Assume the product is not InOrder when order status is allows you to select the order statuses that you wish to ignore and not sync by quantity, price or cost for unposted orders.
-
When Subtract “InOrder” quantity when syncing? is not selected it will not allow you to sync the quantity, price and cost for products located on orders that are not posted. Selecting this box will ignore the InOrder status and allow sync.
9. Enable adjustment account is available for some sales channel connections. When transferring products to QuickBooks manually or when orders are posted, this will add an entry into QuickBooks for inventory adjustments.
10. Webgility works with QuickBooks Price Levels. Download and sync item prices using price level allows you to select the price level. Only one price level can be selected for item sync. Note: Webgility does not work with QuickBooks Price Rules.
11. When Do not sync non-inventory item quantity? is selected, Webgility will not sync non-inventory item quantity from QuickBooks to the online store.
12. In some instances, when using Units of Measure on products, the product quantity may show as fractions. Online stores will not allow you to sync fractions for quantity. By selecting Round off quantity values in QuickBooks? fractions are eliminated.
13. Select Set the quantity to zero if it is negative in QuickBooks, if you have negative quantities in QuickBooks, as online stores do not allow you to sync negative quantities.
14. Items can be marked as Dropship in the Webgility product list; you can also select to Ignore sync for items marked as Dropship? If you do not want the quantity to be synced on these Dropship items, navigate to Products, then go to QuickBooks and click on All products
15. You can select if you want to calculate and sync group item quantity based on individual items at store.
16. You can select if you want to calculate and sync group item prices based on individual items at store.
17. Use Do you want to set item quantity as 0 if not found in a selected location(s) if you want to set the item quantity to 0 if not found in the selected sales channel location?


18. Navigate to Products, then go to Missing in QuickBooks and click on Product presets to define settings when syncing Group Items and Assemblies.
-
Select Get group product Quantity as individual product quantity
-
Select Get assembly product quantity as individual product quantity

Learn about additional settings for Group Items and Assembly Items here.
The Webgility Scheduler needs to be set to complete automated Sync Settings. Learn more here.
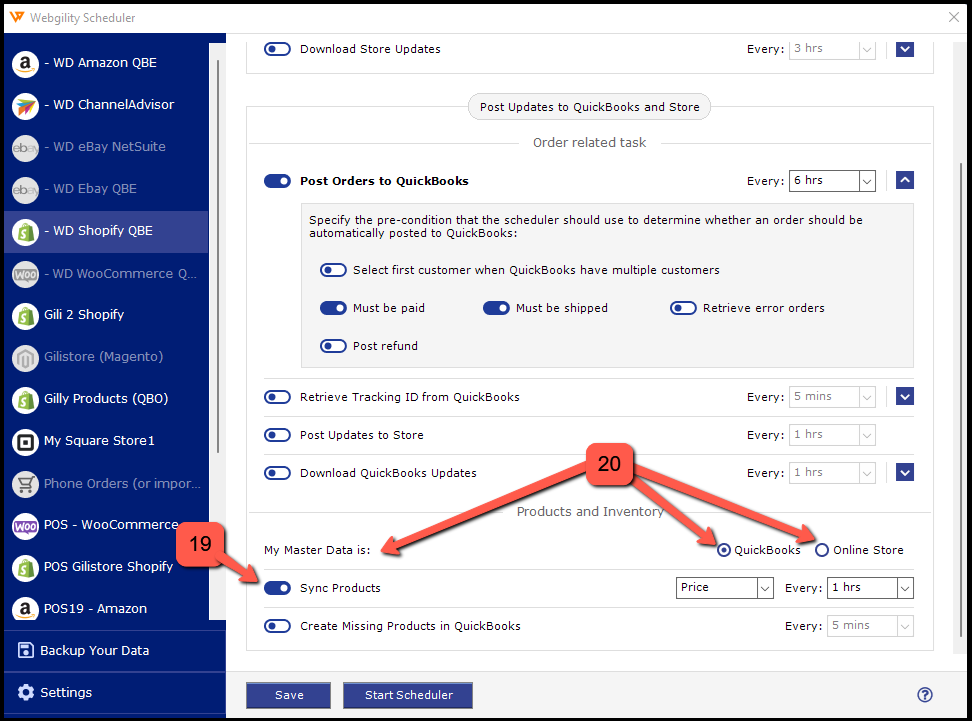
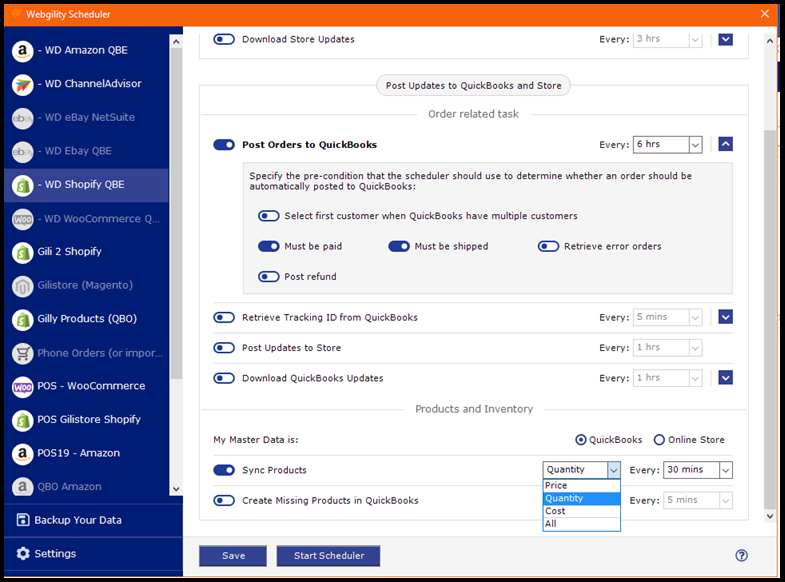
19. Turn on or off the Sync Products setting.
20. For My Master Data is you can select QuickBooks or Online Store as the master data for product sync. Master Data is the location you wish to use as the master for quantity, price, and/or cost during Sync. The drop-downs select the items you want to sync and how often.
Manual Sync Settings
21. For manual sync settings, learn more here.