
Overview
Sales tax can be recorded differently depending on the settings in QuickBooks, Webgility Desktop, and Avalara. Use this guide to review the relevant settings and test the result with one order before making broader changes.
Steps- Check the product’s tax settings in QuickBooks.
- In QuickBooks Desktop, go to Lists > Item List, find the product, and review its tax code and income account.
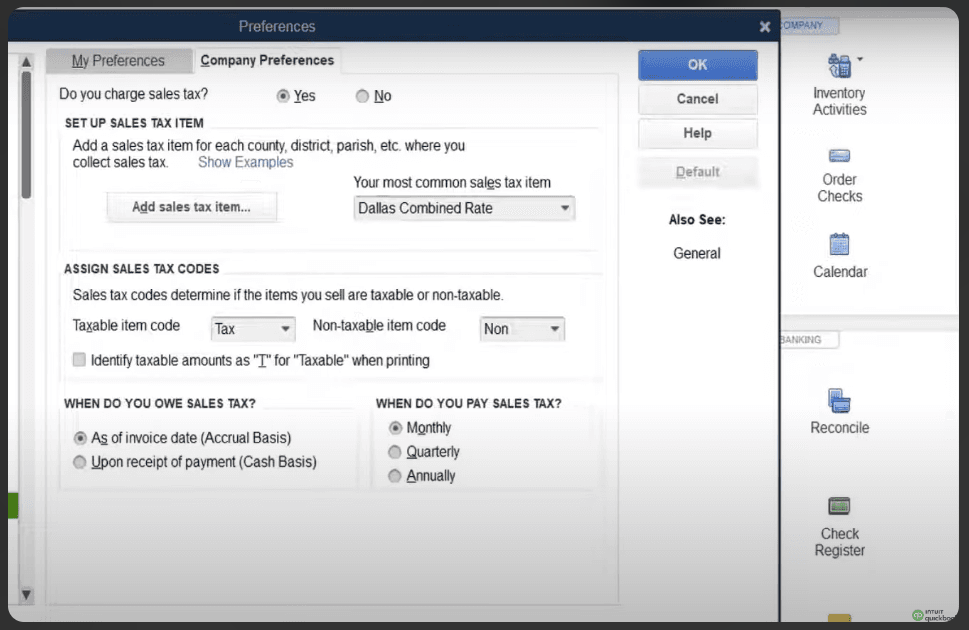
- In QuickBooks Online, go to Sales > Products and Services, find the product, and check whether Taxable is selected.
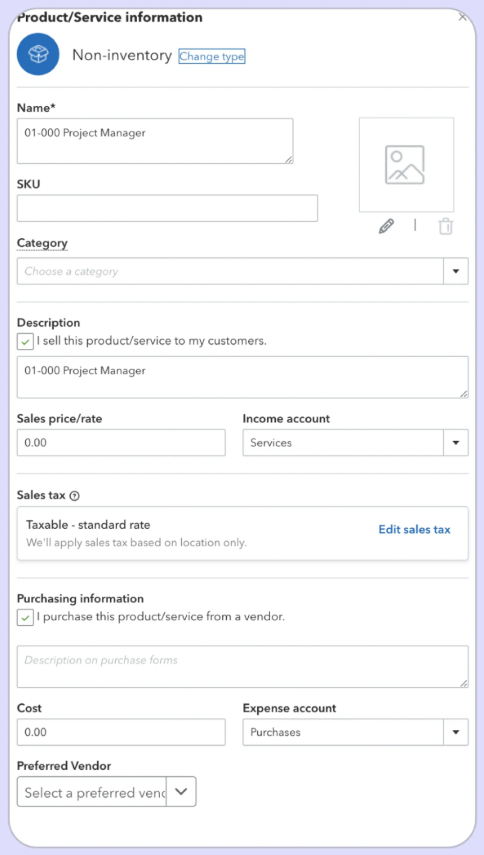
- In QuickBooks Desktop, go to Lists > Item List, find the product, and review its tax code and income account.
- Review Webgility’s sales tax settings. In Webgility Desktop, go to Connections > Accounting/POS/ERP > Sync Settings > Sales Tax. Confirm the selected method matches how you want tax recorded in QuickBooks. See Enable Sales Tax to Match QuickBooks Calculations for details.
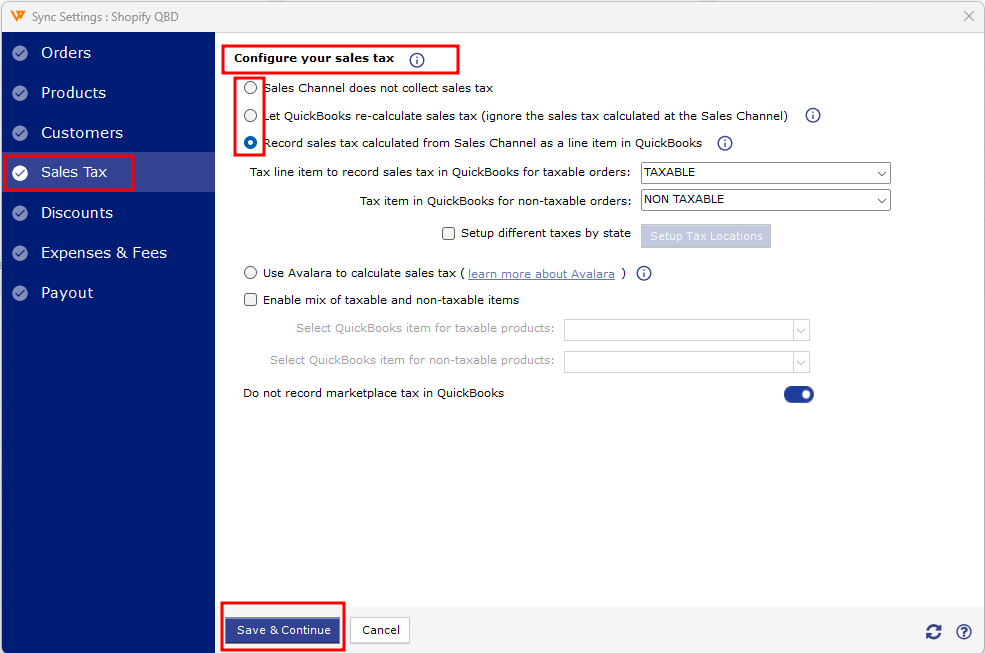
- Check the Avalara connection and setup. Review Avalara settings in Webgility and confirm the account is configured as intended. For information about how AvaTax works with Webgility Desktop, see Avalara AvaTax and Webgility Desktop FAQs.
- Test with one order. Post a test order and check how its tax appears in QuickBooks before applying changes to additional products or orders.
- Reprocess earlier orders only if needed. If earlier orders need to reflect updated settings, unsync them before redownloading and reposting. Follow Order Re-download in Webgility Desktop to avoid duplicate transactions.
If you have any questions or need more help, please contact our support team.