
You are in the right place if
You have connected Webgility Desktop to a different QuickBooks Desktop company file than it was originally posting to (a restored backup, a training copy, or a fresh production file), and a batch of orders already shows as posted or archived against the old file. Those orders will not post to the new file automatically because Webgility still records them as done. You want them back on the New Orders screen so you can post them into the new file.
Why this happens
Webgility Desktop tracks each order's post status against the QuickBooks file it was posting to when the order was last touched. When you switch the QuickBooks connection to a different file, the orders keep their old status — Webgility sees them as already done and skips them. Resetting the status with Undo Sync puts them back in New Orders, where a regular post picks them up and writes them into the new file.
Note: This step is only required when you want to post orders to the new company file after those same orders were already posted to the old company file. This step is only required when you want to post orders to the new company file after those same orders were already posted to the old company file.
What to do
Step 1: Open QuickBooks Desktop as the Admin user, sign in to the newly restored (or newly connected) company file, and leave it open.
Step 2: In Webgility Desktop, rebuild the cache of QuickBooks lists so accounts, items, customers, vendors, and tax codes from the new file are what Webgility uses when posting. Go to Connections > Get Latest Data. Next to Download data, click the dropdown and choose Re-download all data. Webgility pulls a fresh snapshot from the currently connected QuickBooks file and shows a progress indicator while it runs. The full walk-through of this screen is in How to Download the Latest Accounting Data from Scratch - Webgility Desktop.
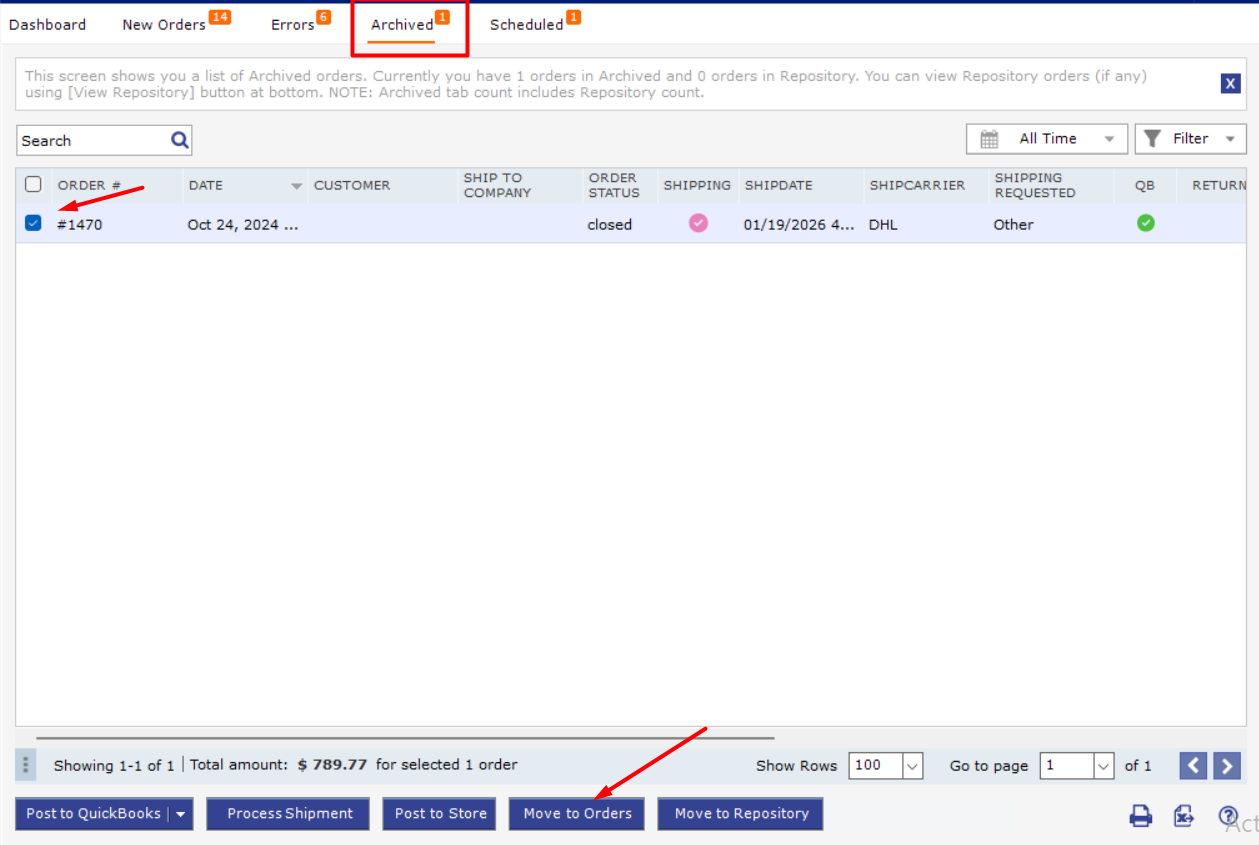
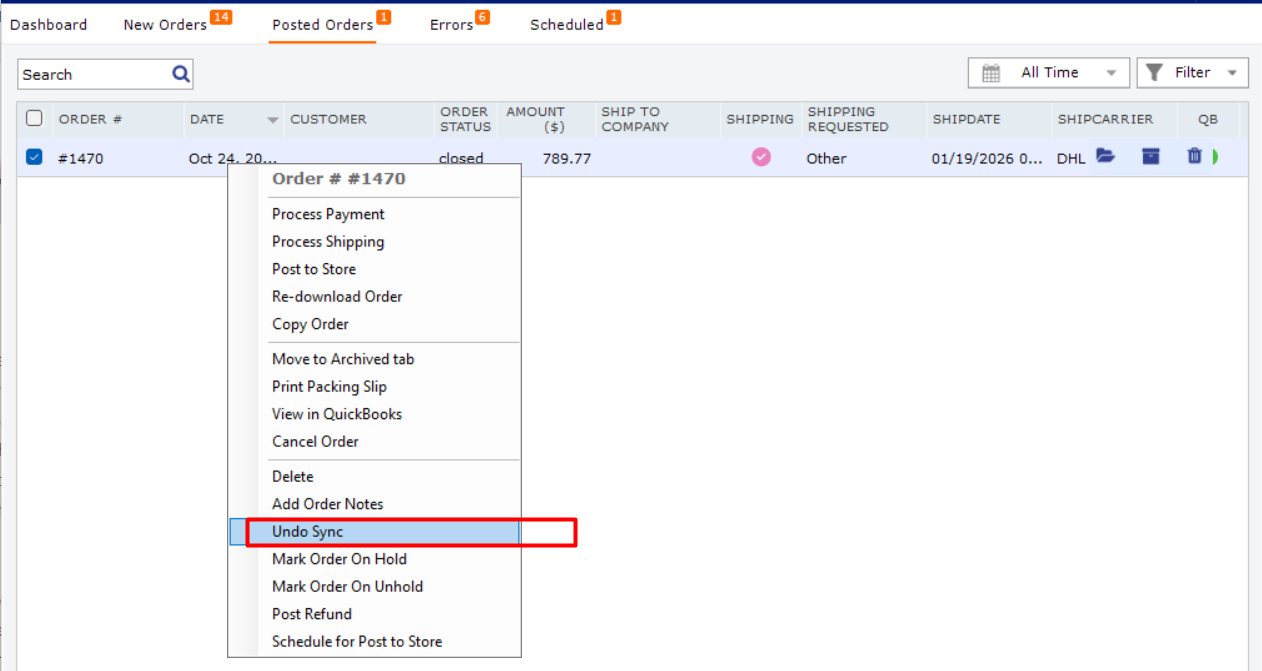
Step 3: Move the affected orders back to New Orders. Open the view that currently holds them — Posted or Archive — and select the orders you want to re-post. Right-click the selection and choose Undo Sync. Webgility clears the post history for those orders and returns them to New Orders. Detailed guidance on the Undo Sync action is in How to Unpost Transactions from Webgility Desktop with Undo Sync.
Step 4: Open the New Orders view and confirm the batch is now listed there. Select the orders and click Post to QuickBooks. Webgility posts each order into the currently connected company file and moves the successfully posted rows to Posted.
Step 5: Verify the posts inside QuickBooks. Open the customer, invoice, or sales-receipt list for the date range of the re-posted orders and confirm that the expected transactions are present. If a small number of orders fail with a mapping error (for example a missing tax item, a missing product, or a missing payment method), fix the mapping in Webgility and re-run Post to QuickBooks on just those rows.
Good to know. Re-posting into a different company file works one batch at a time — you can Undo Sync and re-post as many orders as you need, but Webgility does not carry the post history across files. Once you have finished switching, take a fresh Webgility database backup so the new posting state is preserved. We recommend making the company-file change a one-time move rather than switching back and forth — every switch resets the post-status alignment and forces another Re-download all data plus another round of Undo Sync and re-posting if the orders are required in file. Pick the file you intend to keep, complete the switch, and stay on that file going forward.
Still need help?
If a batch of Undo Sync'd orders will not post into the new file and the error is not a simple mapping fix, share the affected order numbers, a screenshot of the Webgility error message, and the exact name of the company file QuickBooks has open when the error appears with Webgility Support.