
Note: This article applies to users running Webgility Desktop Extension connected to QuickBooks Financial
Symptoms
You may experience one or both of the following issues:
- Orders posted through Webgility Online appear in QuickBooks Desktop without the correct inventory site.
- The Record sales to just one inventory location option is missing under Sync Settings > Products in Webgility Online.
This issue may occur when Webgility Online is connected to a rebuilt or updated QuickBooks company file. In some cases, QuickBooks may not return the available inventory sites when Webgility Onlinerefreshes its accounting data.
As a result, the inventory-location setting may become unavailable or disabled.
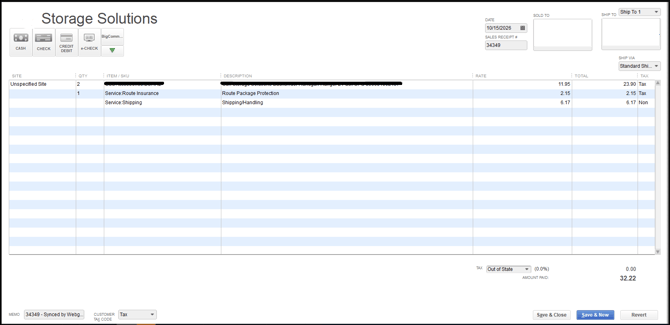
How to fix:
Step 1: Verify Inventory Sites in QuickBooks Desktop
-
Open the QuickBooks Desktop company file connected to Webgility Online.
-
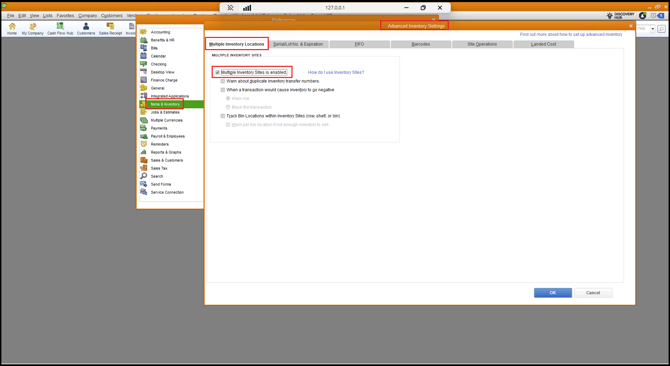
Navigate to the Advanced Inventory settings.
-
Confirm that Multiple Inventory Sites is enabled.
-
Verify that the required inventory site is available
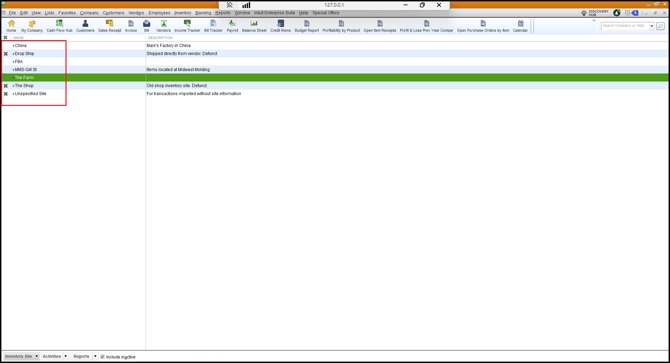
If you recently rebuilt or changed your QuickBooks company file, make sure the inventory settings are configured correctly.
Step 2: Refresh the QuickBooks Connection
- Log in to QuickBooks Desktop using administrator credentials.
- Switch QuickBooks to Single-user mode.
- Ensure that the Webgility Desktop Extension is running and connected to the correct QuickBooks company file. You can refer to the steps mentioned in the article: Reconnect QuickBooks to Webgility using the administrator
- Now refresh latest accounting data in Webgility Online. You can refer to the steps mentioned in the article: Redownload the QuickBooks accounting data
Step 3: Configure the Inventory Location in Webgility:
-
Open Webgility Online.
-
Navigate to Sync Settings > Products.
-
Enable Record sales to just one inventory location.
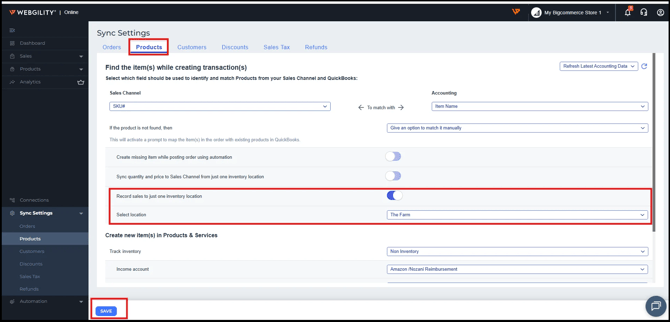
- Select the appropriate inventory site.
- Save the settings.
Repeat these steps for each affected sales channel, and try posting the order.