
Webgility i matches sales channel listings to QuickBooks Online products by SKU. When two QuickBooks Online products share a SKU, Webgility i cannot tell which one a listing should post to, and asks Which QuickBooks product should it post to? on the Needs review tab. Giving one of the products its own SKU clears the question.
Steps:
- Sign in to QuickBooks Online and go to Sales & Get Paid > Products & services.
- Type the SKU in Search. QuickBooks Online lists the matching products, with their SKU in the SKU column.
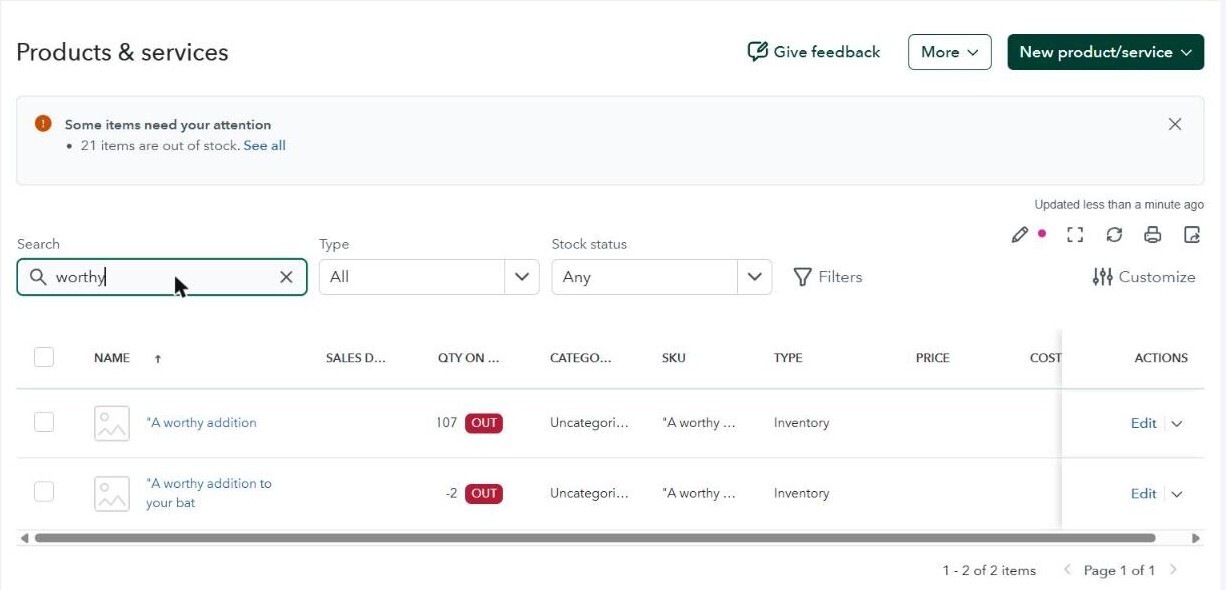
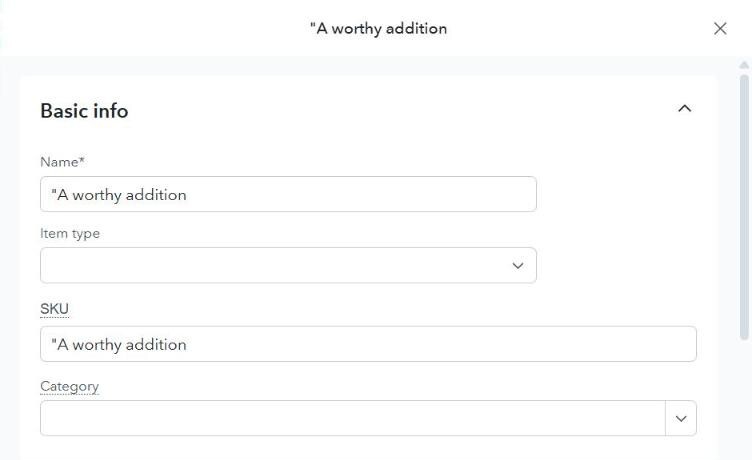
- In the ACTIONS column of the product to change, click Edit. The product's panel opens on the right.
- In SKU, type the SKU that matches the product's listing on your sales channel, or a new SKU of its own.
- Click Save.
What to expect after changing the SKU
- Webgility i reads the change the next time it syncs products, and matches the listings again. The listing leaves the Needs review tab on its own when it has no question left.
- If the listing still needs your answer, map it yourself. See How to Map a Sales Channel Listing to a QuickBooks Product.
Note: These steps describe QuickBooks Online, which is an Intuit product. Intuit can change its screens and labels. If what you see is different, search for "SKU" in QuickBooks Online Help.