
Overview
QuickBooks assigns one currency to each customer record. When the same Shopify buyer orders in different currencies, Webgility Desktop uses your customer matching and currency settings to determine which QuickBooks customer to use.
Set up customer matching- In Webgility Desktop, go to Connections > Accounting/POS/ERP > Sync Settings > Customers.
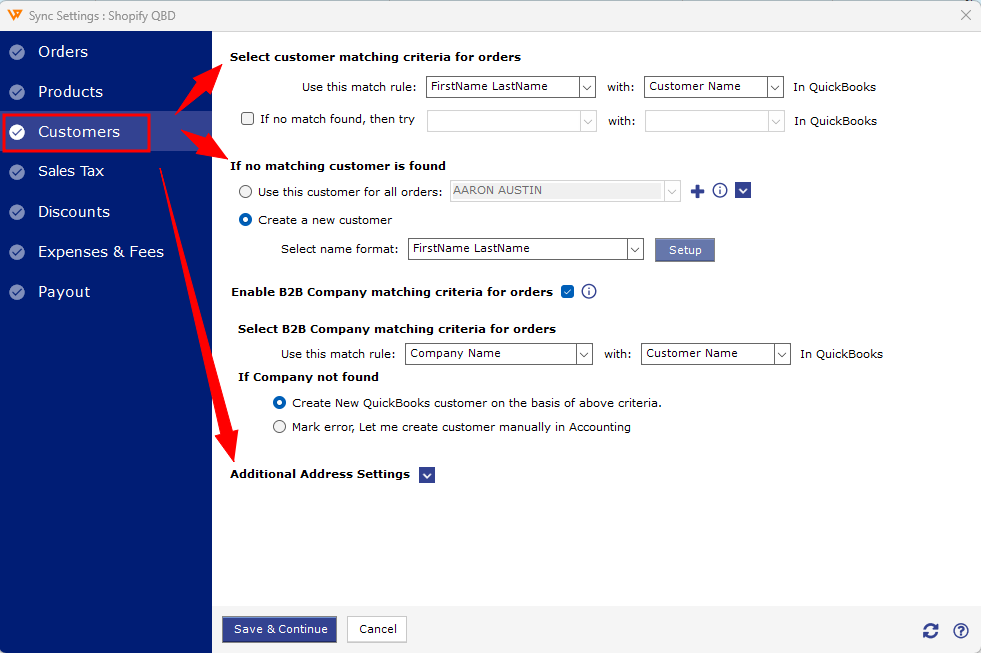
- Set the customer matching criteria to use the buyer’s email address. Choose how Webgility should handle orders when it can’t find a match.
- For step-by-step guidance, see Configure Customer Settings in Webgility Desktop.
- In Sync Settings > Customers, open Multiple Currency Settings and enable Map Customer Currency.
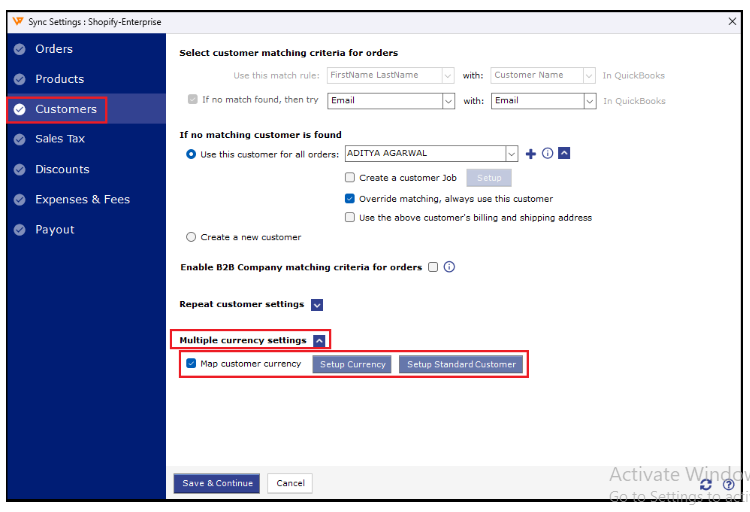
- Configure the mapping for each currency your Shopify store accepts. Select the matching QuickBooks customer and the required accounts for each currency.
- Click Save & Close. For detailed setup instructions, see Multiple Currency Settings in Webgility Desktop.
Confirm the setup
Post one order in each currency and check that each order appears under the expected QuickBooks customer. If an order posts under the wrong customer, review the customer selected for that currency in Setup Standard Customer. See Change the Standard Customer per Currency in Webgility Desktop.
If you have any questions or need more help, please contact our support team.