Note1 : Once activated, the Multi-Currency feature in QuickBooks Desktop cannot be deactivated.
To enabled Multi-Currency feature in QuickBooks Desktop navigate to Edit > Preferences > Multiple Currencies, and setting up desired currencies and chart of accounts in the respective currencies.
Steps to follow:
A). Once the multi currency feature is ON in QuickBooks Desktop, navigate to Webgility Desktop and download the latest accounting data. Kindly refer the article
Note2 : Make sure you are logged in Admin user in QuickBooks Desktop before the attempt of download data.
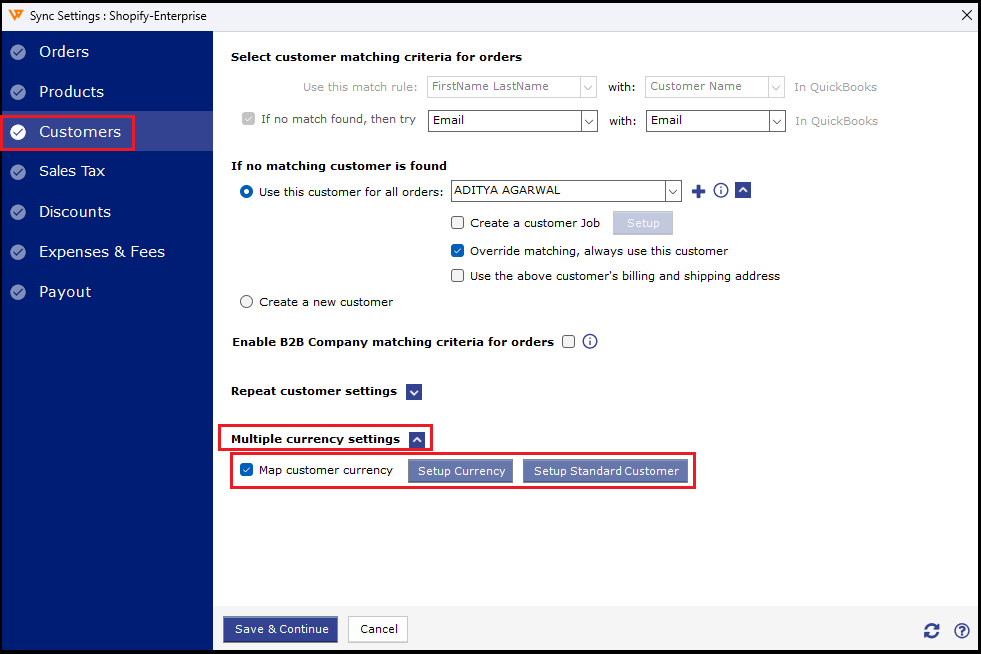
B). Once the data download is complete navigate to Connections > Accounting/POS/ERP > Sync Settings > Customers > Multiple Currency Settings > Map Customer Currency.
-
Setup Currency
-
This feature allows you to configure and map multiple currencies to their respective QuickBooks Desktop accounts. The currency from the online sales channel needs to match the currency of the account it is posting into in QuickBooks Desktop.
-
Depending on your requirements, you may choose between Map by Store Currency, Map by Country, and Map by Price Level.
-
-
- Map By Store Currency: For instance, if you select Map by Store Currency. Then you must match the “Currency”, “A/R Account”, and “Deposit to Account” before clicking Save & Close.
Note3 : You may also configure Map by Country and Map by Price Level in the same way.
-
-
- Flag order with error status when currency is blank If you want the orders to be marked as errors if they don't have any currency, check the box in the bottom left corner.
-
-
-
- Store Currency: In the bottom right box, you can specify the default sales channel currency.
-
Note4 : The "Setup Standard Customer" option is only available if you use "Standard Customer" for your sales channel; otherwise, it will be grayed out. If you select the option to create a new customer, then set up a standard customer is available.
- Setup Standard Customer:
- This option is only available if you select a Standard Customer for your sales channel. It allows you to designate different Standard Customers to different currency types.
-
- For each currency type, you must configure a default customer type.
Note5 : please ensure that the currency assigned to that customer in QuickBooks Desktop is correct (same).
Once you have completed the settings, click Save & Close. And this will allow you to post the orders with their respective currencies under their respective customers into
Refer to this article for more customer settings in Webgility Desktop:
Configure Customer Settings in Webgility Desktop