
When This Applies
Use these steps when you added or renamed an account in QuickBooks Online (a payment-processor fee account, a deposit account, or a reserve balance such as an Amazon Reserve under Other Current Assets) and the account dropdown in your Webgility Online settings does not appear to list it. A common trigger is a sales-report discrepancy — QuickBooks totals coming in lower than your sales channel reports because an older fee account was renamed or deleted and settlement posting cannot find it.
How It WorksWebgility Online keeps its own cached copy of your QuickBooks chart of accounts, and that cache does not refresh at the moment you create the account. The dropdown is also not sorted alphabetically, so even after the refresh, scrolling may not surface the account — the fastest way to find it is to type its name in the dropdown. These steps apply to any account dropdown in Webgility Online — Amazon-settlement mapping touches four posted categories (orders posted as invoice or sales receipt, Amazon fees, reserves and refund adjustments, and FBA inventory adjustments), and the same find-the-account workflow applies to each. For the specific Amazon-settlement use case, see Amazon Summary Posting: Automated Account Creation.
Important Note: "If the account you are trying to view was recently inactivated or renamed in QuickBooks, re-activate it under its new name in QuickBooks first; Webgility Online shows only active QuickBooks accounts."
- In QuickBooks Online, confirm the account is Active in the Chart of Accounts under the correct account type — for an Amazon reserve balance, use Other Current Assets (How to make an account active in Chart of accounts at your QuickBooks Online).
- Open Webgility Online and refresh the latest QuickBooks data so the new account syncs into Webgility's cache (Download the Latest Data from QuickBooks and Your Online Sales Channel in Webgility Online).
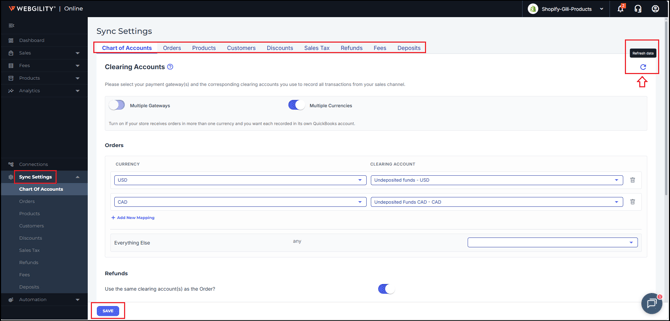
- Go back to the settings screen where you need to pick the account and open the account dropdown.
- Start typing the account name in the dropdown — the list is not alphabetical, so typing the name is the fastest way to pull it up.
- Select the account and click Save on the settings screen, then repost any transactions that were stuck in the error tab because of the earlier missing account.
If you are mapping accounts for Amazon settlement posting, line up every required account in QuickBooks Online first (fees, reserves, and the deposit bank account), then refresh Webgility once, and map them in one sitting — the recommended set for the Amazon sales channel is listed in Recommended Settings for Amazon Sales Channel with Webgility Online.
Additional SupportIf the account still does not show up after you refresh and type its name, contact Webgility Support at support@webgility.com with the account name and the Webgility settings screen where you expected to see it.