
Overview
When Webgility Desktop records sales tax calculated by your sales channel, choose separate QuickBooks items for taxable and non-taxable orders. The non-taxable item should have a 0% rate. This prevents QuickBooks from using the same item for both the sales tax line and the transaction tax field.
Steps
- In Webgility Desktop, go to Connections > Accounting/POS/ERP > Sync Settings > Sales Tax. For more details, see How to Configure Sales Tax Settings in Webgility Desktop.
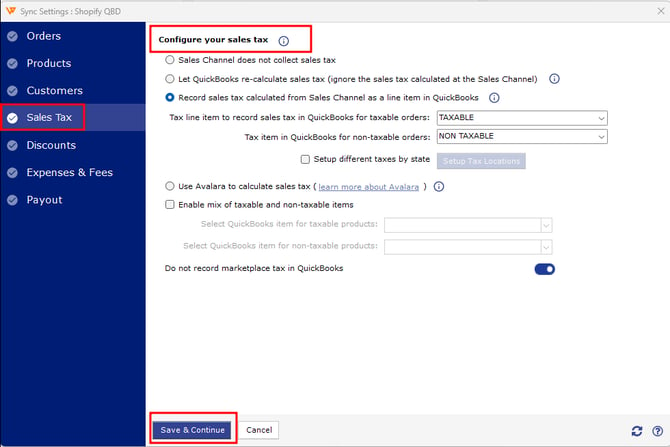
- Under Select a sales tax item for taxable orders, choose the QuickBooks item used to record sales tax.
- Under Select a sales tax item for non taxable orders, choose a different QuickBooks item with a 0% rate.
-
Create the item in QuickBooks Desktop (if you don’t see a suitable one)
If you don’t see a suitable non-taxable item in Webgility, create one in QuickBooks Desktop (Pro, Premier, Enterprise):
- Go to Lists > Item List.
- Click Item (bottom left) > New.
- Set Type to Sales Tax Item.
- Enter an Item Name (e.g., “State Tax”) and a short Description.
- Enter the Tax Rate as a percentage.
- Under Tax Agency, choose the vendor you pay this tax to, or add a new one.
- Click OK.
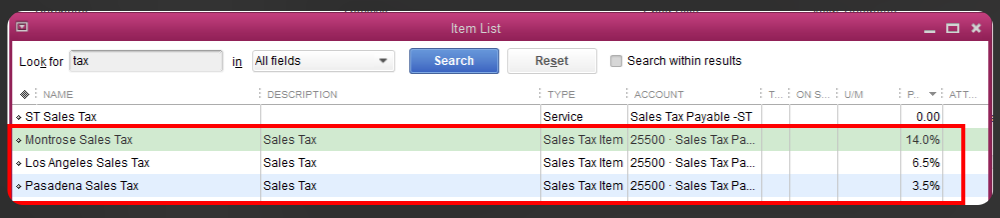
- Return to Webgility and download latest accounting data. Then select the item you just created under Sales Tax settings, then click Save & Continue. For more detail, see How to Download the Latest Accounting Data from Scratch - Webgility Desktop.
- To learn how these settings affect QuickBooks’ sales tax field, see Post tax under the correct QuickBooks sales tax field.
If you’re choosing between sales tax methods, see Recommended Settings for Sales Tax for Webgility Desktop & QuickBooks Online.
If you have any questions or need more help, please contact our support team.