Who needs to upgrade?
If you already have a UPS Account Registered with Webgility Desktop.
To integrate a new UPS account with Webgility, it's important to ensure that you're using the latest version of Webgility Desktop. Follow the steps outlined in this guide: How to Integrate UPS with Webgility Desktop.
Why do we need to do this?
We are upgrading our system to comply with the new UPS API authentication requirements. Effective June 3, 2024, UPS will no longer support access key authentication, and all integrations must migrate to OAuth 2.0. As a result, we are releasing a new Webgility Desktop version v9.7, which requires all UPS customers to upgrade to the latest version and re-authenticate their UPS accounts.
This upgrade is essential to ensure uninterrupted service for our UPS customers. Failure to comply with UPS norms by June 3, 2024, may result in service disruptions. To facilitate a smooth transition, we have created this help article outlining the upgrade process.
** If this process feels overwhelming or complex, please schedule a 20-minute Zoom with a member of our team here. We will walk you through the process step-by-step and ensure you're set up for success.
Completing the steps below will ensure that your UPS integration in Webgility Desktop is upgraded to the latest OAuth 2.0 authentication model, preventing service disruptions.
Steps:
Step 1: Log into Webgility Desktop
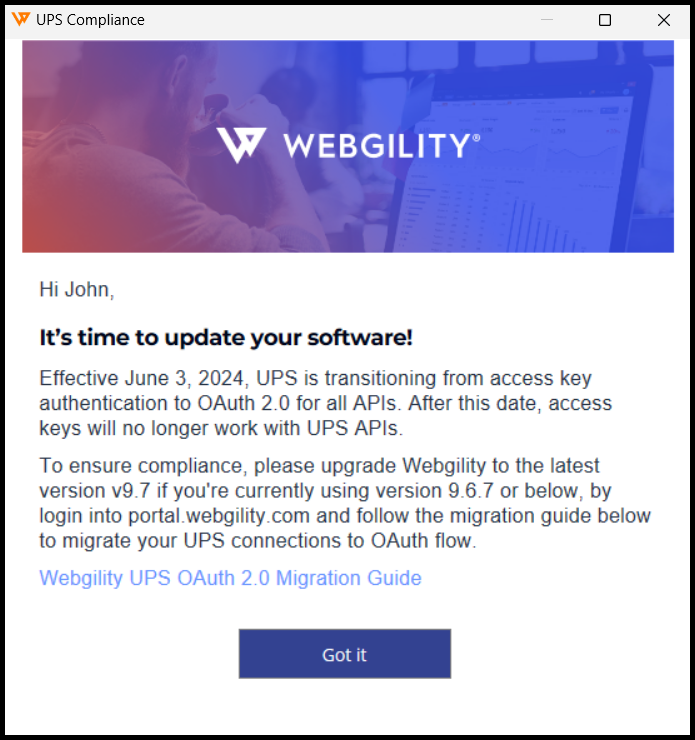
Open the Webgility Desktop application and log in to your account. Upon login, you will see the UPS Compliance warning window. If this window does not appear, proceed to the next step.
-1.png)
Step 2: Create a database backup
Before beginning the migration process, please create a database backup. This will facilitate a smooth reversal of the migration process if needed. Go to System > Database > Backup.

Select a location and click “Ok“ button.

Step 3: Upgrade the Webgility app to the latest version
Before proceeding, it's important to ensure you're on the latest version of Webgility Desktop. Follow the steps outlined in this guide: How to Update Your Webgility Desktop Software to upgrade the application.
Step 4: Upgrade UPS Integration to OAuth 2.0
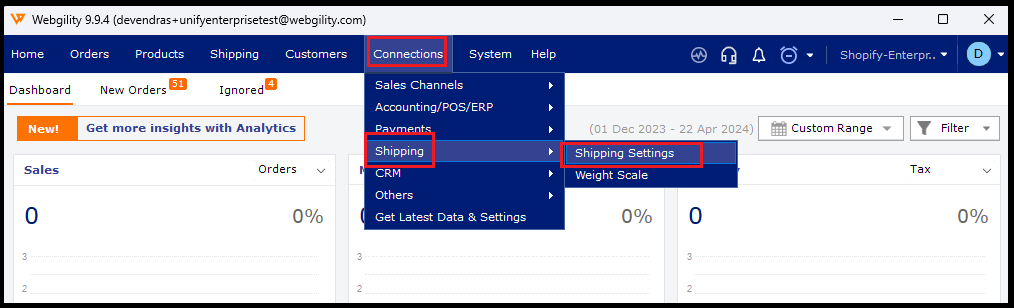
1. Navigate to Connections → Shipping → Shipping Settings.
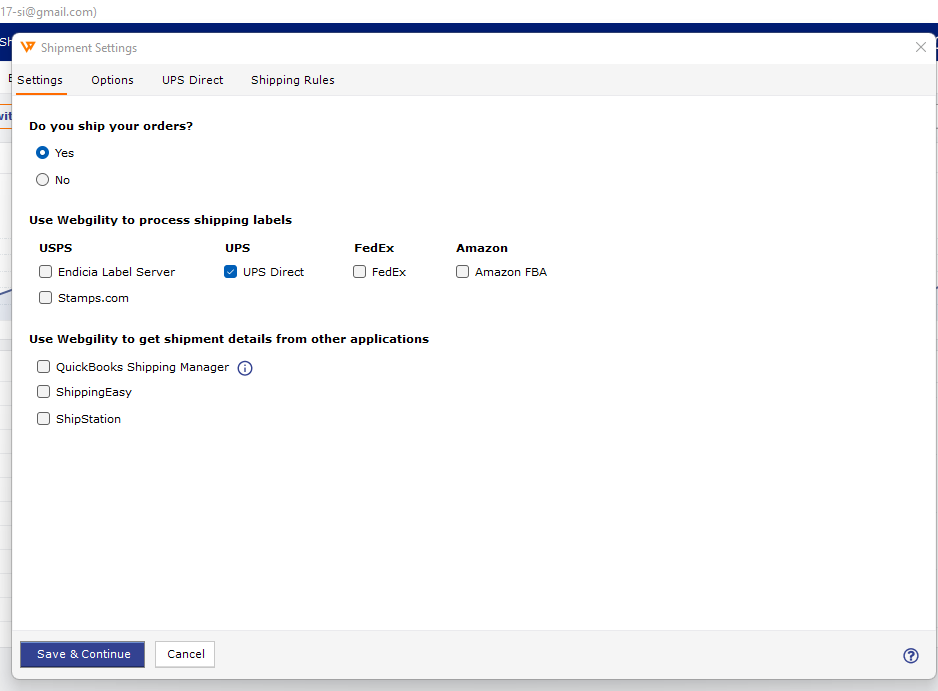
2. Check the UPS Direct box, then click Save & Continue
3. Click the Migrate to UPS OAuth Flow button. If all your UPS accounts share the same UPS account number across all profiles or a single profile, you only need to follow the step below once. However, if you have different account numbers for different accounts, select each of your UPS registered accounts one by one from the dropdown menu, and then repeat the following steps.
-1.png)
4. Review your UPS account details and click "Sign in with UPS Direct".
-1.png)
5. Login with your UPS Direct account credentials.
-1.png)
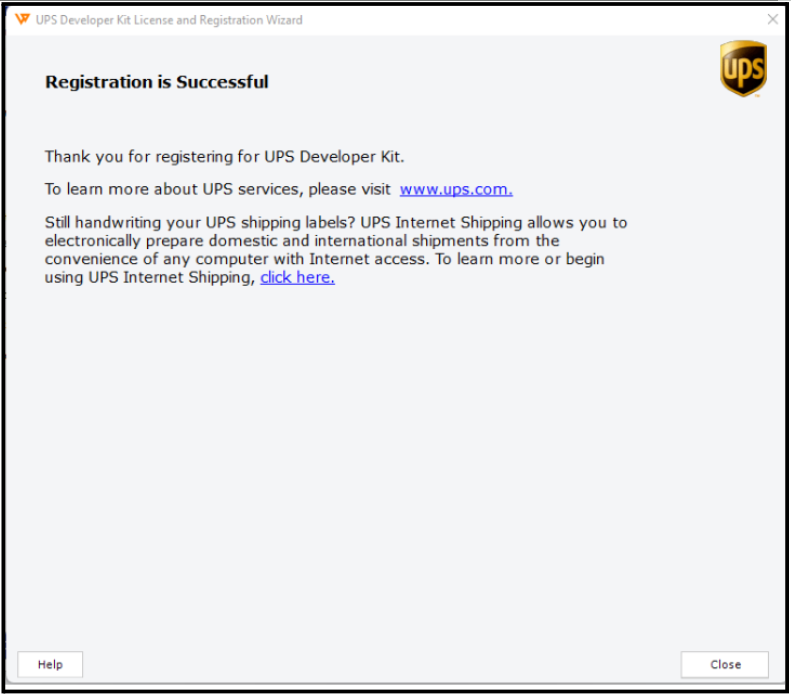
6. Upon successful migration, you will see a success window in Webgility Desktop.

7. Close the window, save and close, and continue using shipping with the new OAuth flow.