Note: Before connecting your UPS account, please ensure that you are running latest version of Webgility Desktop. Follow the steps in this helpful article on How to Update Your Webgility Desktop Software
Integrate UPS to Webgility Desktop:
1). In Webgility Desktop navigate to Connection > Shipping > Shipping Settings

-
Select Yes for Do you ship your orders?
-
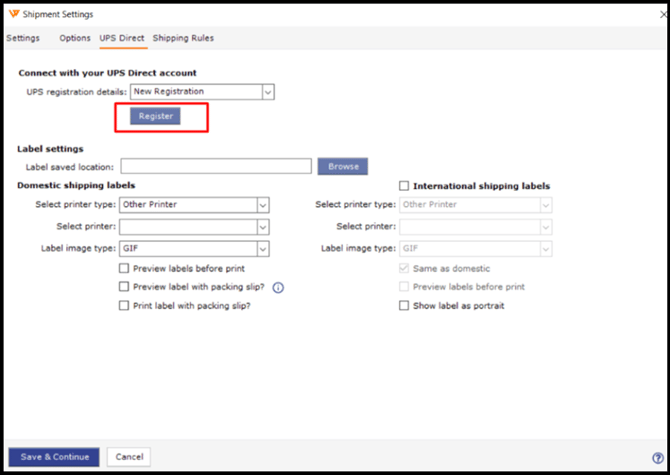
Select UPS Direct for Use Webgility Desktop to process shipping labels

-
A new tab will appear on the top of the window once UPS Direct is selected. Go to this tab and click Register to continue.
A new tab will appear on the top of the window once UPS Direct is selected. Go to this tab and click Register to continue.
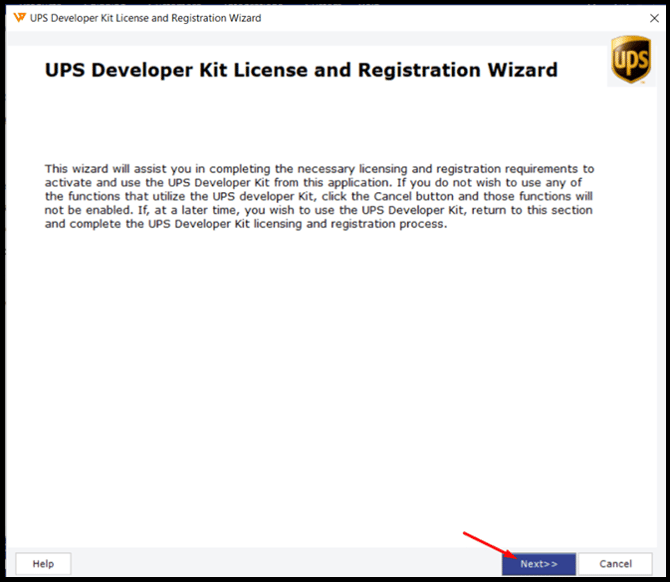
UPS Developer Kit License and Registration Wizard
-
The UPS Developer Kit License and Registration Wizard window will open and guide you through UPS registration. Click Next to proceed.
-
Review the terms and conditions screen and scroll down to select I agree UPS License agreement. Then click Next.

-
Enter your account and invoice details. Once complete, click Next.
Note: Invoice details are only needed if you have negotiated rates with UPS.

-
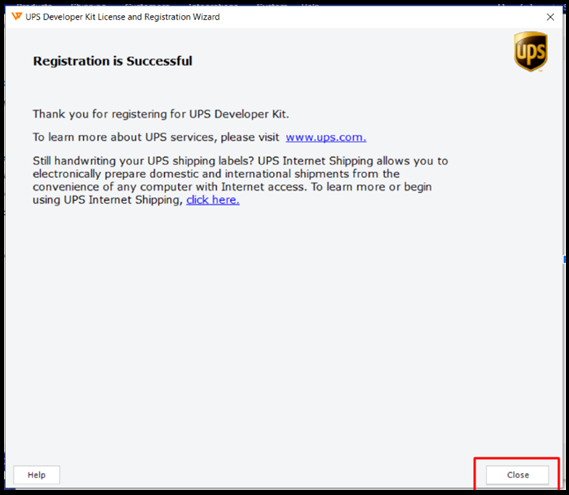
When you reach the Registration is Successful screen, click Close. You will return to the UPS Direct settings screen.
UPS Direct Label Settings
-
Click Browse under Label settings.

-
Create a new folder named UPS Labels on your desktop.

-
Select the newly created folder and click OK.

Printer Settings
Next you will need to select the printer type, the name of the printer, and the label image type:
-
If you are using a thermal printer you will only be able to select ZPL or EPL for label image type. The Preview label before print option will not be available.
-
For all other printer types, you can select GIF or PNG for label image type. The Preview label before print option can be used.
Click Save & Continue to complete the integration with UPS.

Shipping Rules
In order to set default rules for this shipping processor, go to the Shipping Rules tab.
-
Click Configure for the UPS shipping processor.

Configure the presets that you want to appear by default upon selection of the UPS shipping processor for the shipping order, and click Save.
Process Shipping
Once all of your settings are configured, navigate to Dashboard > New Orders and use the Process Shipping feature to generate the labels.
