Webgility Desktop Multi-Sync not Working
This article provides guidance for Webgility Desktop users experiencing issues with the Multi-Sync (Multi-channel Product Sync) feature. Multi-Sync is designed for businesses managing multiple sales channels, with QuickBooks serving as the master source of price and quantity data. The article outlines troubleshooting steps such as stopping and restarting the Scheduler, verifying automation rules and sync frequency, and ensuring all required sales channels are enabled. It also highlights the importance of keeping Webgility Desktop updated to the latest version to ensure smooth synchronization across connected platforms.
Overview:
The multi-sync process (also known as Multi-channel Product Sync) is typically used when more than one sales channel is connected in Webgility Desktop. By default, this feature uses QuickBooks as the master source of data for both price and quantity.
Troubleshooting:
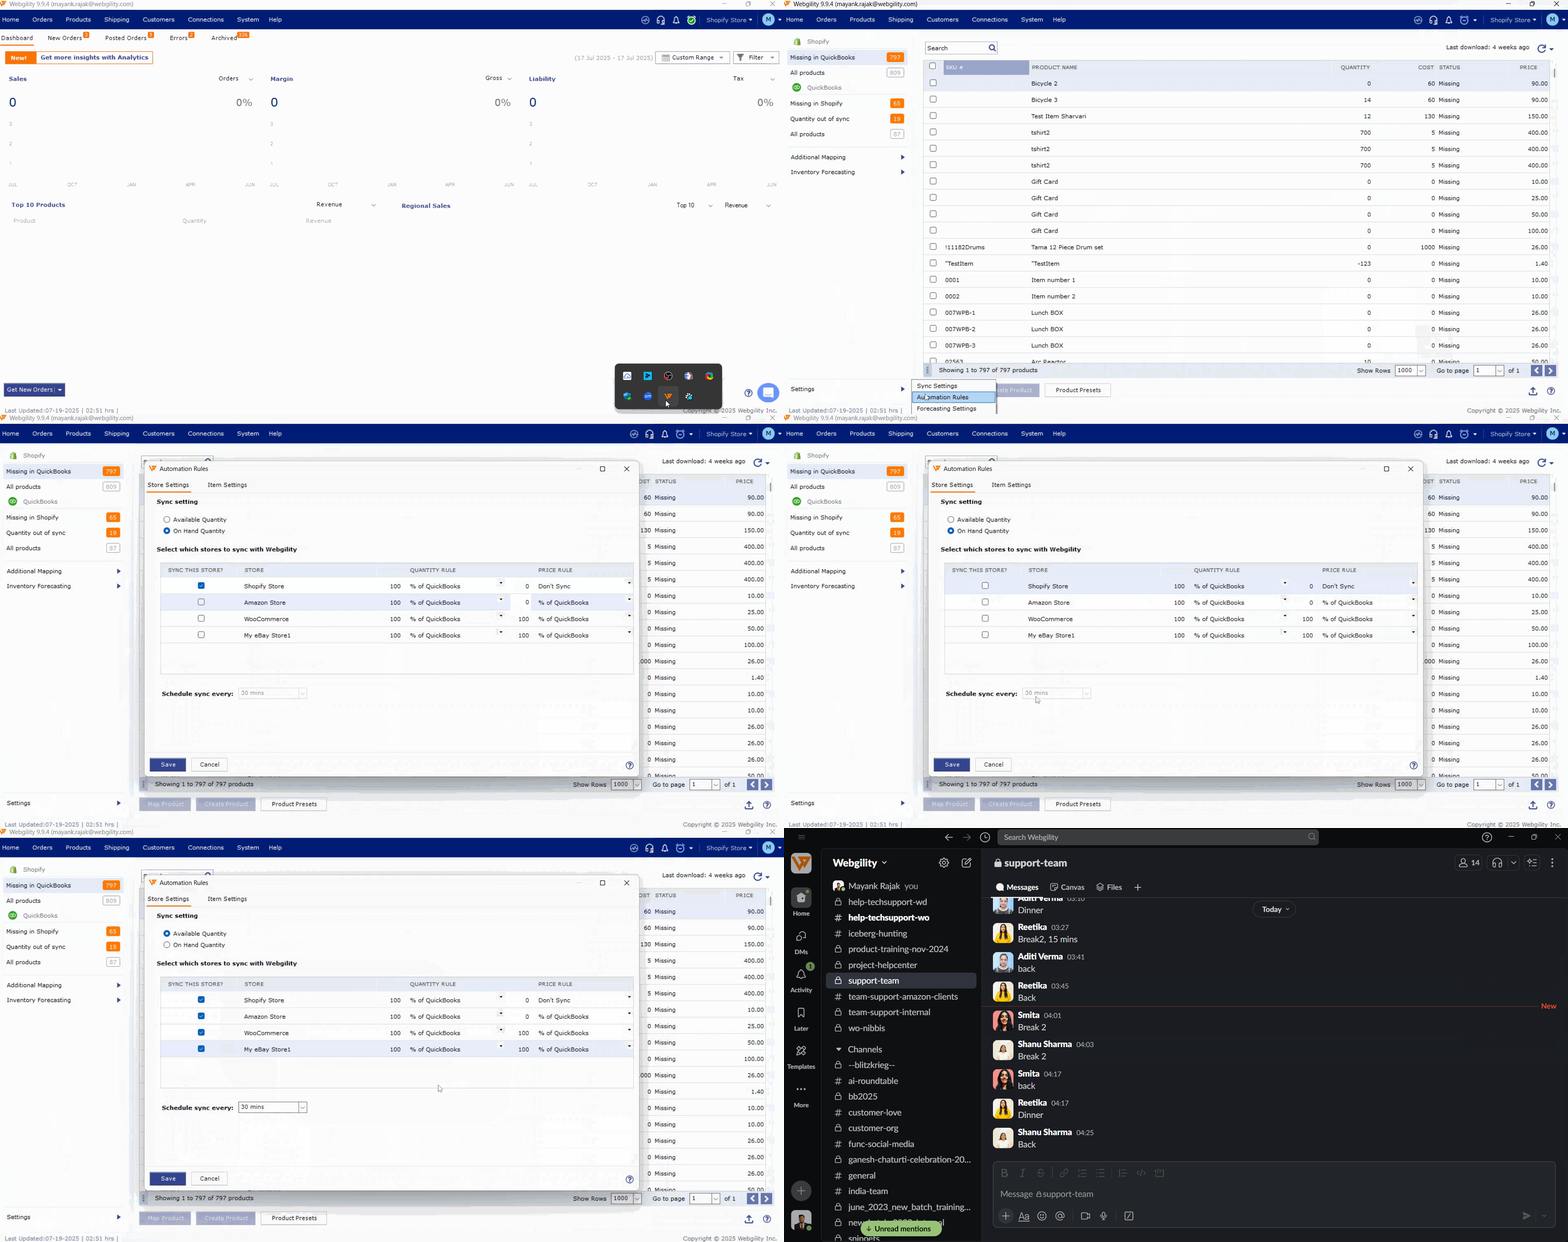
1). On the Webgility Desktop machine that is running the Scheduler automation, go to the System Tray and look for the Webgility Scheduler icon, right-click on it, and select Stop and Exit until it is completely closed. (The clock sign on the Webgility Desktop Dashboard should turn grey)
2). From Webgilty Desktop navigate to Products> Settings> Automation Rules, and verify the quantity field you want to sync from Quickbooks (On-hand or Available). Select the sales channel to sync with Webgility Desktop & make sure all the required sales channel profiles you want to enable Multi-Sync on are selected. Select the Sync Frequency (30 Mins is recommended) and Save. Once done restart the Scheduler and monitor the Scheduler logs. Once the first cycle has been completed verify if the items have been synced at the respective sales channels.

3). If you encounter an issue, it might be that Webgility Desktop is running on an older software version. Please make sure you are up to date with the latest version available on your Webgility Desktop Portal Account. Once done verify all the steps mentioned in step number 2 above, restart the Scheduler, and monitor the Scheduler logs. Follow the steps in this helpful article on How to Update Your Webgility Desktop Software
