Overview:
Webgility Desktop updates are released regularly to deliver new features, performance improvements, and critical bug fixes. Keeping your Webgility Desktop app updated ensures compatibility with sales channels, accounting systems, seamless operations, and security standards.
This guide walks you through the steps to manually check for and install the latest version of Webgility Desktop using the Check for Updates feature.
Note 1: If you are using a Webgility version older than 9.8.4, use the following article to upgrade the application: Webgility Desktop Upgrade Guide: For Versions Pre-9.8.4
Note 2: It’s recommended to back up your Webgility database before proceeding.
Steps to follow:
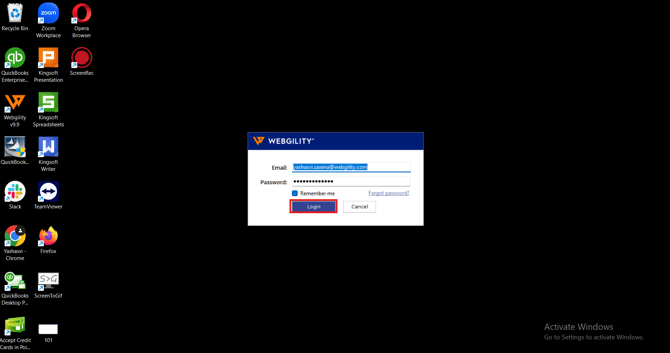
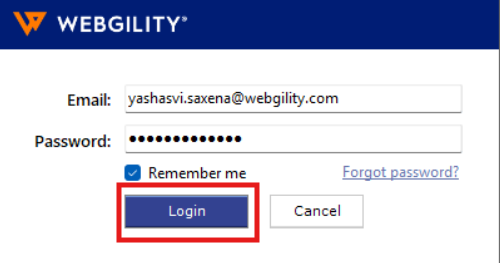
1). Open the Webgility Desktop application. Click Login.
2). Once logged in, click on Help > Terms and Privacy. This opens the About Webgility window. Here we can see the current version of the Webgility Desktop application installed on your computer.

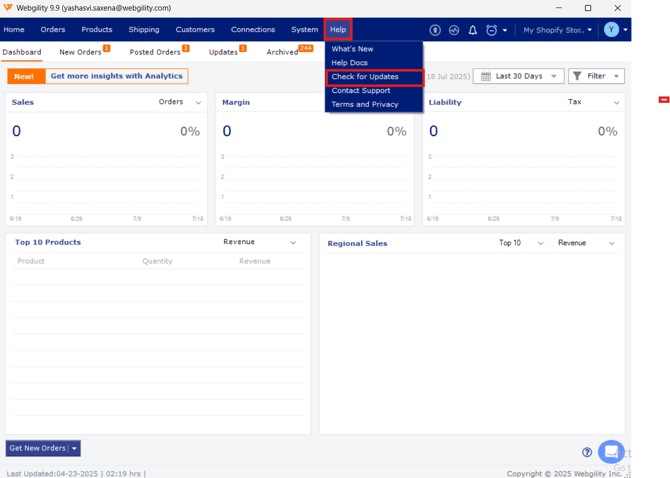
3). Go to Help > Check For Updates.
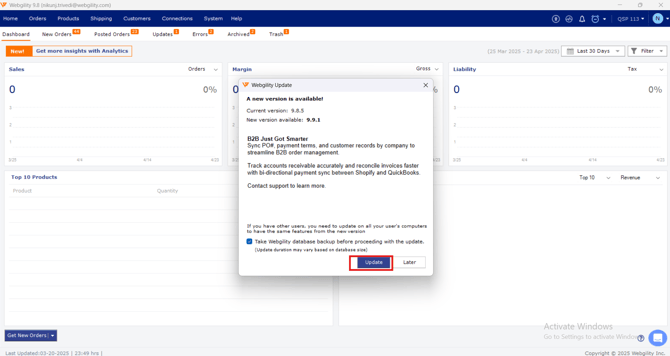
4). In the Webgility Update window, you can see the current version of your Webgility Desktop application and the new version available, as shown in the screenshot below.

5). In the Webgility Update window, click on the Update button. Make sure to keep the “Take Webgility database backup before proceeding with the update.”
6). After clicking on the Update button, select the default location of the database backup to be created, as shown in the gif below
7). After the backup is created, Webgility Installer will start to install the updated version on your computer
8). You will see the installation progress window, showing the ongoing installation
9). After successfully installing the updated version of Webgility Desktop, it will take you to the login window, click Login:
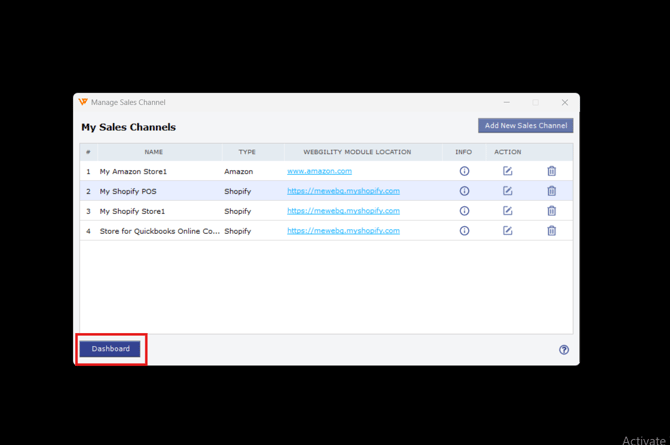
10). After updating the database, it will take you to the window, where you can select the sales channel and go to the dashboard view of the Webgility Desktop application
11). On the Wedgility Desktop dashboard view, go to Help > Terms and Privacy, verify the updated version as mentioned in step 2, please refer to the screenshot below.

12). Webgility Desktop has been updated to the latest version.