Access Violation with QuickBooks POS
This article helps Webgility Desktop users in diagnosing and resolving Access Violation errors that may occur when integrating Webgility Desktop with QuickBooks Point of Sale (POS).
Access Violation with QuickBooks POS
Access violation errors occur when a program attempts to access memory that it shouldn't, usually because it is trying to read or write to a memory location that is outside of its allocated space. This can happen for several reasons when connecting Webgility Desktop software with QuickBooks POS:
-
Incompatibility between versions: Webgility Desktop software and QuickBooks POS may be incompatible due to differences in version numbers. Make sure that you are using the latest versions of both software programs and that they are compatible with each other.
-
Firewall or antivirus software: Access violation errors can occur if your firewall or antivirus software is blocking the connection between Webgility Desktop and QuickBooks POS. Check your firewall and antivirus settings to make sure that they are not blocking the connection.
-
Corrupted installation files: If the installation files for Webgility Desktop or QuickBooks POS are corrupted, this can also lead to access violation errors. Try reinstalling both programs to see if this resolves the issue.
-
Permission issues: Access violation errors can occur if the user account does not have sufficient permissions to access certain files or folders needed for the connection between Webgility Desktop and QuickBooks POS. Make sure that your user account has the necessary permissions to access all required files and folders.
-
Conflicting programs: Other programs running on your computer may be conflicting with Webgility Desktop and QuickBooks POS, causing access violation errors. Try closing all other programs and see if the issue persists.
-
Hardware issues: Access violation errors can also be caused by hardware problems, such as faulty RAM or a failing hard drive. Check your hardware for any issues and replace any faulty components.
Troubleshooting
1). To ensure that you are using an updated version of Webgility Desktop, please follow these steps:
- Open Webgility Desktop and click on "Help".
- Click on "Terms & Privacy".
- Check the current version of your Webgility Desktop app.
- If your version is outdated, please update it to the latest version. Follow the steps in this helpful article on: How to Update Your Webgility Desktop Software
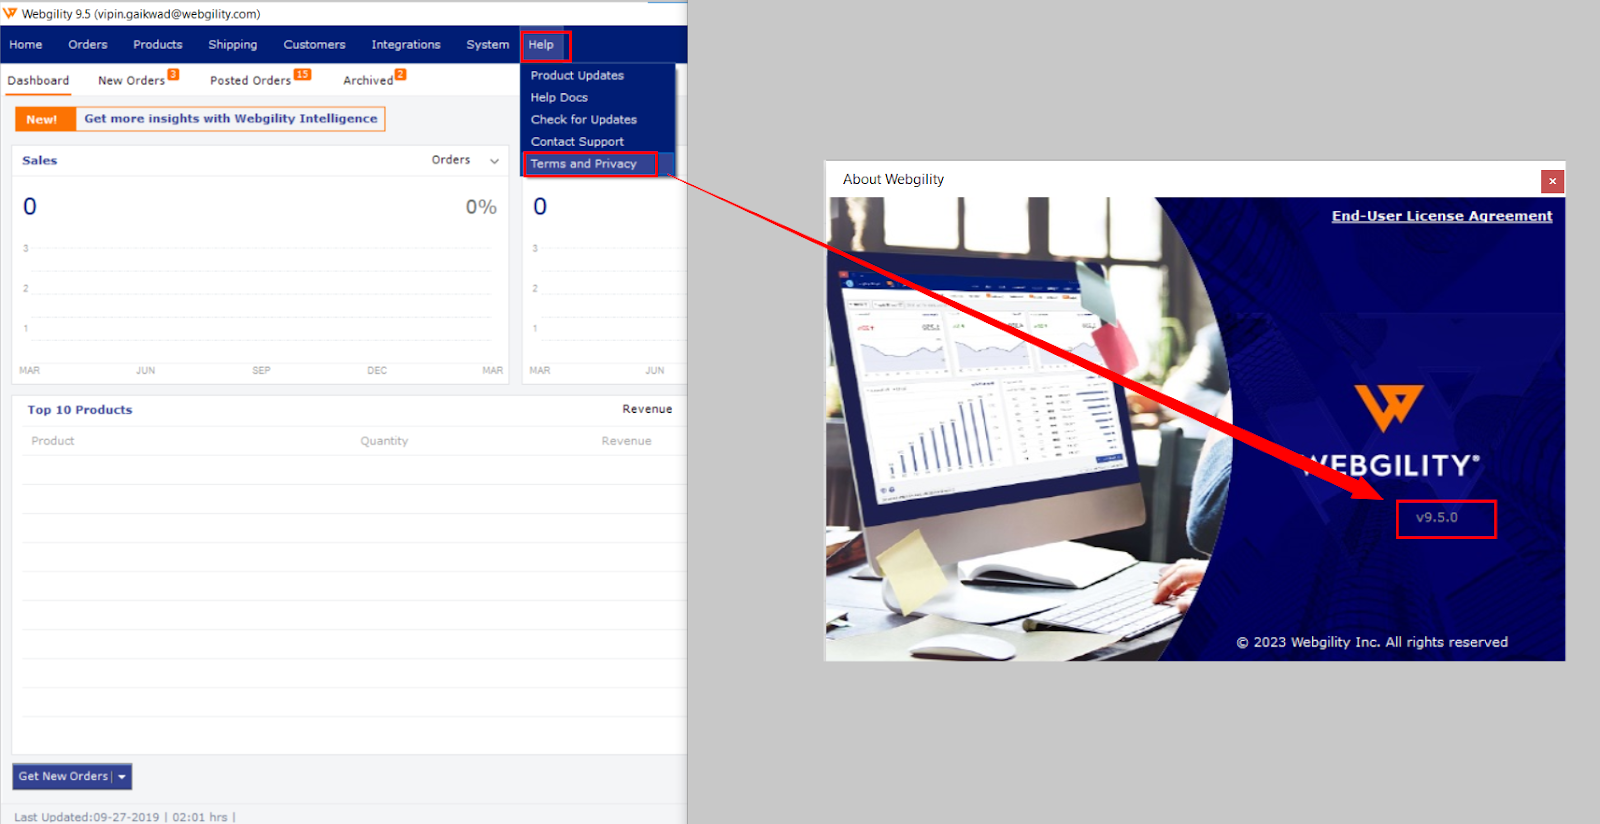
It is important to use the latest version of Webgility Desktop to ensure that you have access to the latest features and fixes, and to maintain the security of your data.
2). If you have an antivirus program installed on the computer where you are using the Webgility Desktop Scheduler, you may need to add an exception for the scheduler to prevent the antivirus program from interfering with its operation. Here are the steps you can follow to add an exception to the Webgility Desktop Scheduler:
-
Open the antivirus program on your computer.
-
Look for the settings or configuration menu.
-
Navigate to the section that deals with exclusions or exceptions.
-
Add an exclusion for the Webgility Desktop Scheduler, which is located at the unifyscheduler.exe file.
-
Save the changes and close the antivirus program.
By adding an exception for the Webgility Desktop Scheduler in your antivirus program, you can ensure that the scheduler can run without being blocked by the antivirus software.
3). To grant permissions to the "Everyone" group, please follow these steps:
-
Locate the file, folder or object that you want to grant permission to.
-
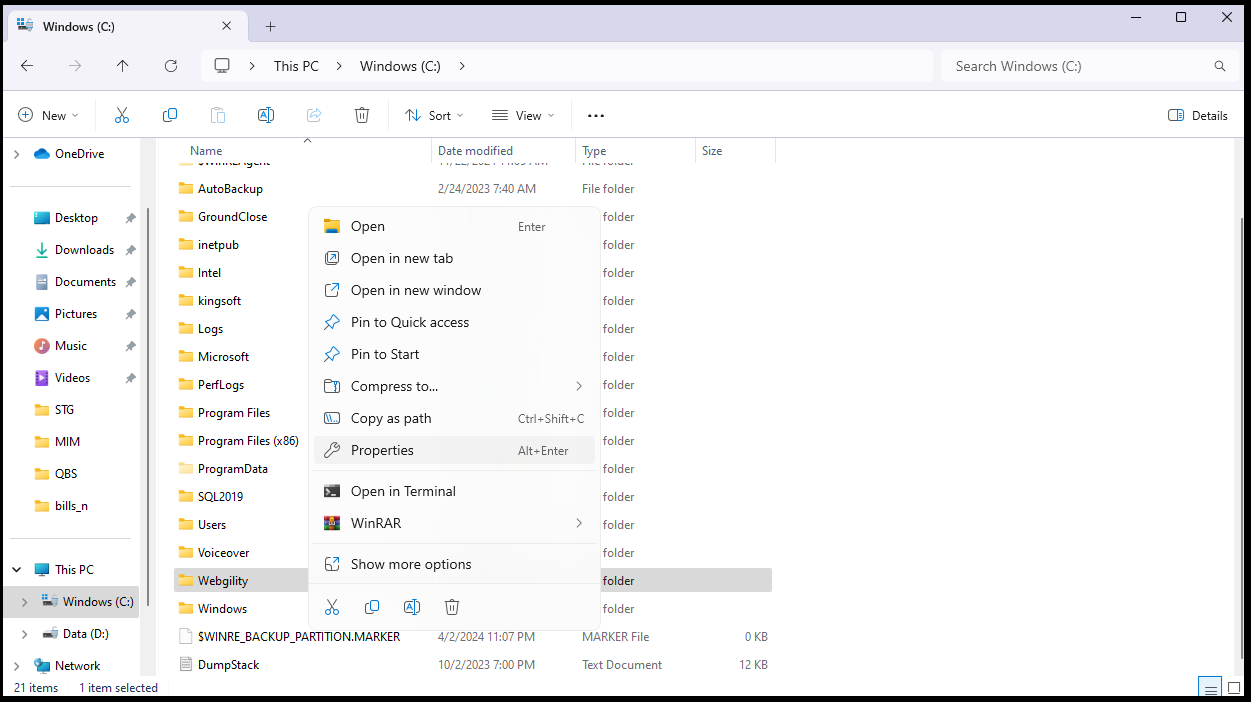
Right-click on the file, folder or object and select "Properties".
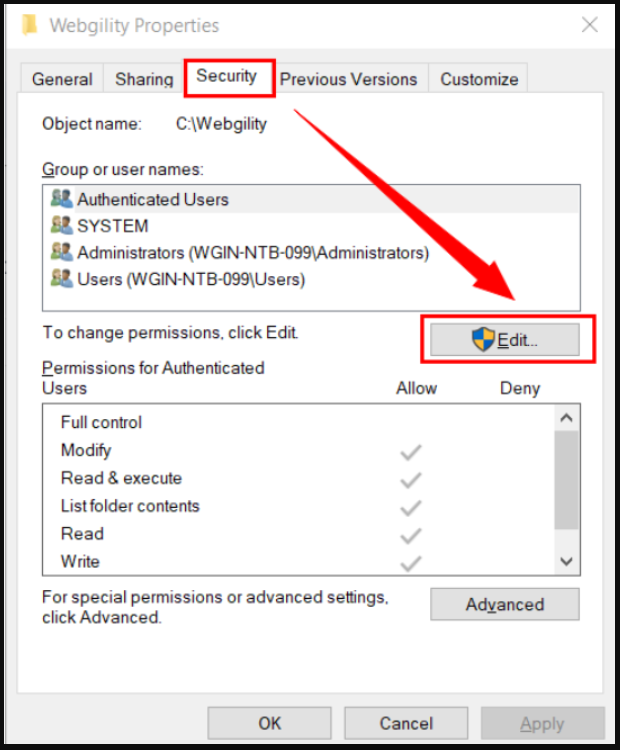
3. Click on the "Security" tab.
4. Click on the "Edit" button to change permissions.
5. Click on the "Add" button to add a new group or user.
6. Under the "Object Name" field, type in "Everyone" and then click "Check Names".
7. "Everyone" should be underlined, indicating that it is a valid entry.
8. Click "OK" to add the "Everyone" group.
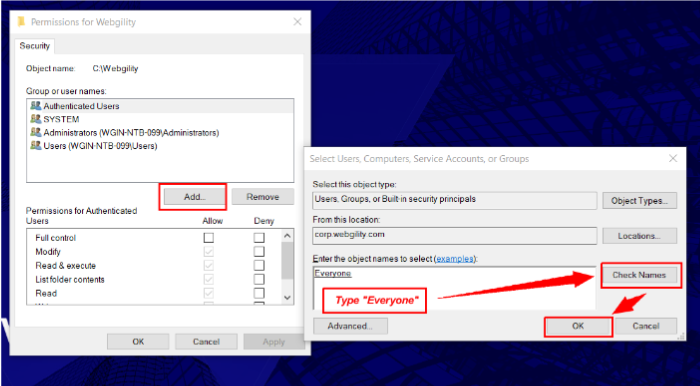
9. With the "Everyone" group selected, click on the checkboxes next to the desired permissions you want to grant.
10. Click "OK" to save the changes.
After completing these steps, the "Everyone" group will have the specified permissions for the selected file, folder, or object. Please note that granting permissions to the "Everyone" group can potentially compromise security, so use this with caution.
1). From the Windows search bar, search for Services, click Open or hit Enter on your keyboard.

2). On the Services Window, look for QBPOS Database Manager, right-click the QBPOS Database Manager and click Properties.

3). Click the second tab, Log On & select This Account, click Browse & under the object name, type Network, click Check Names, select Network Service, click OK, remove "Password and Confirm Password” click Apply & OK.
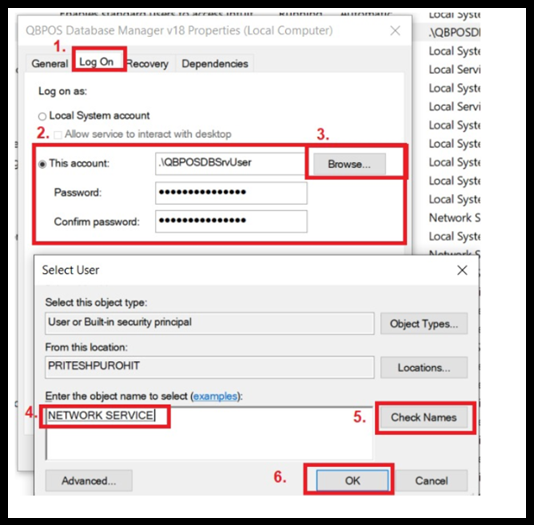
4). Log in to QuickBooks POS as SysAdmin and navigate to File> Preferences> Company> Integrated Application select, Unify_Enterprise and Unify_Scheduler Remove & Save.
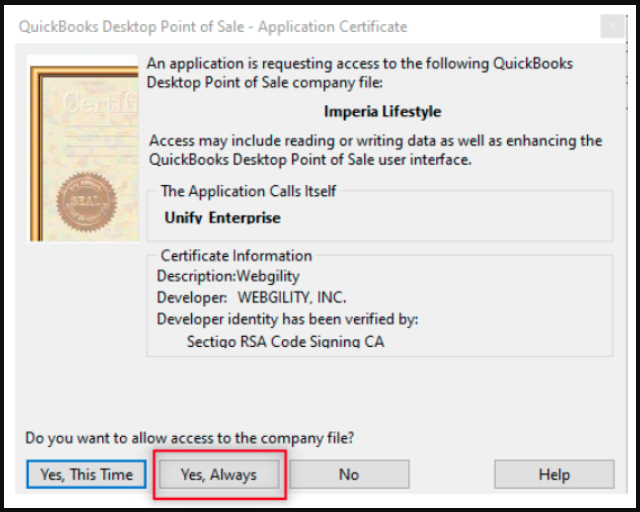
5). Now, in Webgility Desktop, navigate to Connections> Accounting/POS/ERP > Edit Connection & Test QuickBooks Connection. You’ll get a prompt in QuickBooks POS, click Yes, Always & grant access permission.
