How to Resolve Database Connection Issues in Webgility Desktop
This article helps users troubleshoot and resolve database connection issues in Webgility Desktop, a common problem that can disrupt business operations. It provides step-by-step guidance on identifying and fixing SQL Server connectivity problems, including verifying the SQL database location, ensuring necessary services are running, enabling required network protocols, configuring firewall and antivirus settings, and selecting the correct SQL instance. The article also includes instructions for users working in hosted QuickBooks environments, outlines alternative authentication methods.
Common database connection issues and steps to address them:
1). Verify SQL Database Location
First, you need to confirm the location of the SQL Database that Webgility Desktop is trying to connect to. Follow these steps:
-
Primary Workstation: Ensure that the system you are using is set as the primary workstation where the SQL Database is located.
-
Check SQL Server (Unify): Open the Services application from the Start menu and look for "SQL Server (Unify)." If you don't find it, it means the database is on a different workstation. In this case, try restarting the service.

2). Confirm SQL and Browser Services
To ensure a successful database connection, you must verify that the SQL and browser services are available on the network. Follow these steps:
-
Open the Services application by running services.msc.
-
Look for "SQL Server (Unify)" and "SQL Server Browser" services.
-
Right-click on each service and select "Properties."
-
Go to the "Log On" tab, click "Browse for Network Service," and remove any passwords if they are present.
-
Click "Apply" and then "OK."
-
Now, restart both services.

3). Enable TCP/IP and Named Pipes
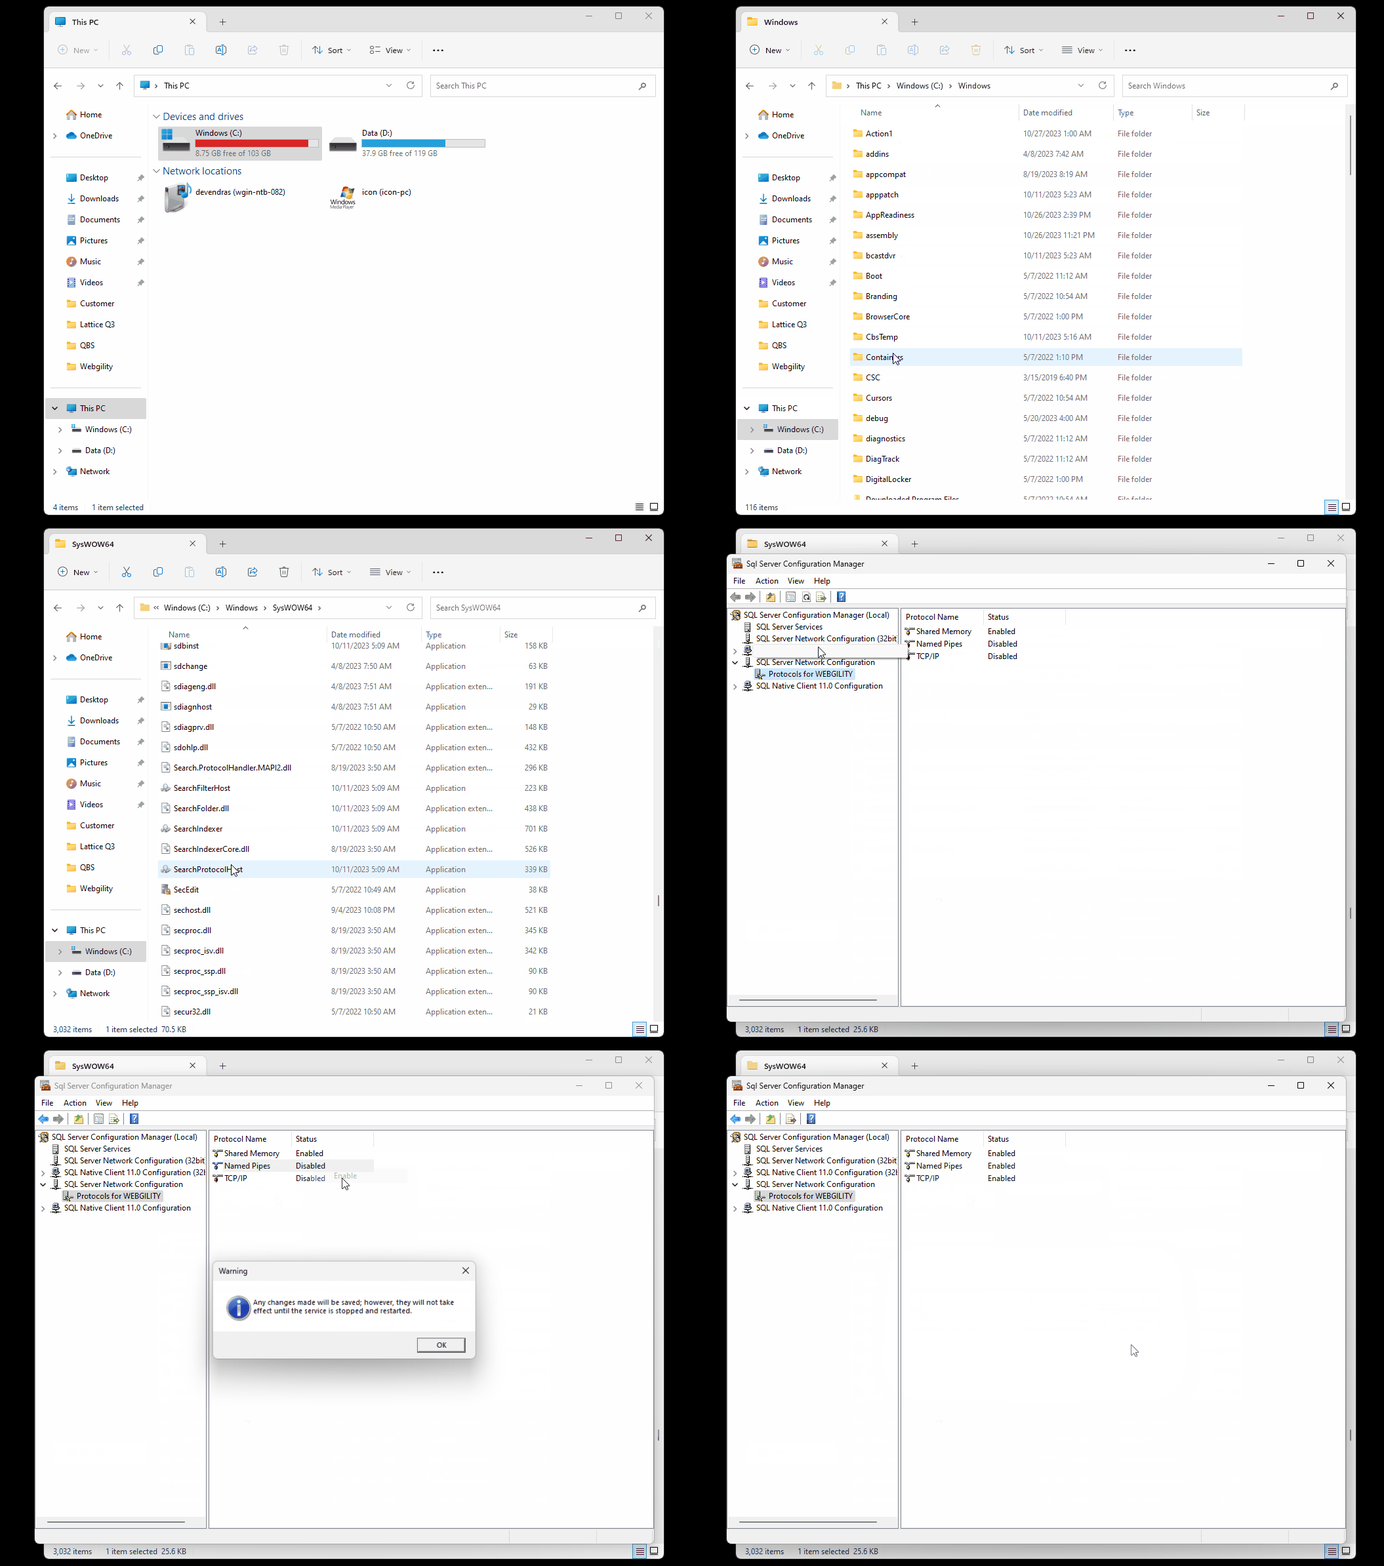
Enabling TCP/IP and named pipes in the SQL Configuration Manager can be a technical process. Ensure that these protocols are enabled as required by following the instructions provided in your SQL Configuration Manager.

4). Restart SQL Services
After making any changes, it's essential to restart the SQL services to apply those changes effectively.
5). Configure Firewall Rules
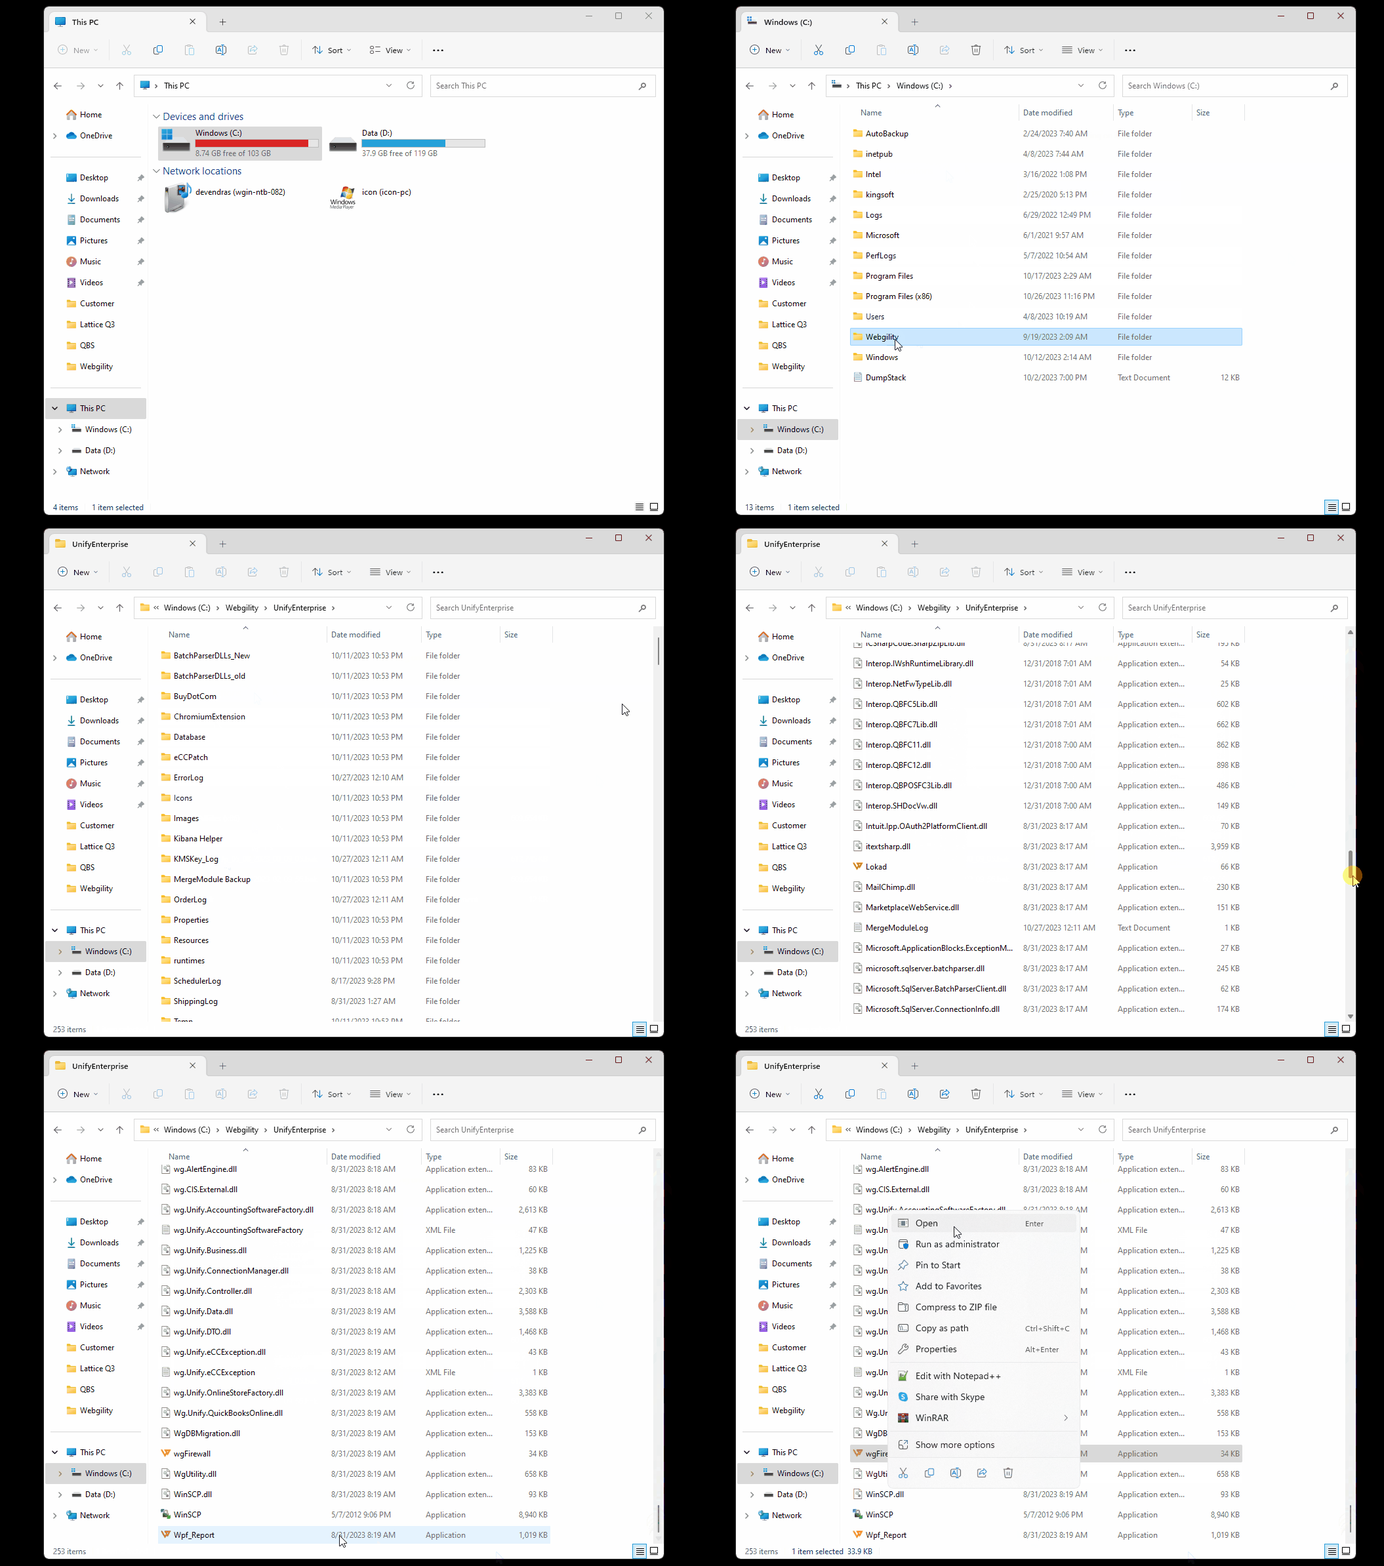
Run wgFirewall.exe to configure firewall rules. This application can be found in C:\Webgility\UnifyEnterprise. Right-click on it and run it as an administrator.

6). Add Webgility Desktop to the Exemption List
To prevent interference from antivirus software, add C:\Webgility to your antivirus's exemption list. After making this change, restart Webgility Desktop.
7). Select the Instance Name
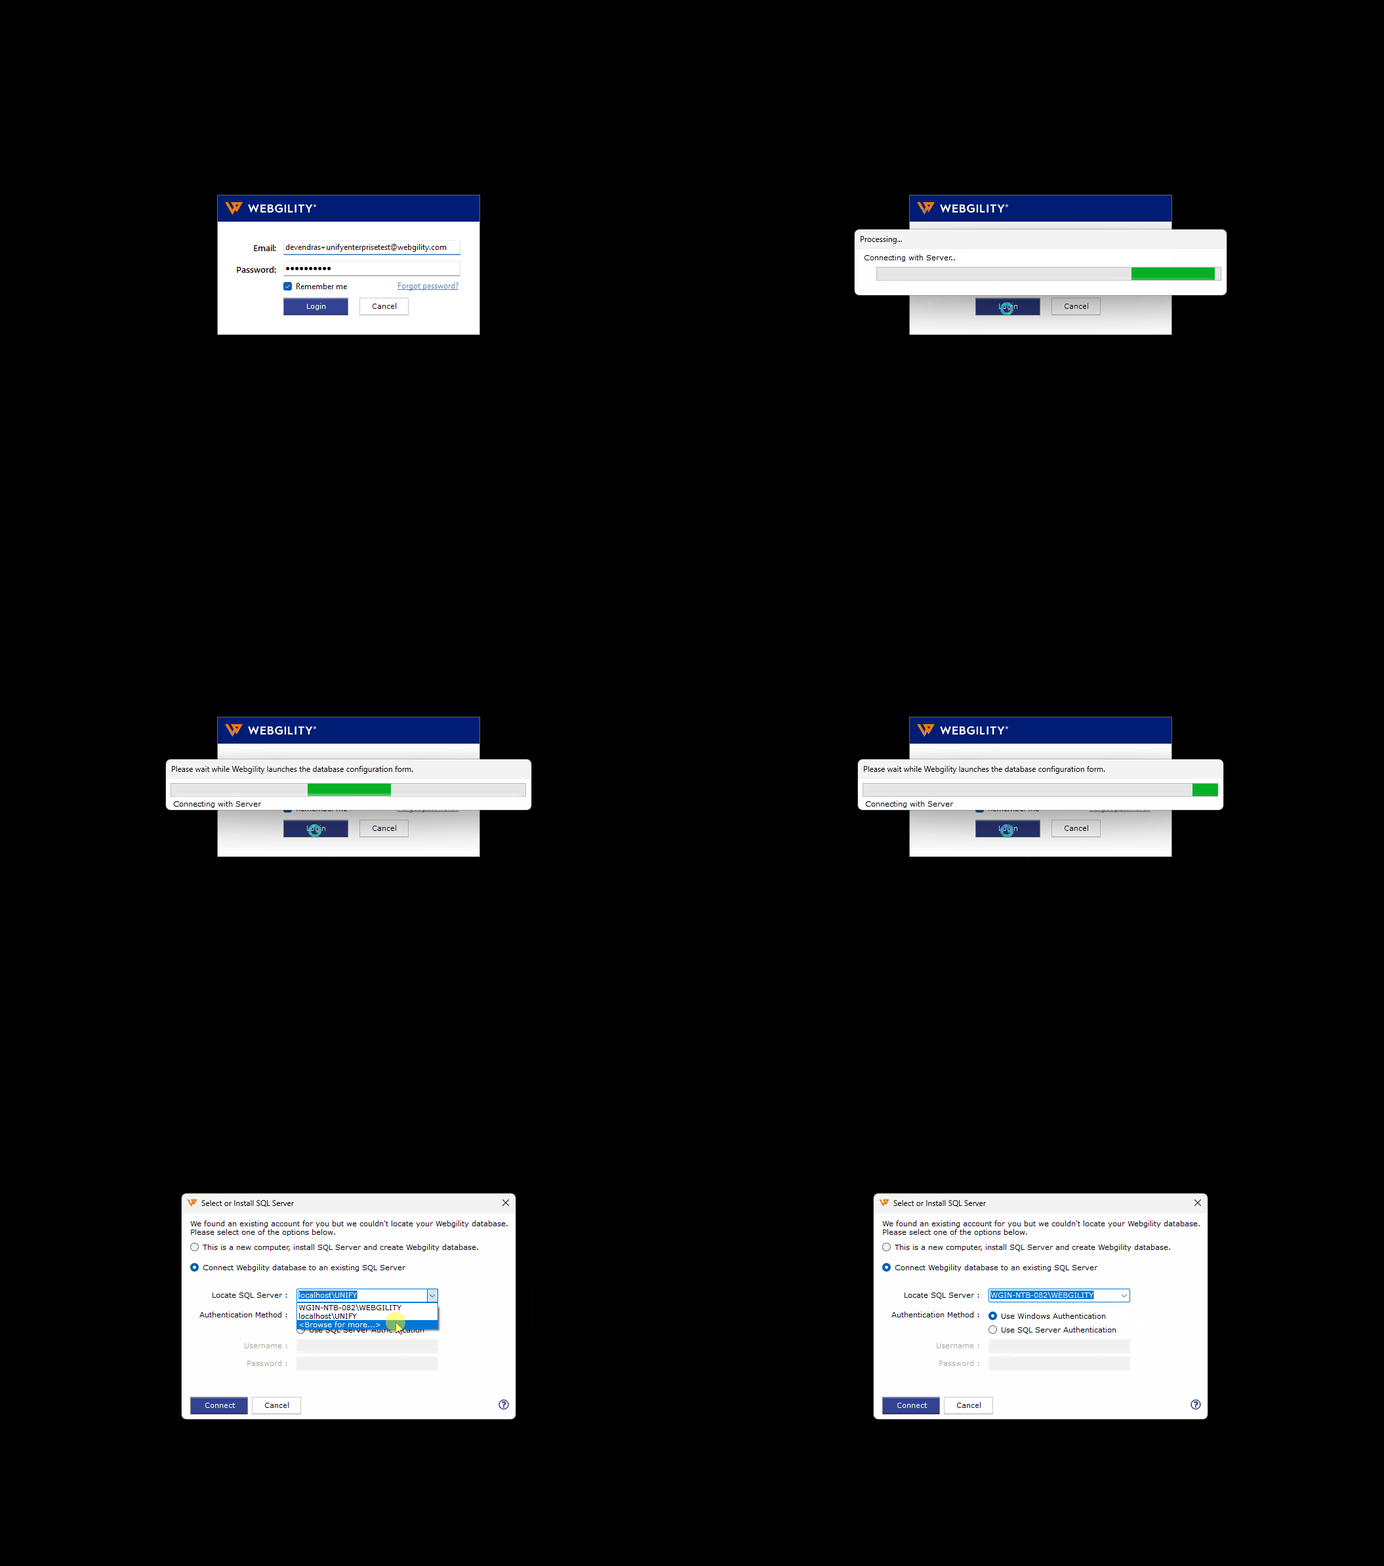
In the Database Configuration screen, select the instance name where the machine is installed. Typically, this is ComputerName/Unify. If it does not appear under "Locate SQL Server," click on the drop-down and select "Browse for more." Note that this step may take a few minutes.

8). Connect Using SQL Authentication
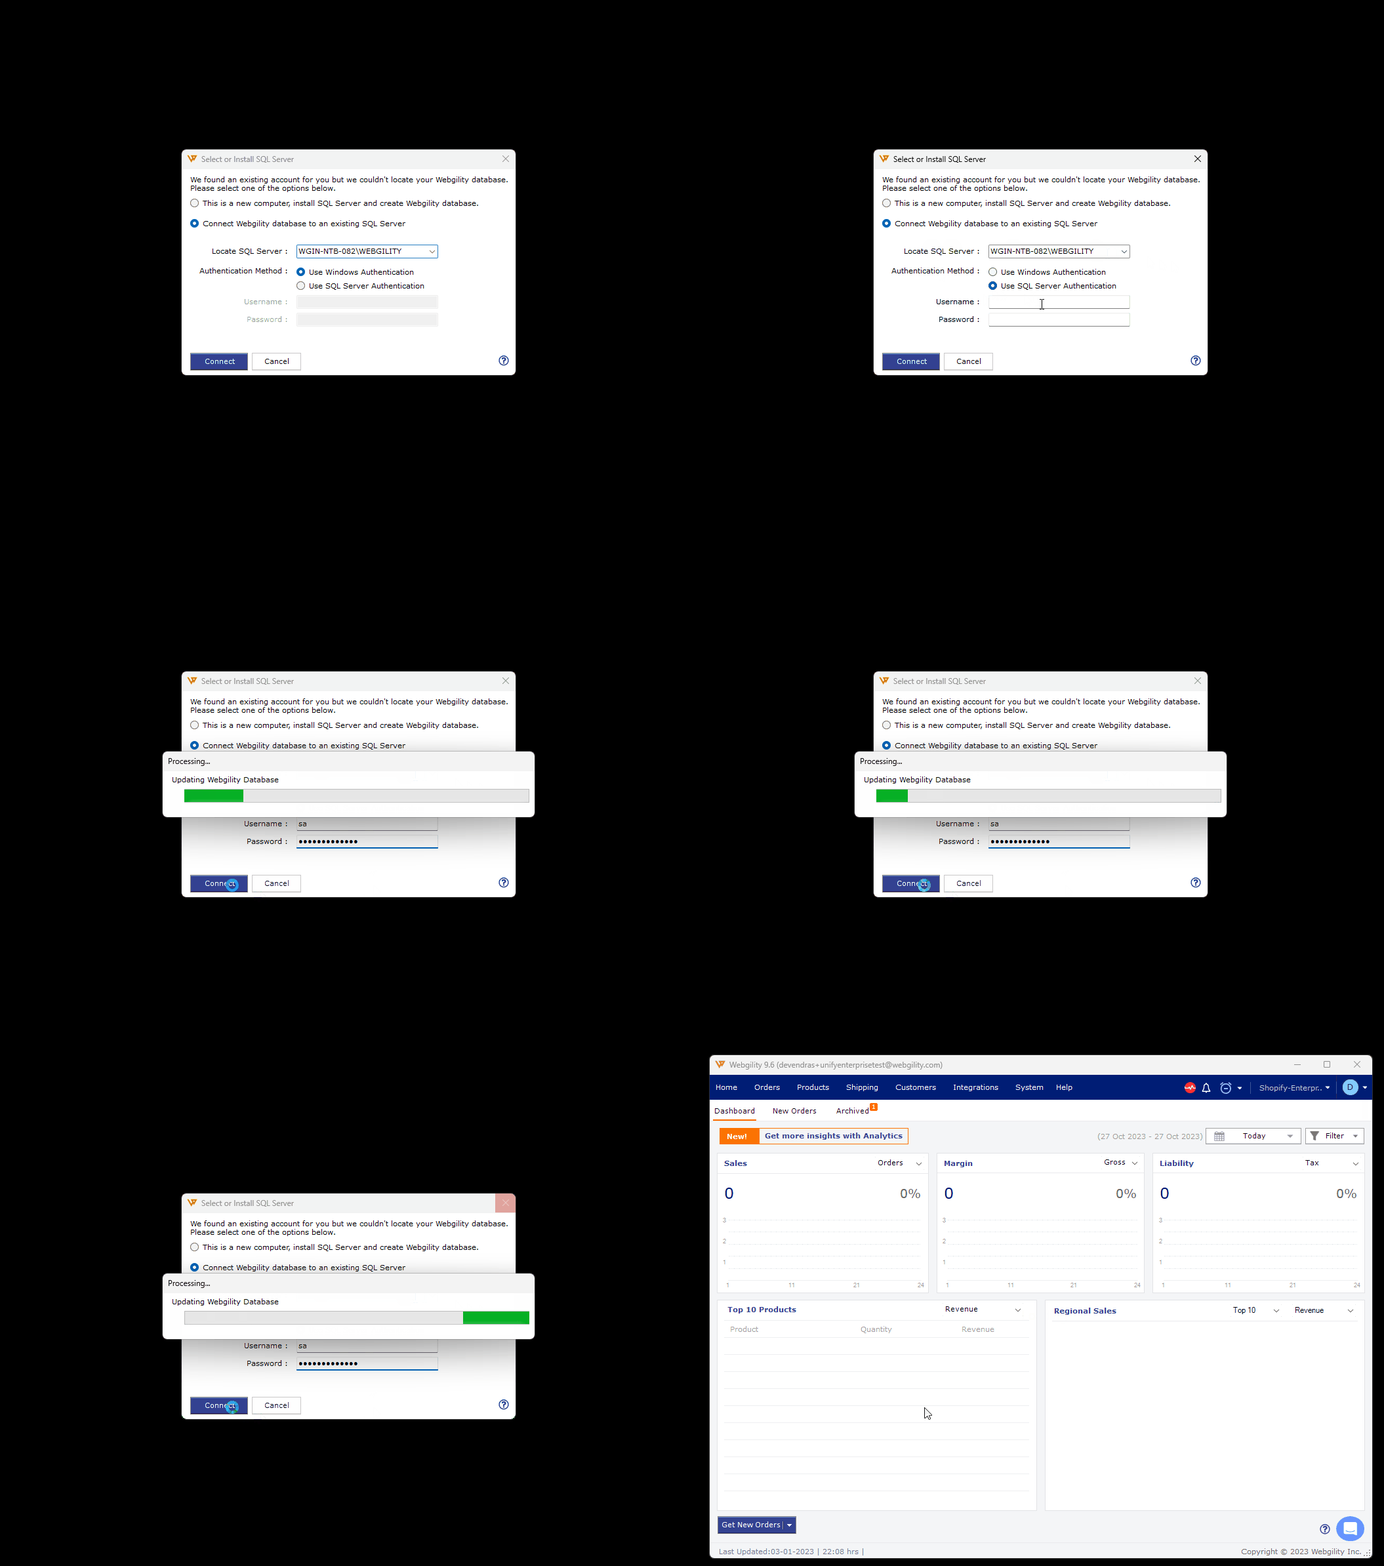
If you are connecting the database to run on an add-on machine, use SQL authentication with the following credentials:
-
User Name: sa
-
Password: Webgility2011

9). QuickBooks Hosting Providers
If your QuickBooks company file is hosted with a provider such as Rightworks or Summit Hosting and you're experiencing database connection issues, it's recommended to contact your hosting provider's customer support. They may have specific procedures or requirements for database connections in their hosted environment. Learn more about working with Rightworks for Webgility Desktop here.
Additional Resources
If you're looking for more guidance on setting up the SQL database connection, we have a video resource available to assist you. You can watch the video here. This video provides a step-by-step demonstration of the process.