Steps to follow:
In QuickBooks:
To get started, you will need to activate your Webgility Desktop account from within QuickBooks Enterprise 22. Learn how, here.
In Webgility Desktop:
1). Once your Webgility Desktop account is activated, connect Webgility Desktop to the Sales Channel.
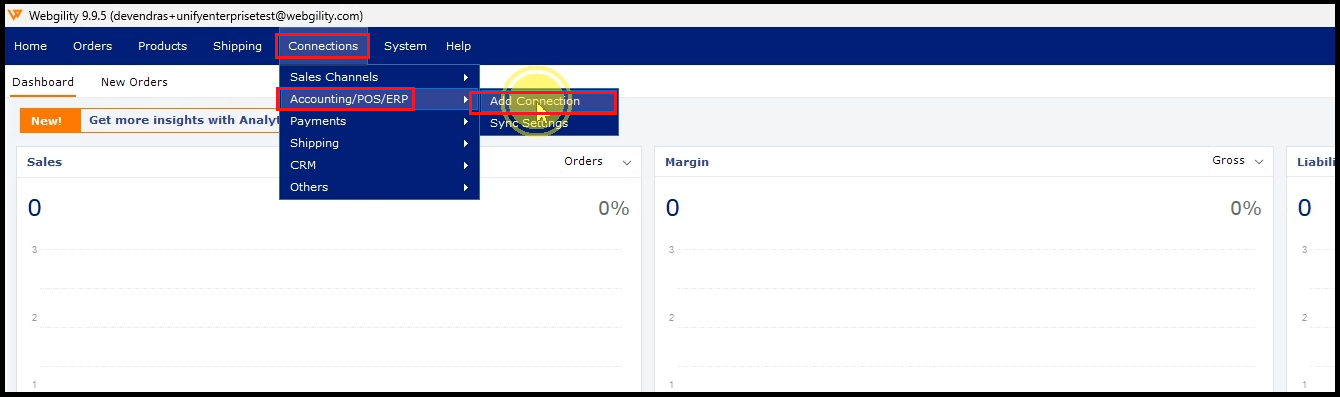
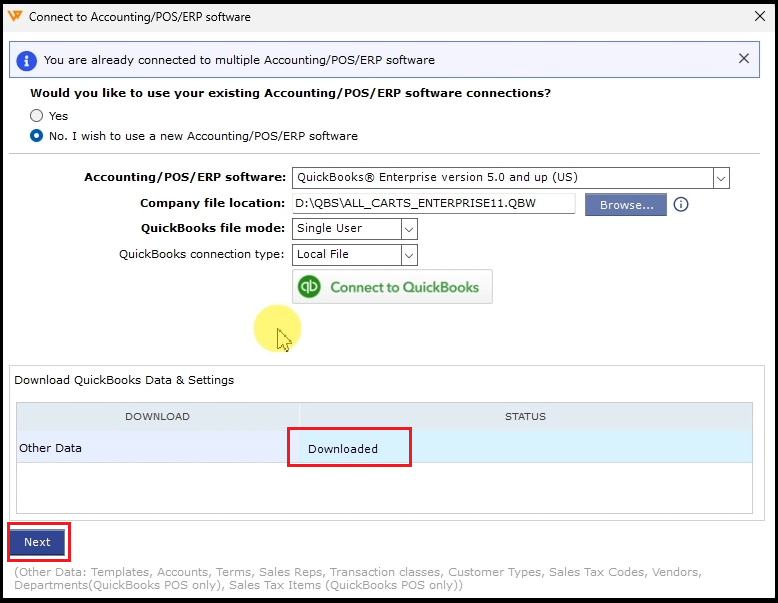
2). Navigate to Connections > Accounting/POS/ERP> Add Connection
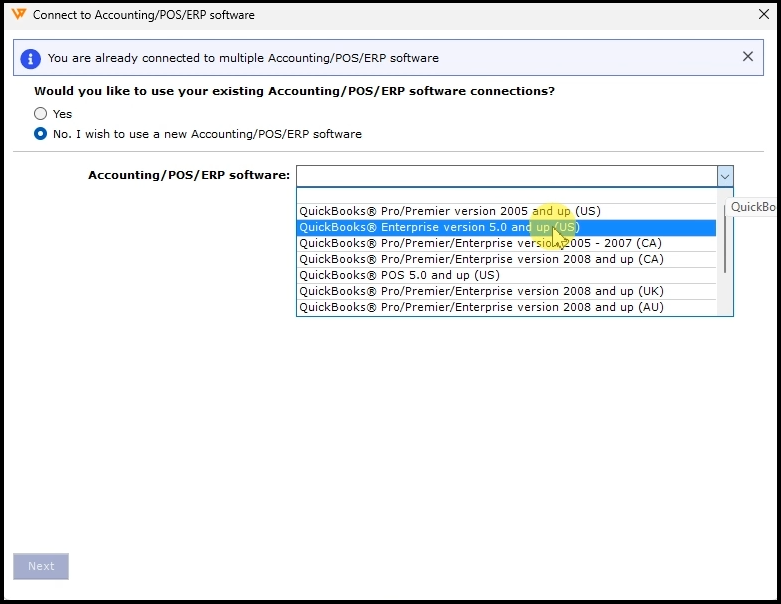
3). Select the correct version of QuickBooks from the drop-down menu.
4). Launch the QuickBooks company file you want to connect to Webgility Desktop.
5). Log into QuickBooks as the admin user and switch it to single-user mode. The admin login is required for connection purposes only. Once the connection is made and the data download is complete, you can switch back to any other user or switch to multi-user mode.
6). Press the F2 or Control + 1 key to bring up the Product Information window on the screen.
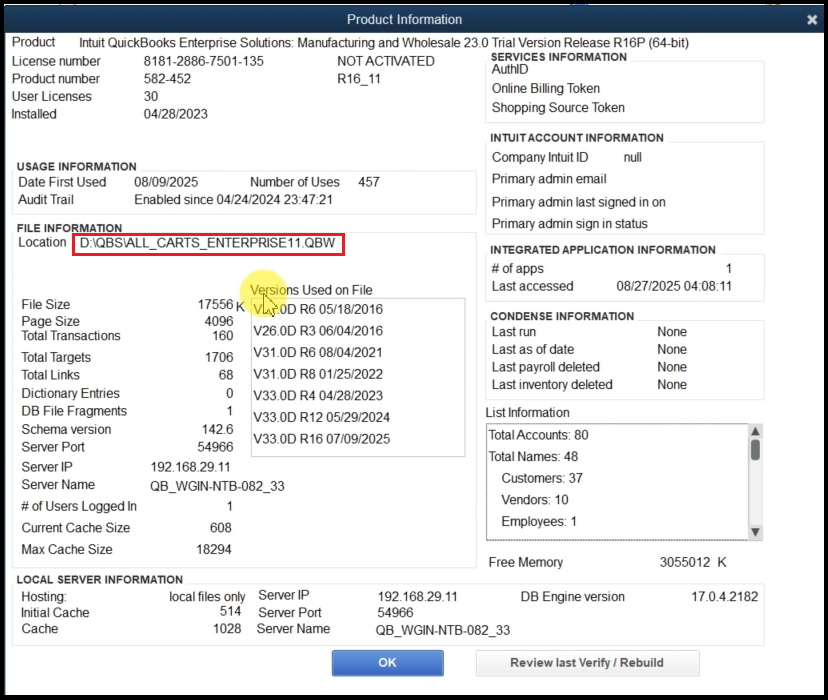
7). Copy the company file location from the Product Information window, then close it.
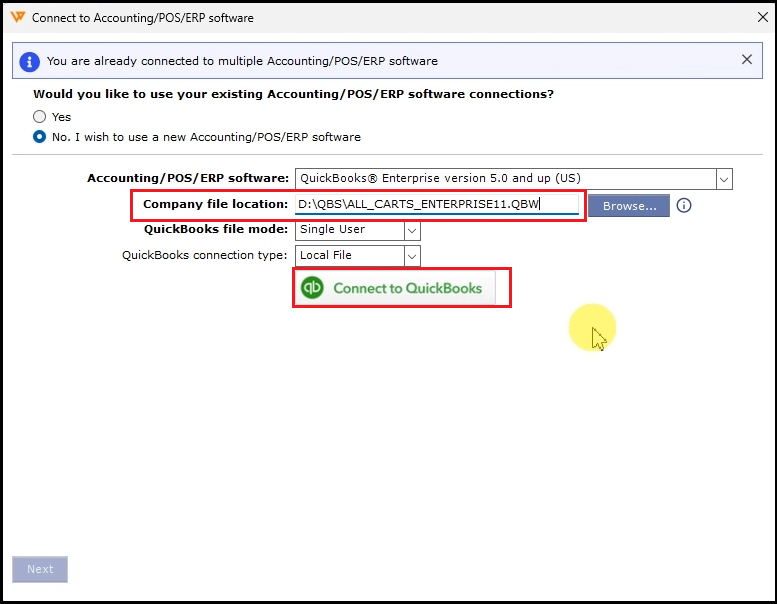
8). Paste the copied file path to the Company file location field in the Webgility Desktop connection window. Then click Connect to QuickBooks.
9). This will open the Application Certificate in QuickBooks and grant access to the Webgility Desktop application from QuickBooks as an admin.
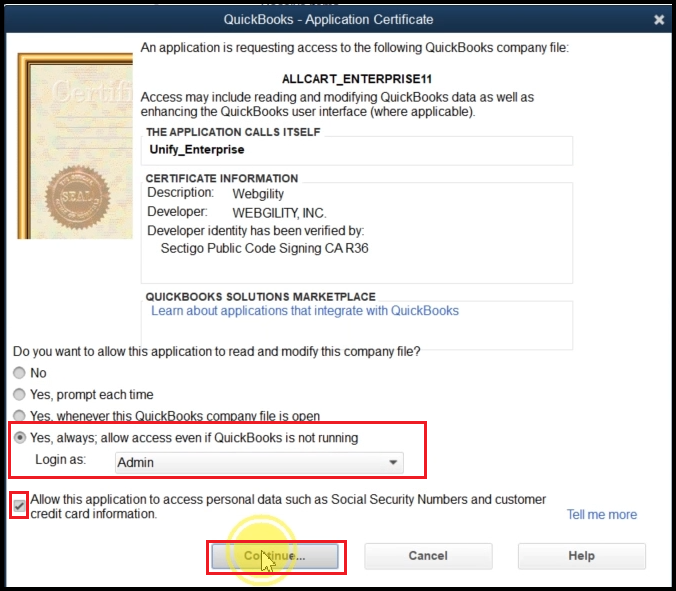
10). Once this permission is granted, click Continue to process.
Once done then you will be directed to the Dashboard of Webgility Desktop.