Overview:
To connect Webgility with Magento, you’ll need to install the Webgility Extension, which requires your Sales Channel FTP information.
-
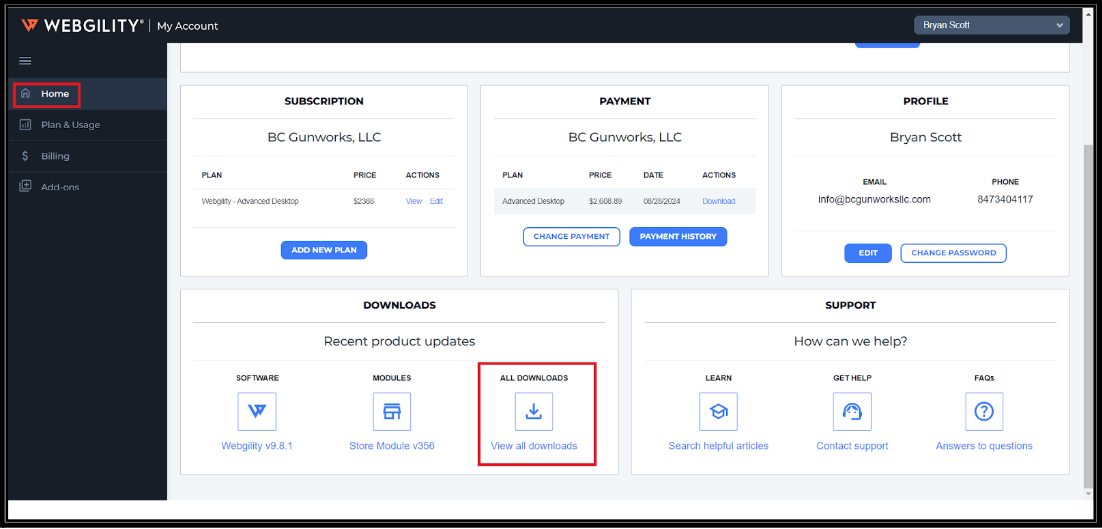
Log in to portal.webgility.com with your Webgility credentials.
-
Go to View All Downloads under Home.
-
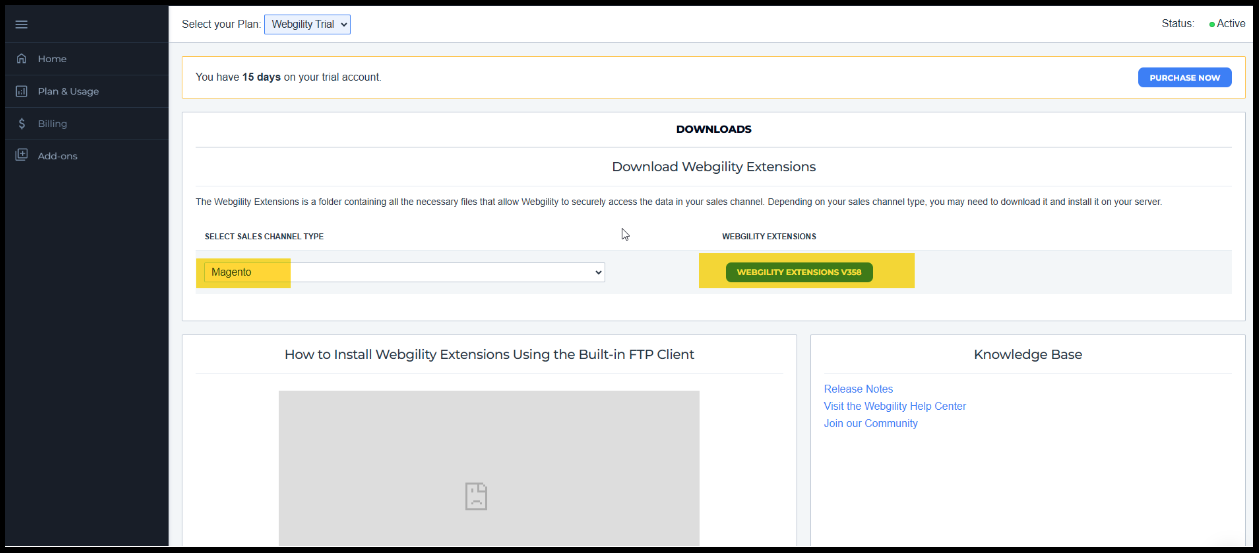
In the downloads section, select Magento as the sales channel type, then click Webgility Extension v358 to download the extension.
Log in to portal.webgility.com with your Webgility credentials.
Go to View All Downloads under Home.
In the downloads section, select Magento as the sales channel type, then click Webgility Extension v358 to download the extension.
Watch here how to connect your Magento sales channel.
Steps to Connect the Magento Sales Channel in Webgility Desktop
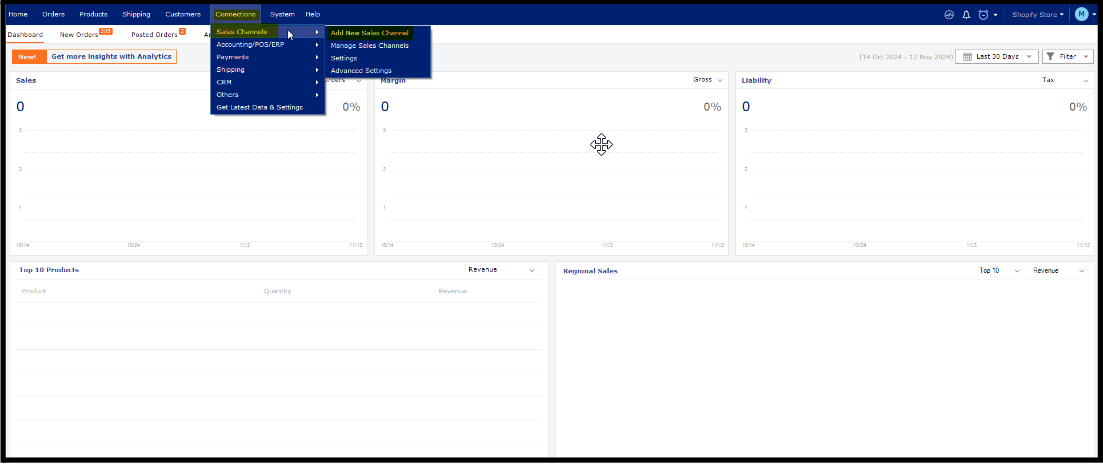
01. Install the Webgility Extension: After installing the Webgility Extension, go to Connections, select Sales Channels, and click Add New Sales Channel. (If this is your first channel, you can skip this step.)
02. Select the Store Type: In the pop-up screen, choose Magento as the sales channel type and enter a name for your store. In the Store Web Address field, type the URL where the Webgility Extension is located (e.g., https://storename.com/webgility/webgility-magento.php).
03. Continue to the Next Step: Click Continue.
04. Enter Magento Admin Credentials: On the next screen, input your Magento admin username and password.
05. Connect to Magento: Click Connect to Magento.

06. Download Store Information: Webgility Desktop will download basic sales channel information. Once the download completes, click Continue.
07. Enter Business Contact Information: Fill in your business contact details. Ensure all fields marked with a red asterisk (*) are completed, as they are required.
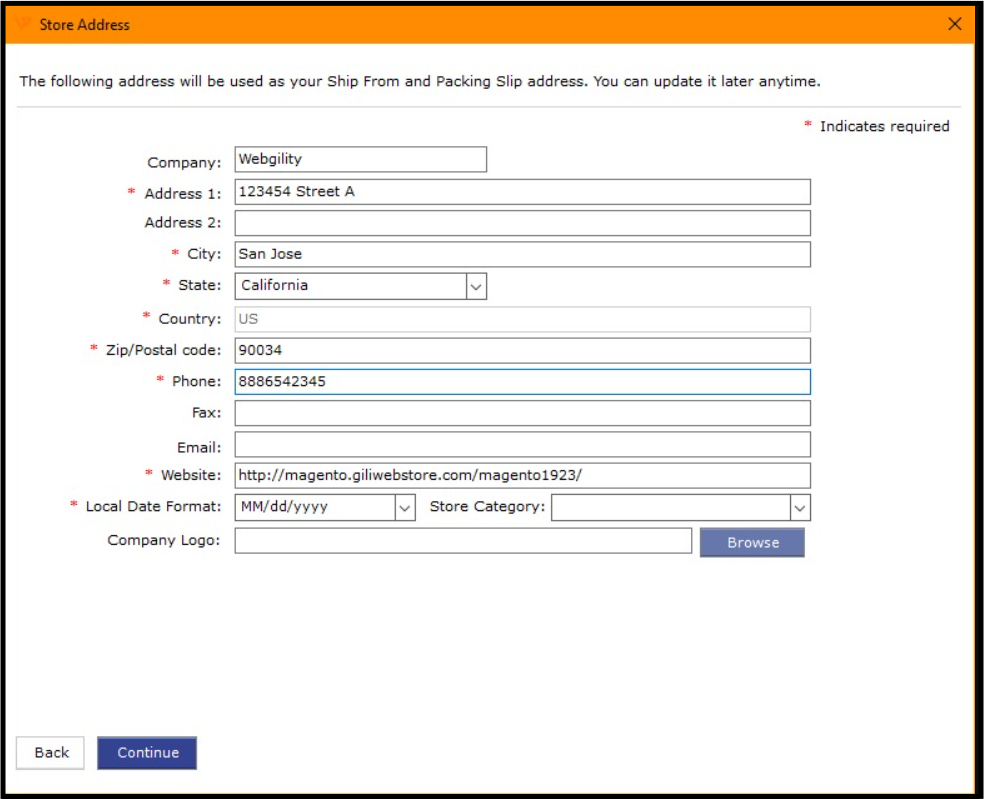
08. Save the Store Information: After entering all the required information, click Save Store, then select OK. Your sales channel has now been successfully added.
09 Follow the steps in this helpful article on How to Connect Webgility Desktop with QuickBooks Enterprise, Pro, or Premier