Overview:
Webgility Desktop supports installation on multiple computers, allowing your team to access a shared SQL database within the same network.
To install Webgility Desktop on an additional computer, you'll connect that machine to the existing SQL Server database used by the primary Webgility setup. This ensures all users work from the same order, inventory, and accounting data.
Prerequisites
Before beginning installation on an additional machine, make sure:
- The admin/primary computer has both Webgility Desktop and QuickBooks Desktop fully installed and configured.
- The additional computer must also have QuickBooks Desktop installed.
- All computers are connected to the same local network.
- If you're using a hosting provider, they will typically assist with setting up Webgility on additional machines.
Installation Steps
1. Install Webgility Desktop on the additional computer. Installation Guide for Webgility Desktop
2. Launch Webgility Desktop and log in with your Webgility credentials.
You’ll see a Database Configuration screen. On this screen:
3. Select "Connect Webgility database to an existing SQL Server".
4. Open the "Locate SQL Server" dropdown and select "Browse for More".
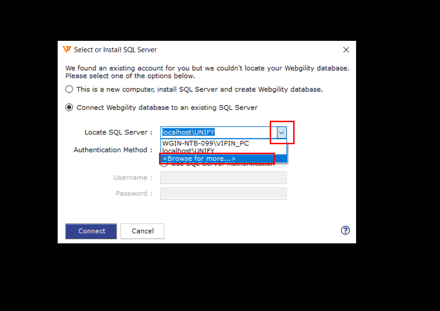
5. A list of available SQL database servers will appear.
- Choose the correct SQL database name.
- If you're unsure, find the name on the server computer:
- Go to
C:\Webgility\UnifyEnterprise\XML - Open the file ApiConfig.xml in Notepad.
- Look for the Source name — this is your database name.
- Go to
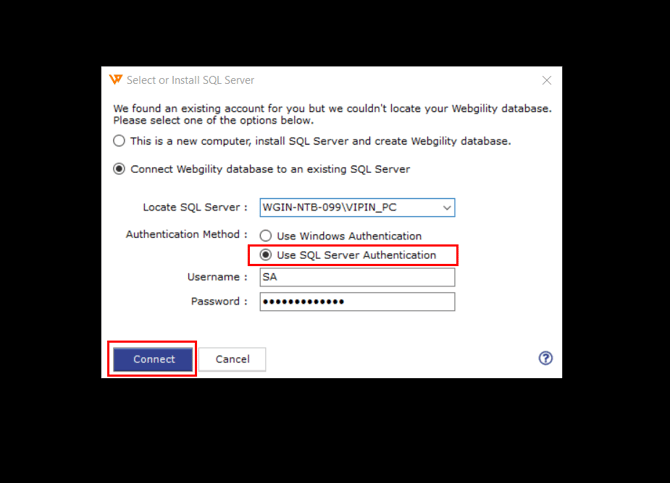
6. In the Authentication Method section:
- Select "Use SQL Server Authentication".
- Enter the following credentials:
- Username:
SA - Password:
Webgility2011
- Username:
- Click Connect.
7. The application will begin updating the Webgility database. This may take a few minutes.
8. Once the update is complete, you’ll be taken to the Webgility Desktop Dashboard, confirming successful setup.
Tip
-
Both machines are connected to the same local network.
-
SQL Server is configured to allow remote connections.
-
The correct database name and credentials have been entered.