How to Post Transactions Based on Payment Methods in Webgility Desktop
How to Post Transactions Based on Payment Methods in Webgility Desktop
Webgility Desktop allows you to set up online sales to post into distinct accounts in QuickBooks by segregating them based on the received payment methods for the orders.
You have the option to assign varied transaction types and distinct accounts while organizing incoming orders from your online sales channel based on different payment methods.
Understanding the Difference: Payment Methods vs. Payment Gateways
Payment Gateways:
Webgility allows you to connect to payment services such as PayPal, Stripe, or Shopify Payments. Which handle the secure transmission of payment data between the customer, the merchant, and the bank, to download payment fees associated with each order.
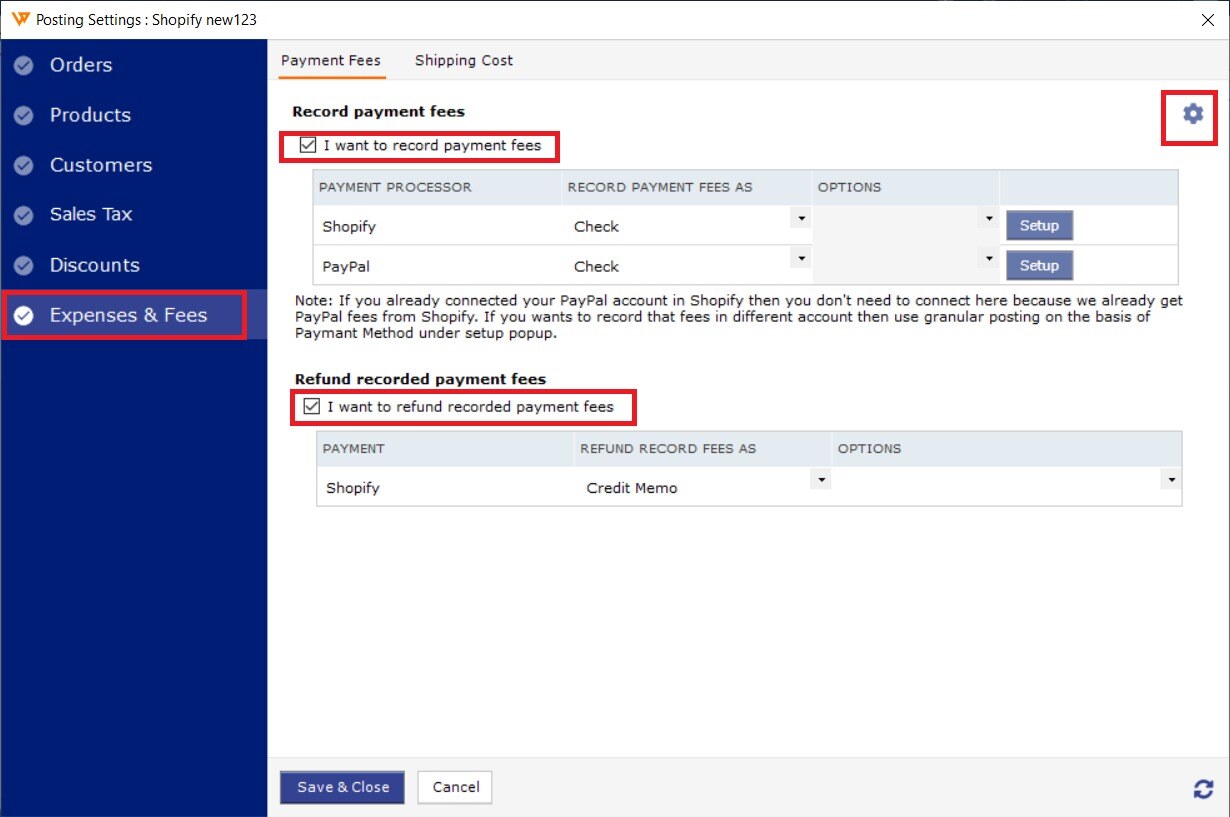
Learn more about how you can add payment gateways to Webgility Desktop for tracking the fees: Track Payment Processor Fees with Webgility Desktop
Payment Methods:
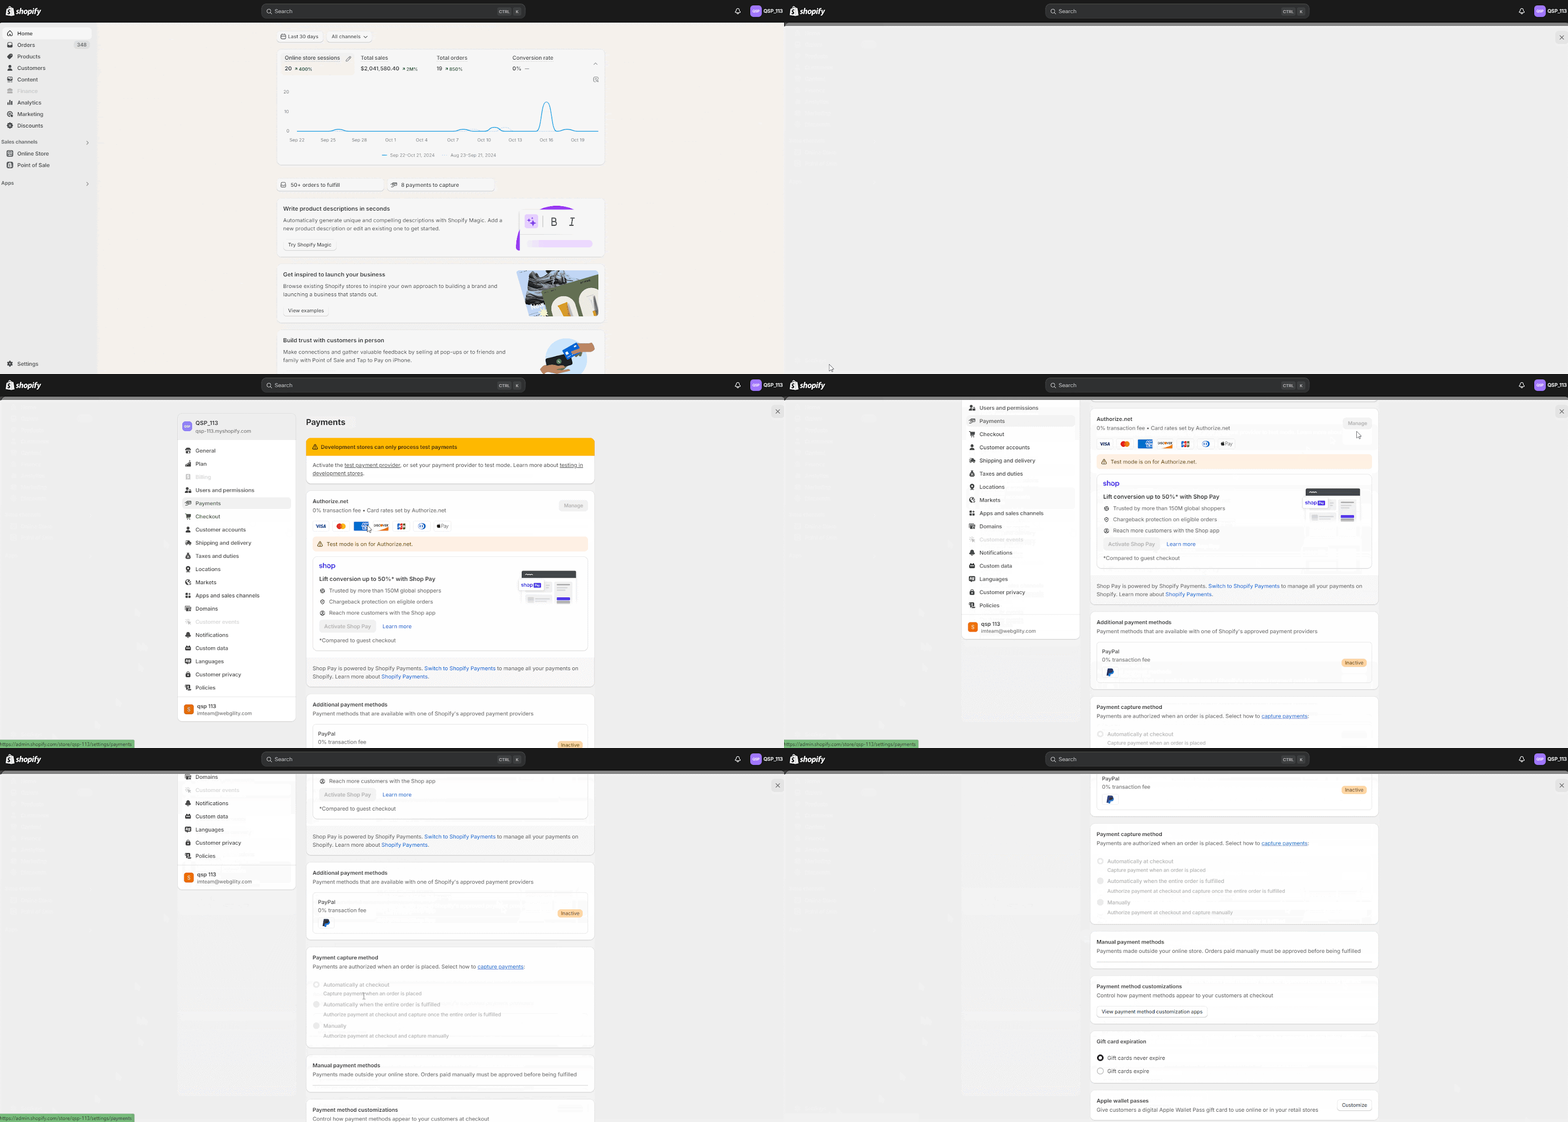
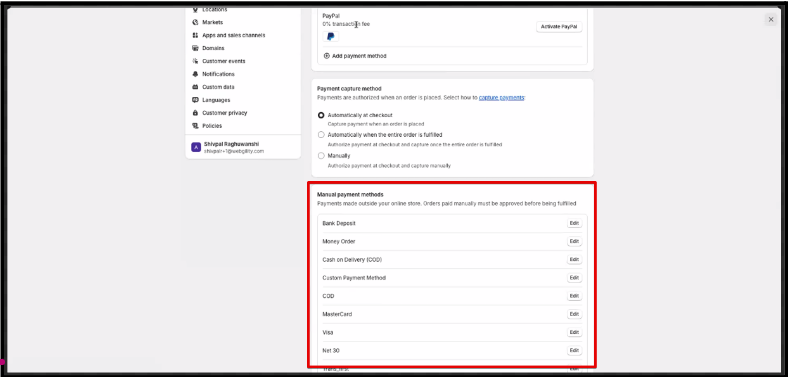
Generally, we download the payment method for each order from your Sales Channel. The values are from your settings about payments in your Sales Channel. For Shopify Sellers, you can add payment gateways to your payments in Settings, click Payments, or create manual payment methods there.
Manual payment methods are for the payments made outside your online store. We suggest not creating a manual payment method name that can be confused with your online payment gateway, such as Credit Card, Visa, or MasterCard.
Shopify:
In Shopify, go to Settings. Navigate to Payments and add or configure multiple payment methods such as credit cards, PayPal, or manual payments.
For other channels, see the references we have mentioned below:
Magento:
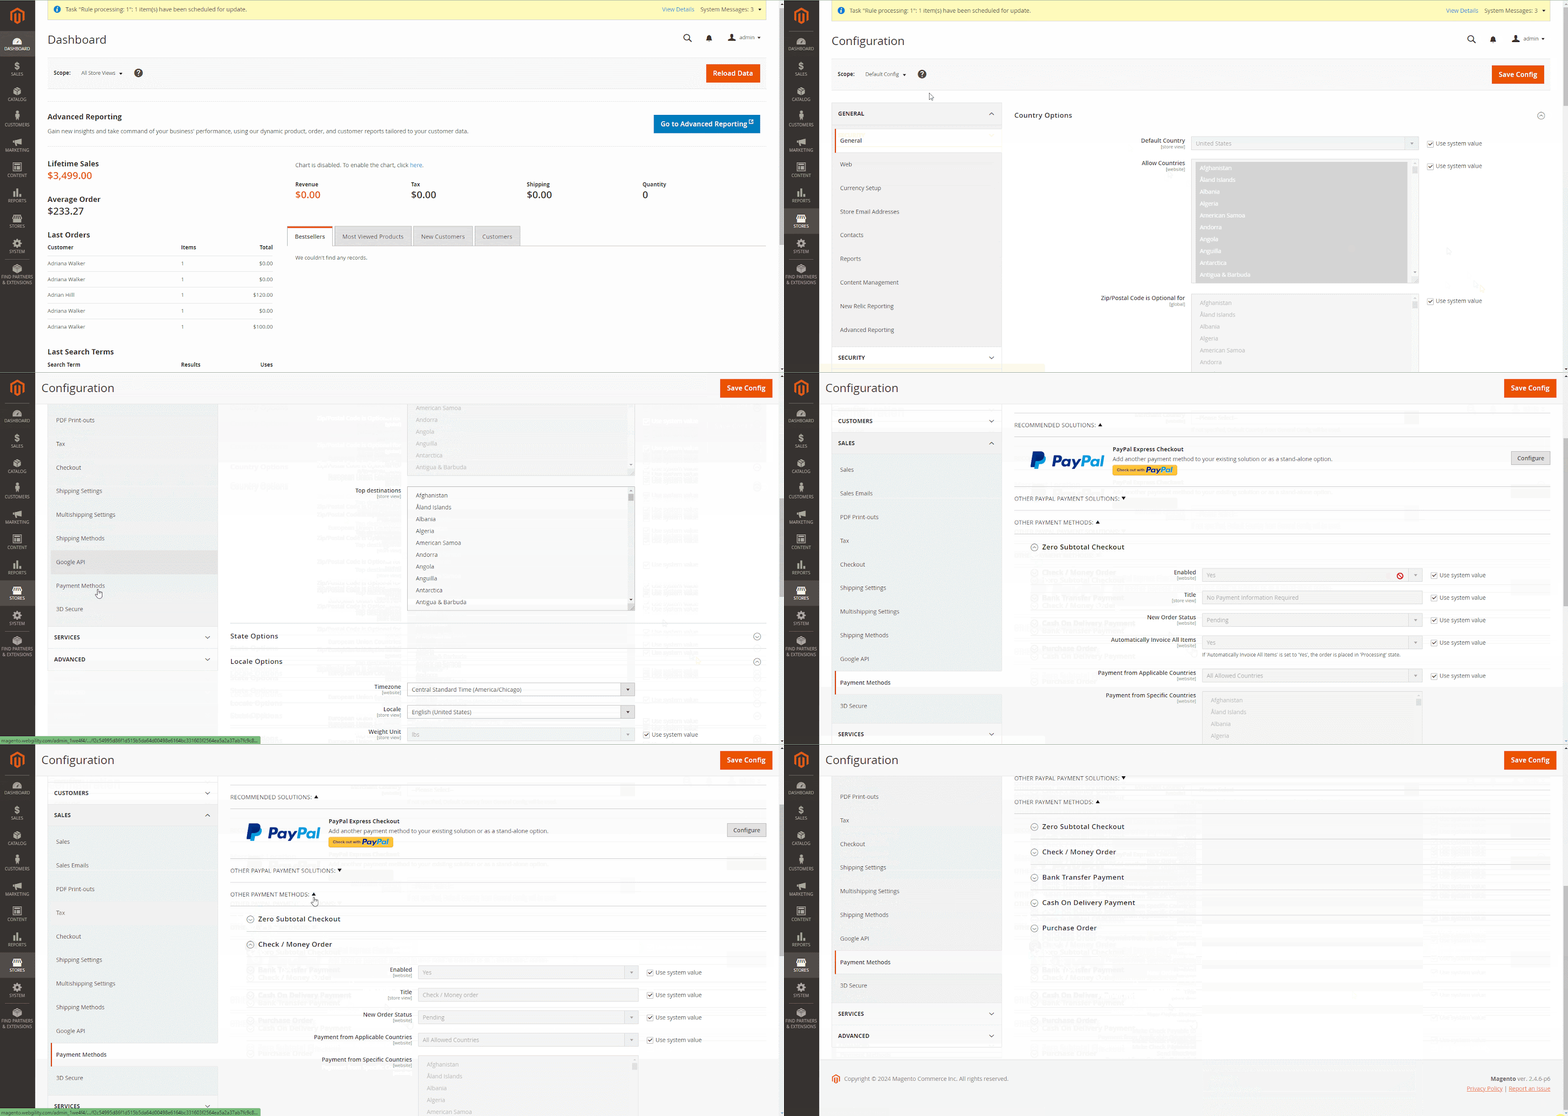
Go to Stores, select Configurations, and then go to Payment Methods to add various accepted payment methods, such as PayPal or credit cards.
BigCommerce:
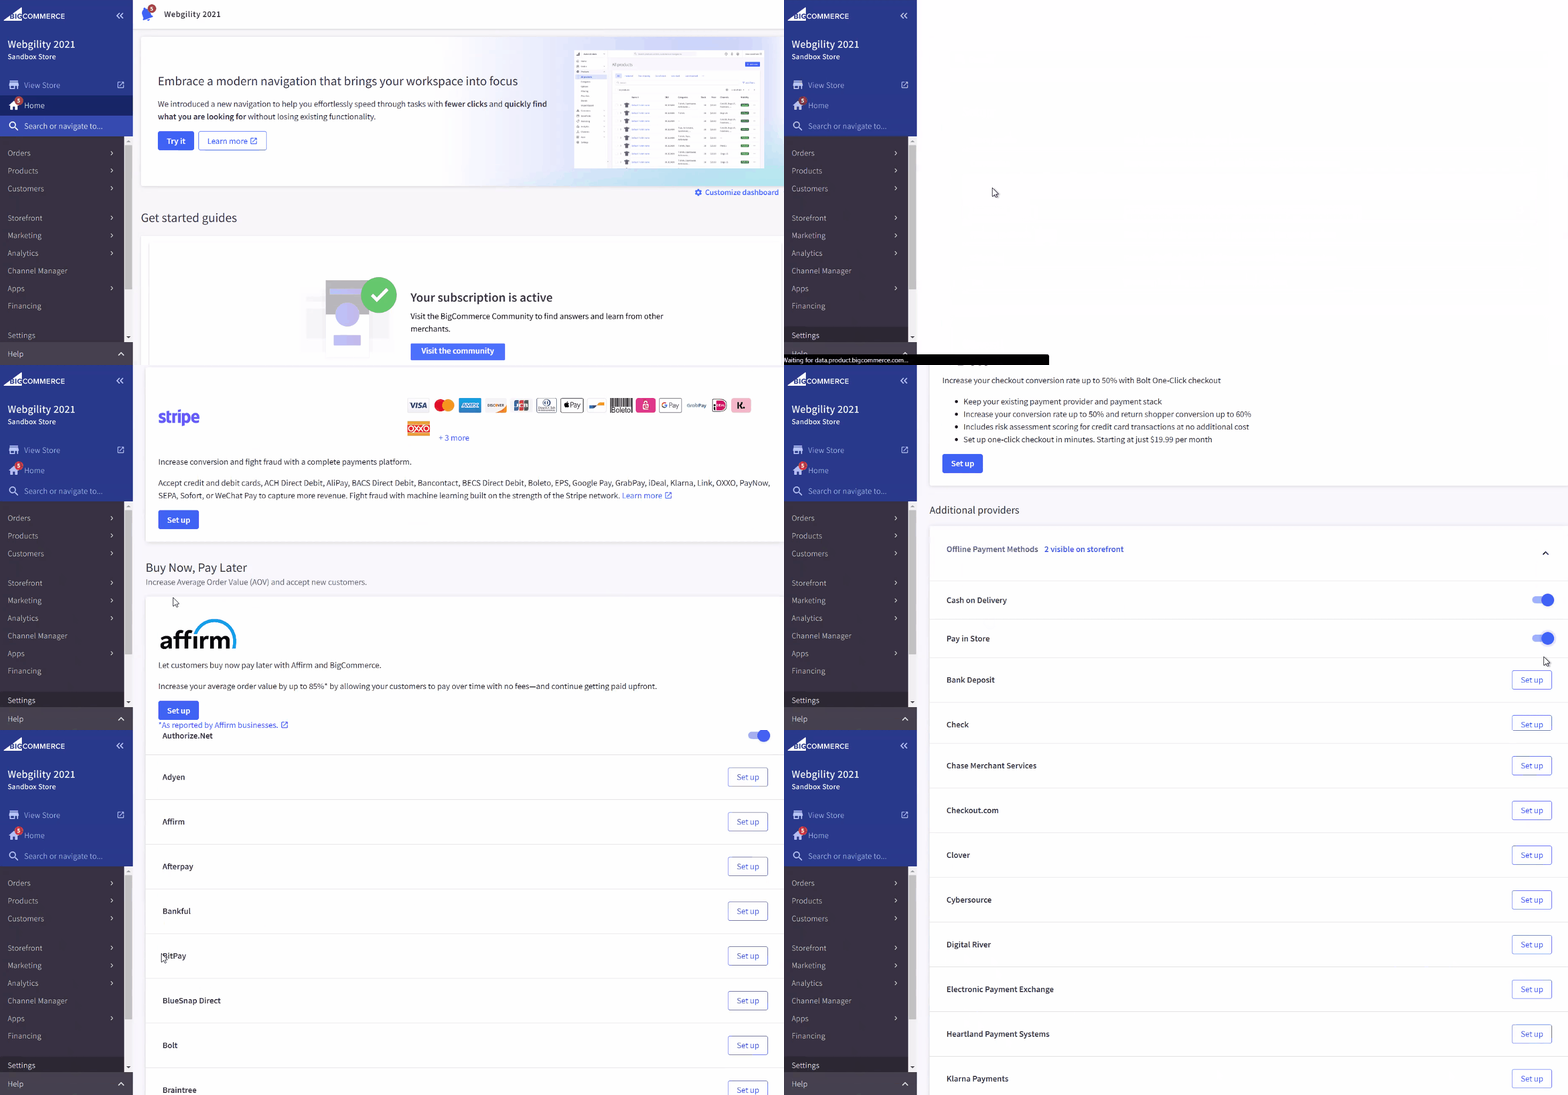
In-Store Setup and then go to Payments, you can add manual payment methods, including third-party gateways.
WooCommerce:
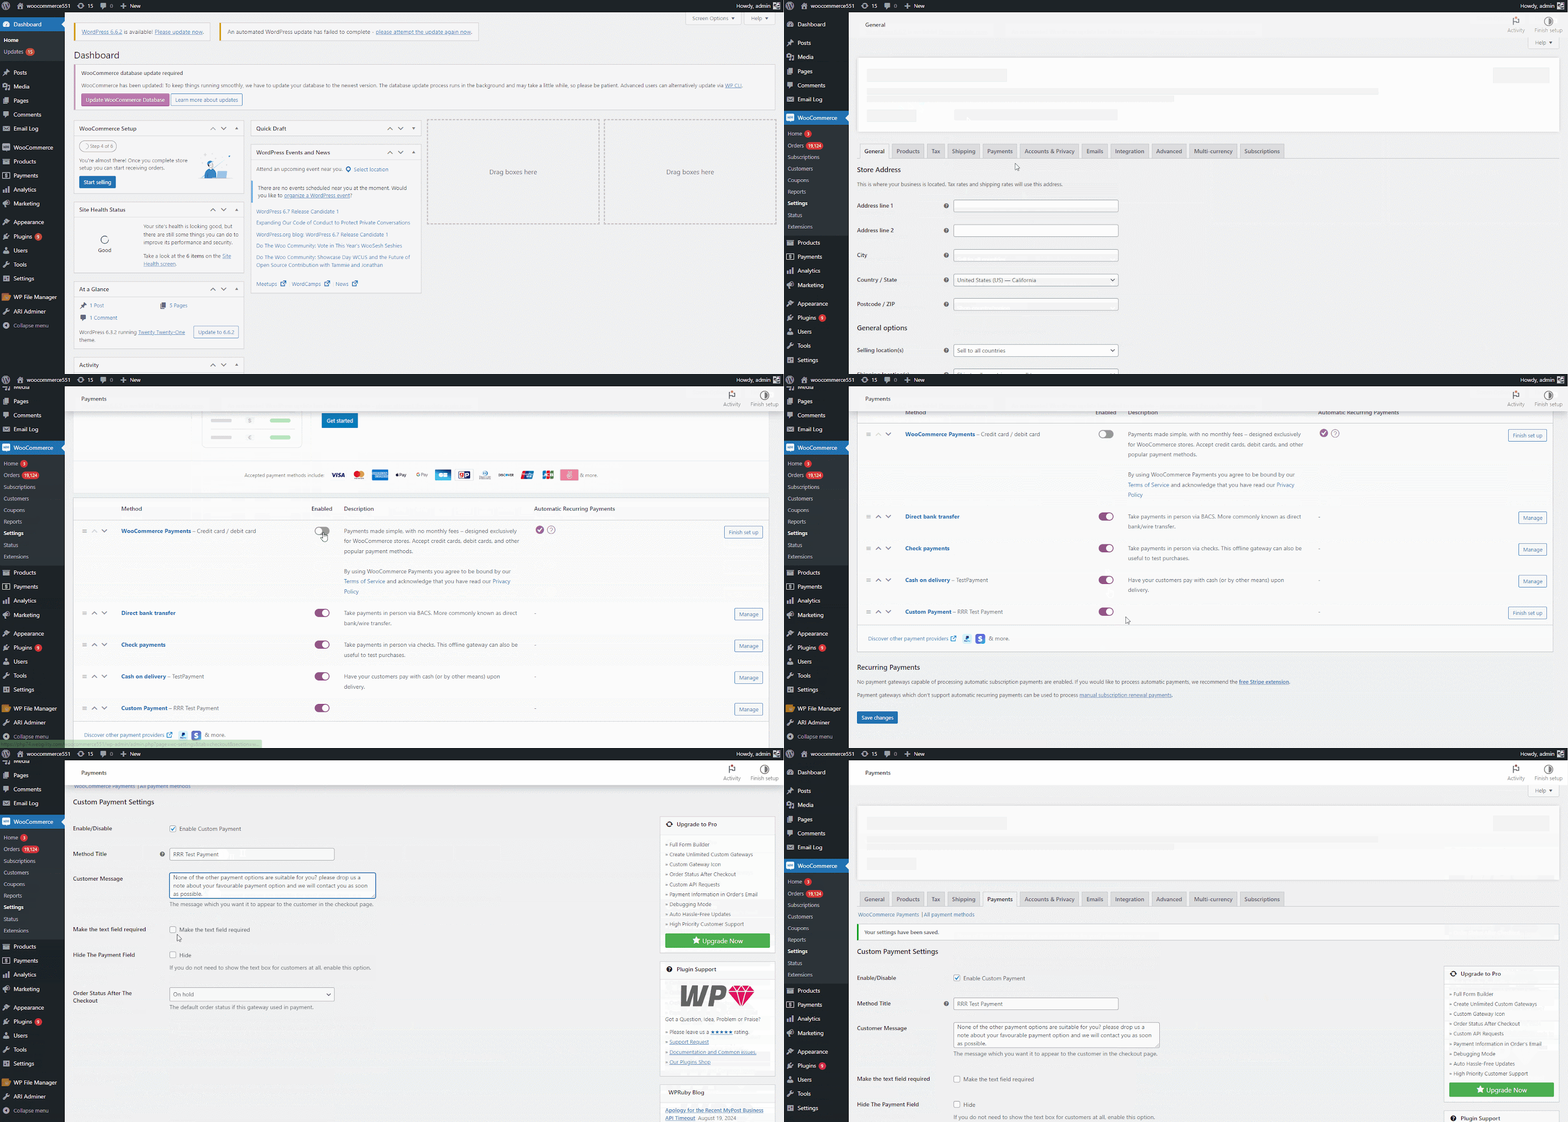
Visit WooCommerce, and open Settings, select Payments, where you can configure multiple payment methods and payment gateways for customers to choose from.
Setup to Post Transactions in QuickBooks Based on Payment Method:
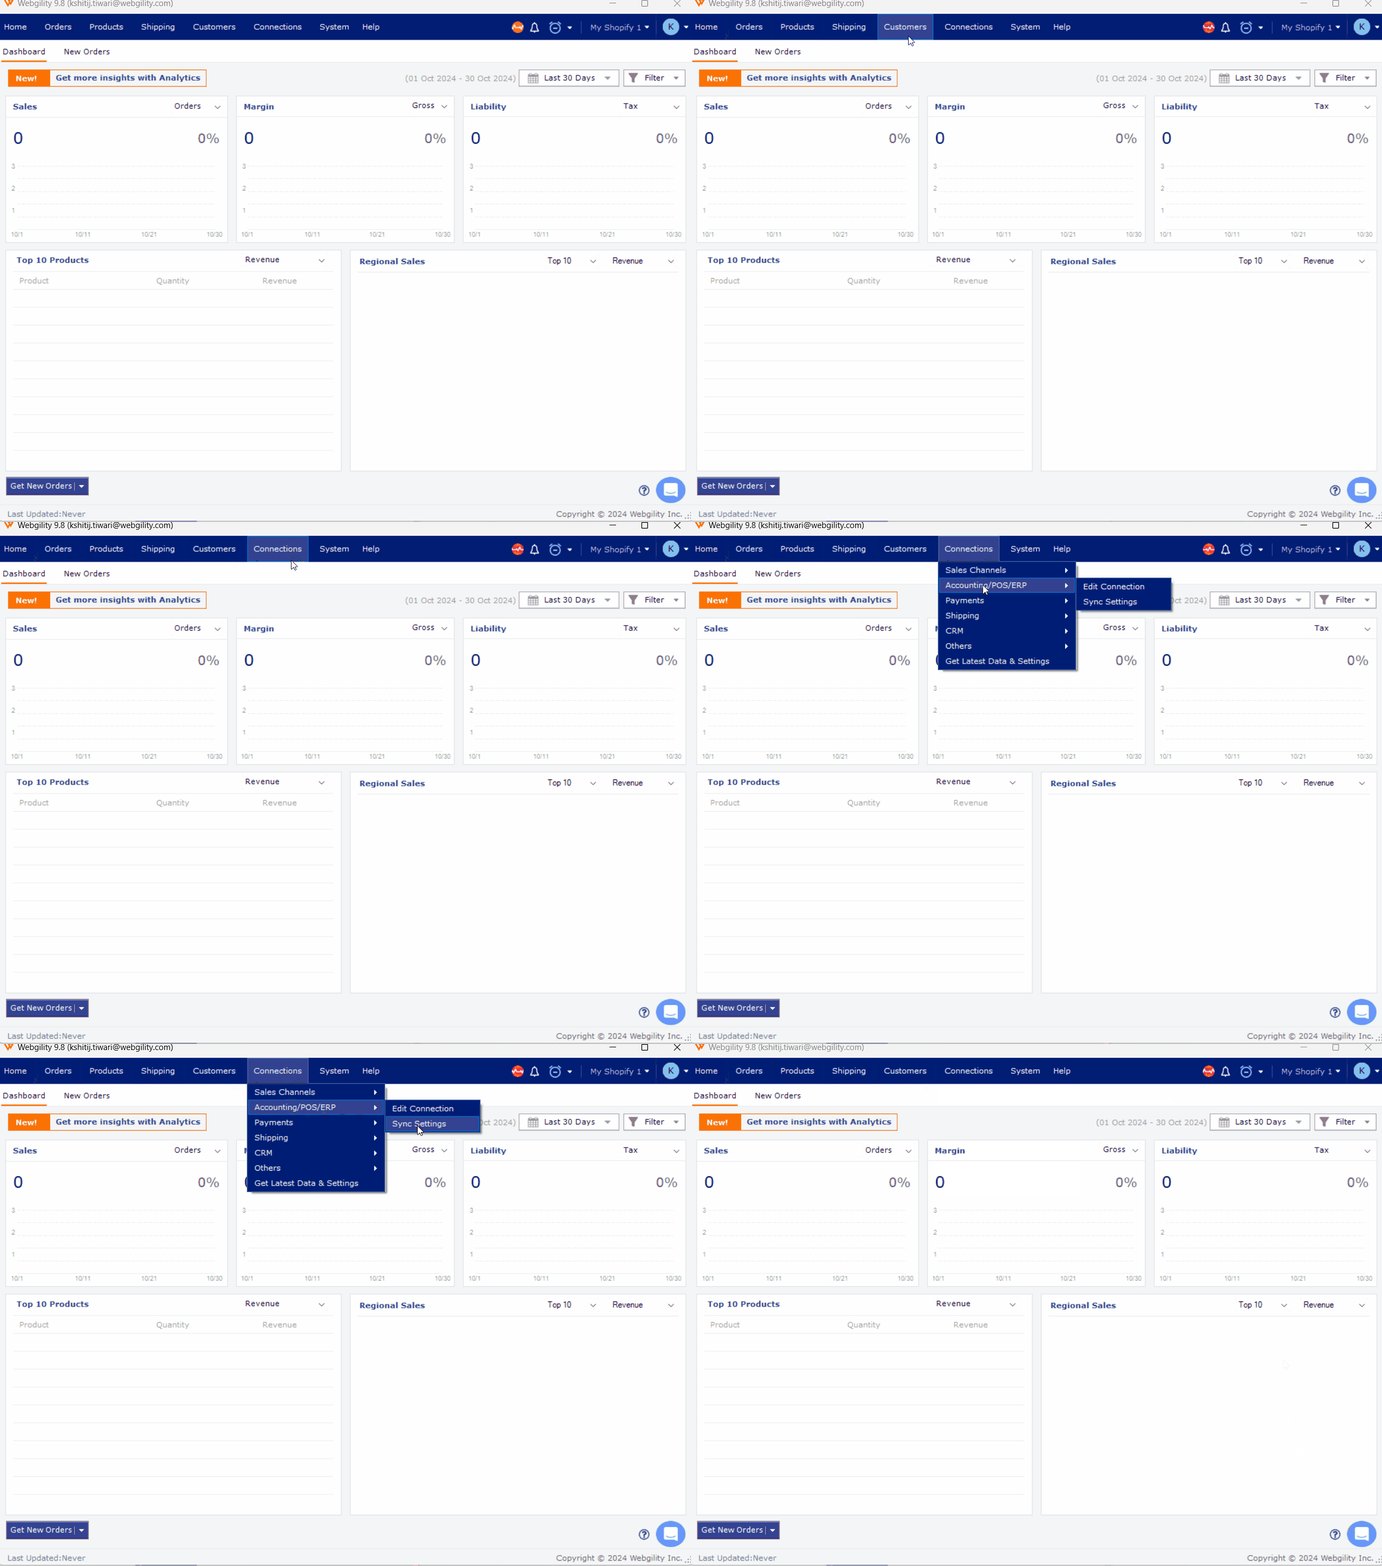
1. Go to the Connections section, select Accounting/POS/ERP, and then click Sync Settings.
2. Navigate to Orders, in the Posting Rules tab, under "Select the transaction type for posting orders", select the option "Post differently based on”. Then from the drop-down select “Payment Method”
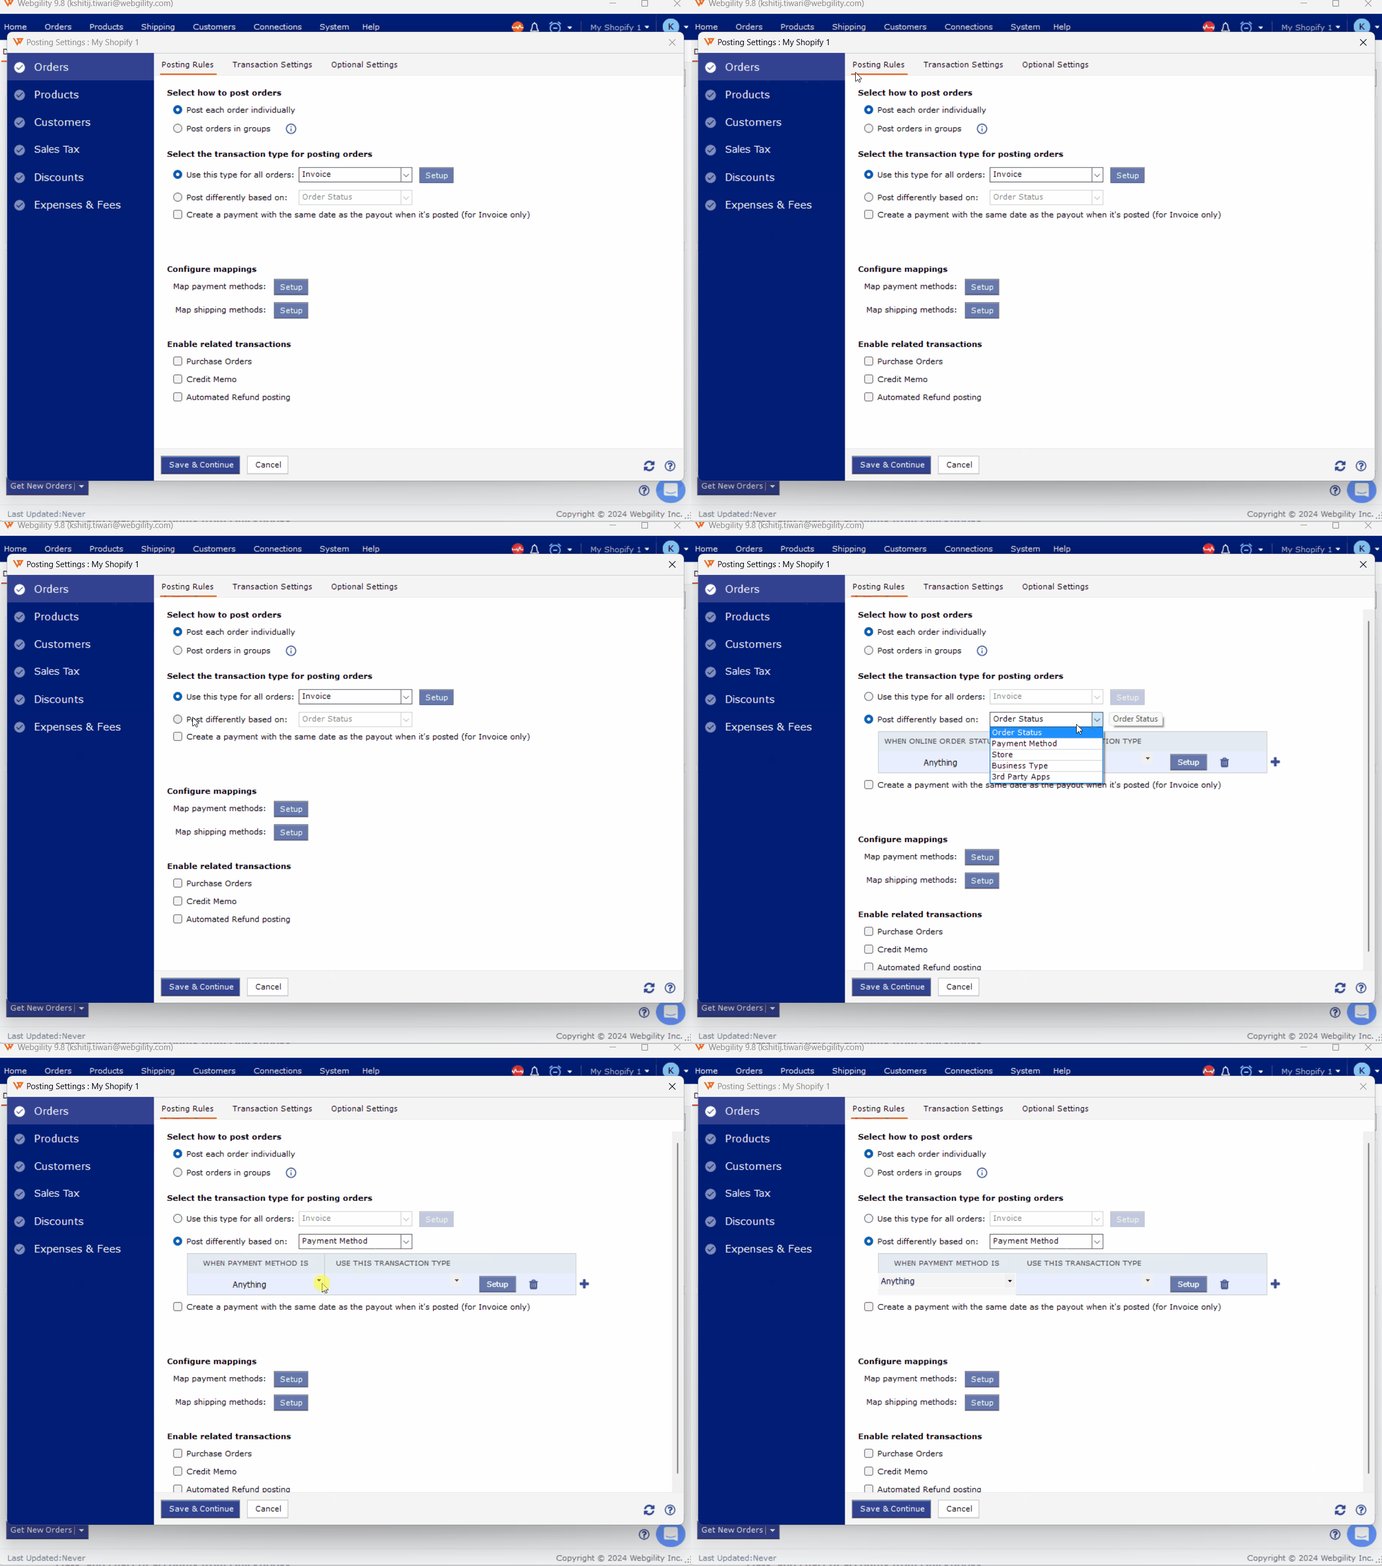
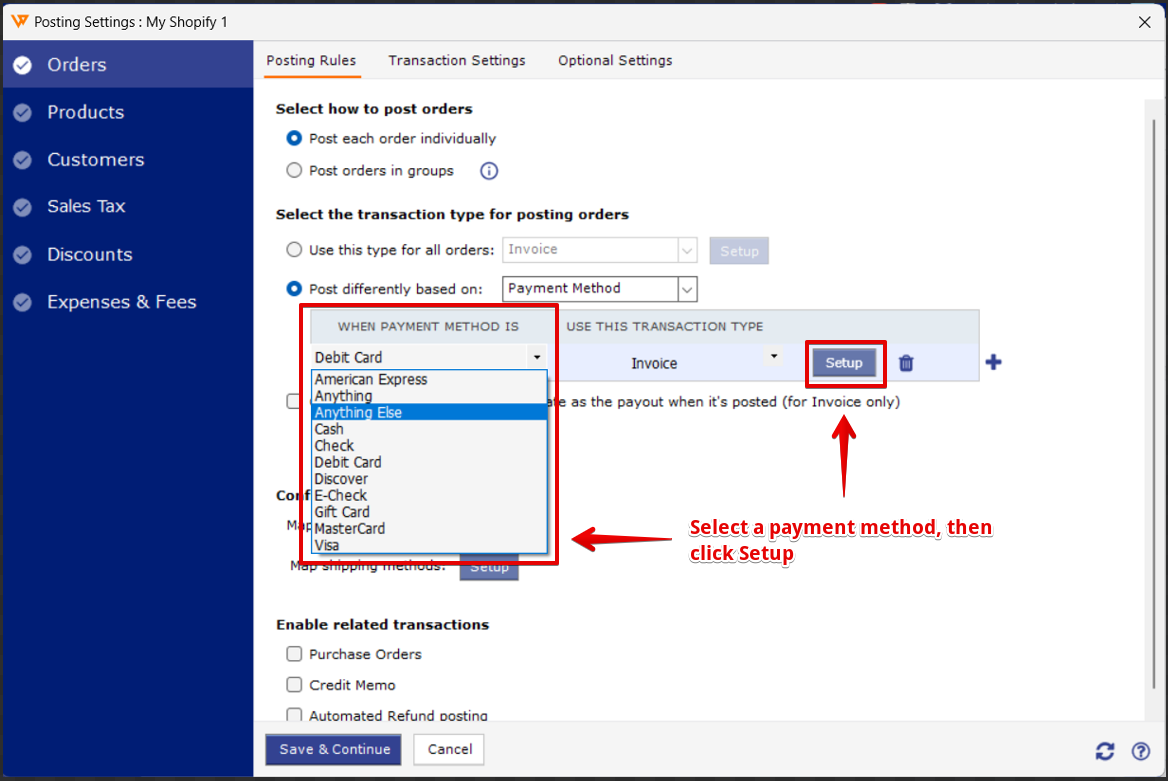
3. Select the payment method from the drop-down menu and choose the desired transaction type (Invoice, sales receipt, sales order, estimate) to post orders into QuickBooks using this selected payment method. Click Setup.
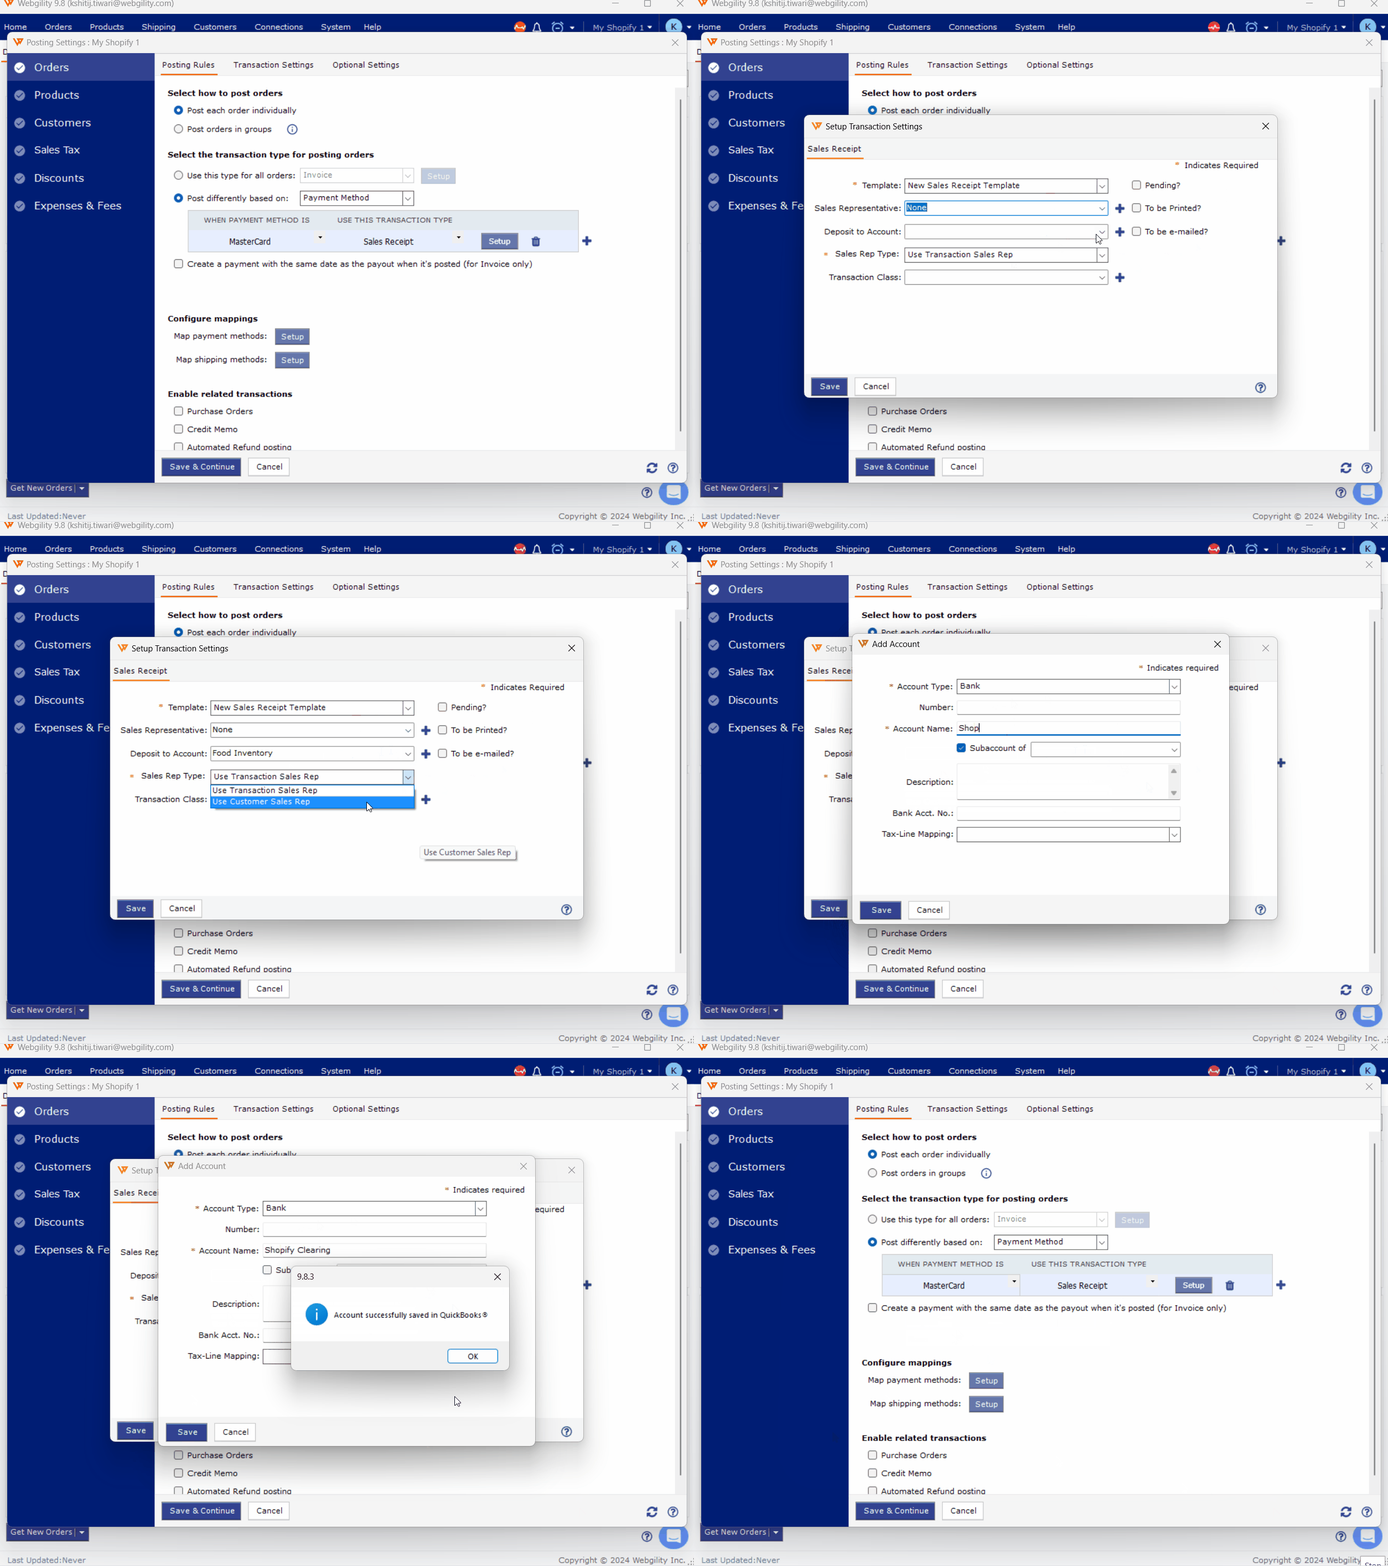
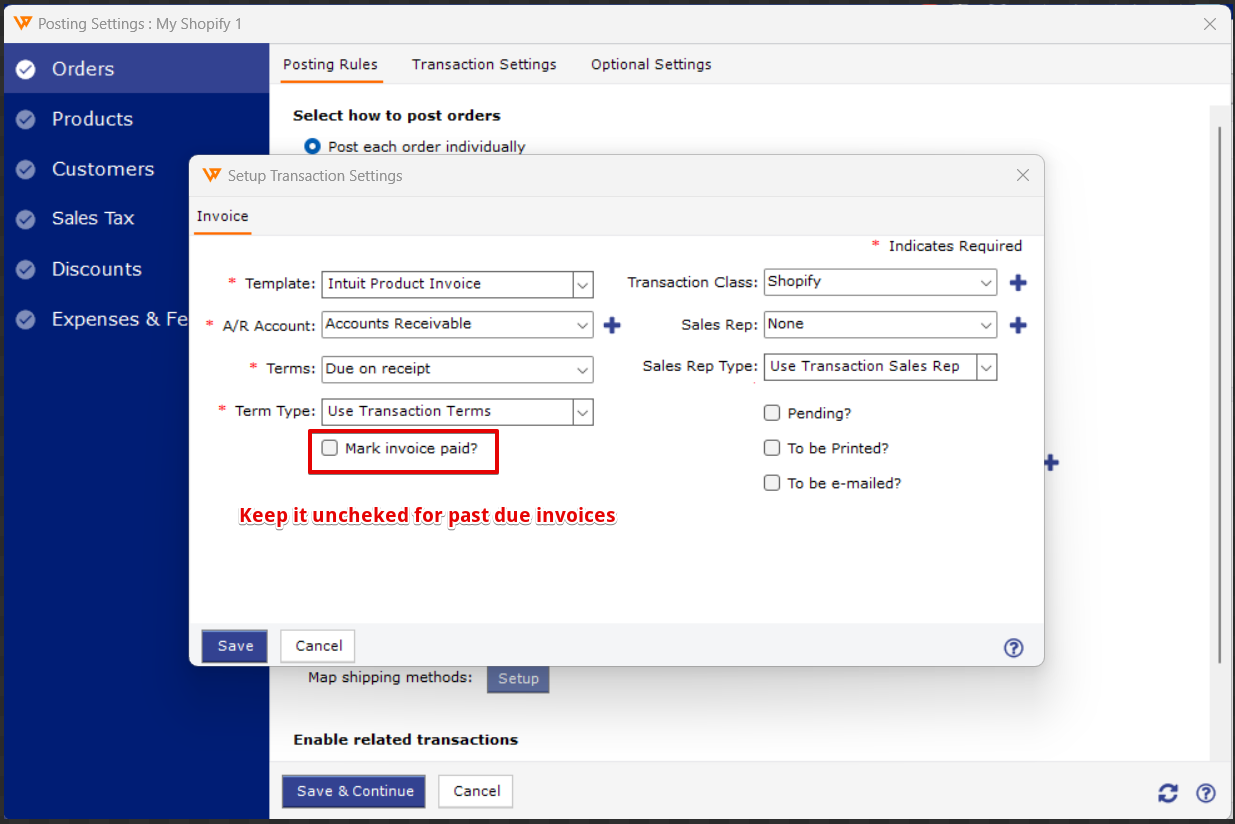
4. Under Setup, you can define the template, terms, sales rep, transaction class, and chart of accounts from QuickBooks.
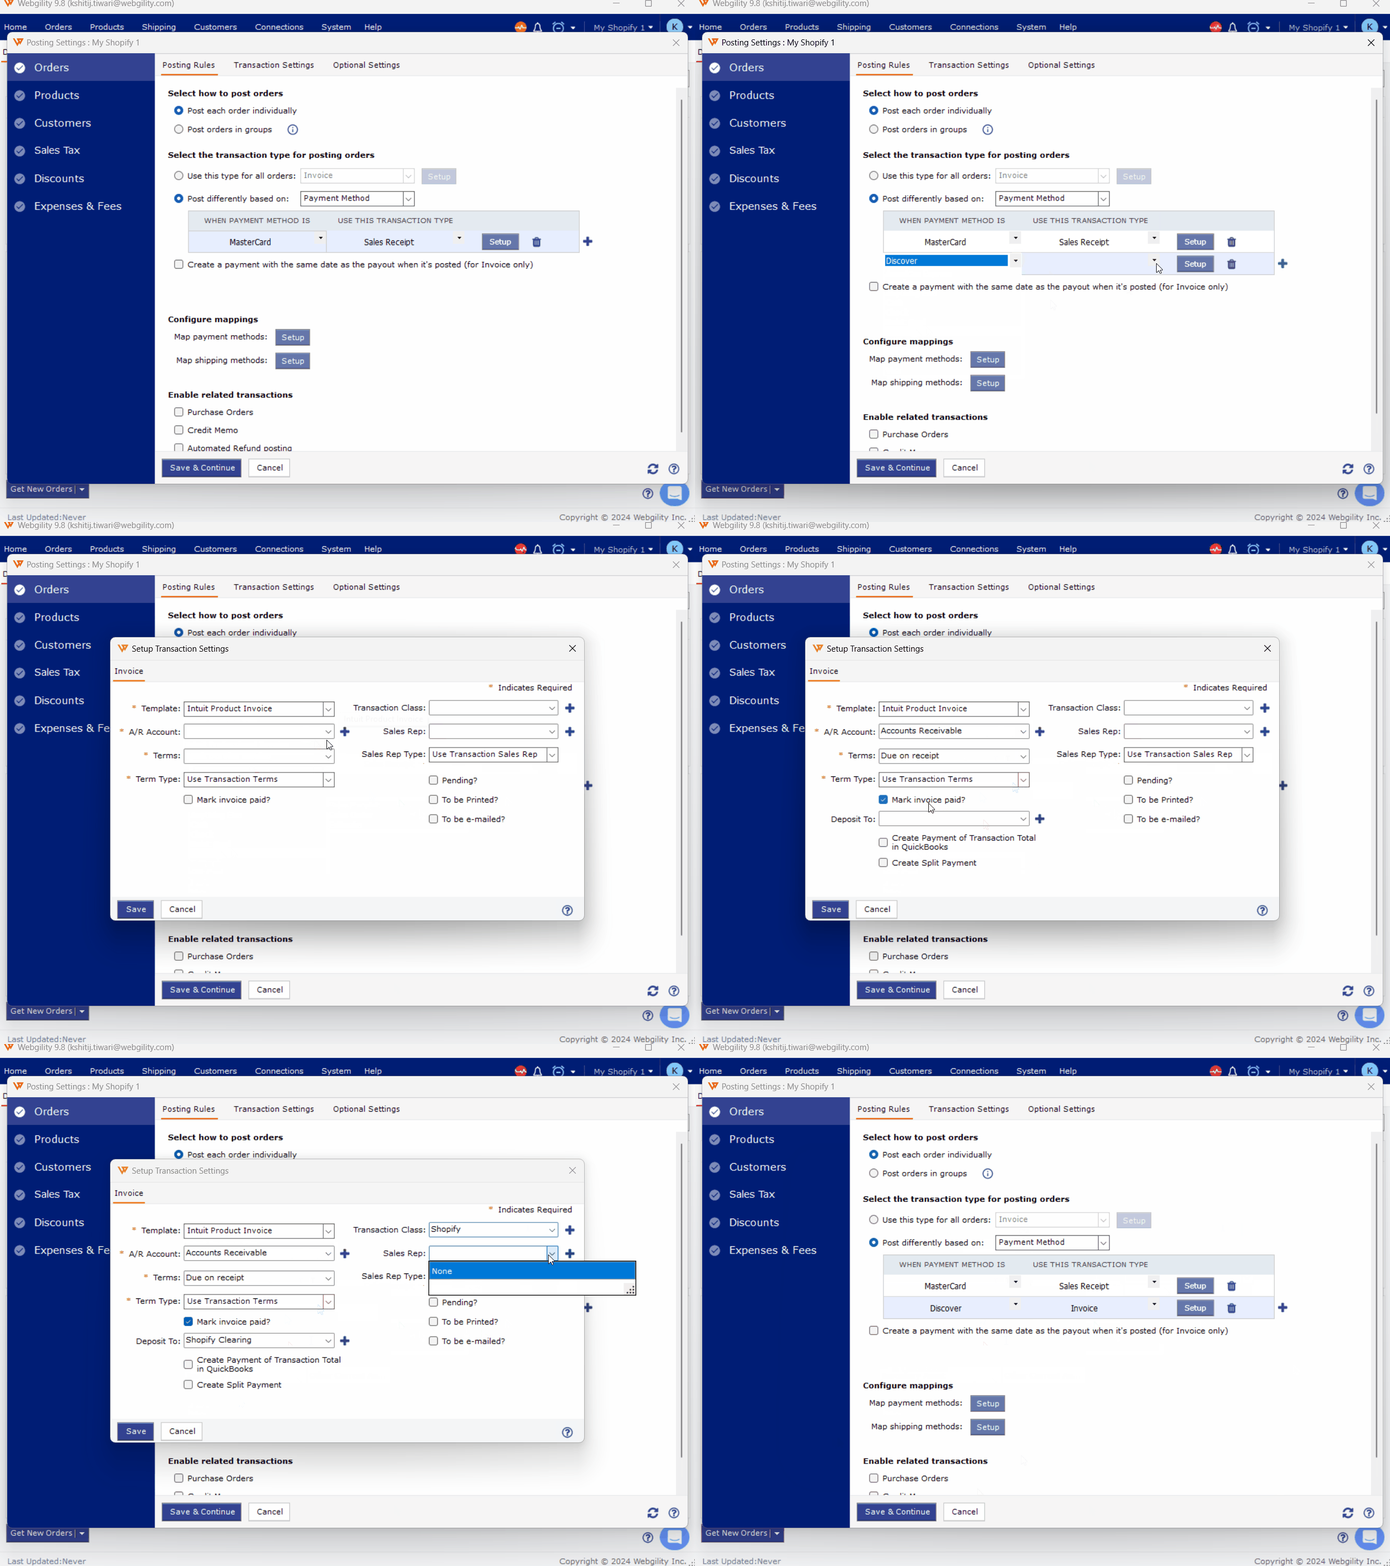
5. Click on the + icon to add other payment methods, if needed, and set up rules for it.
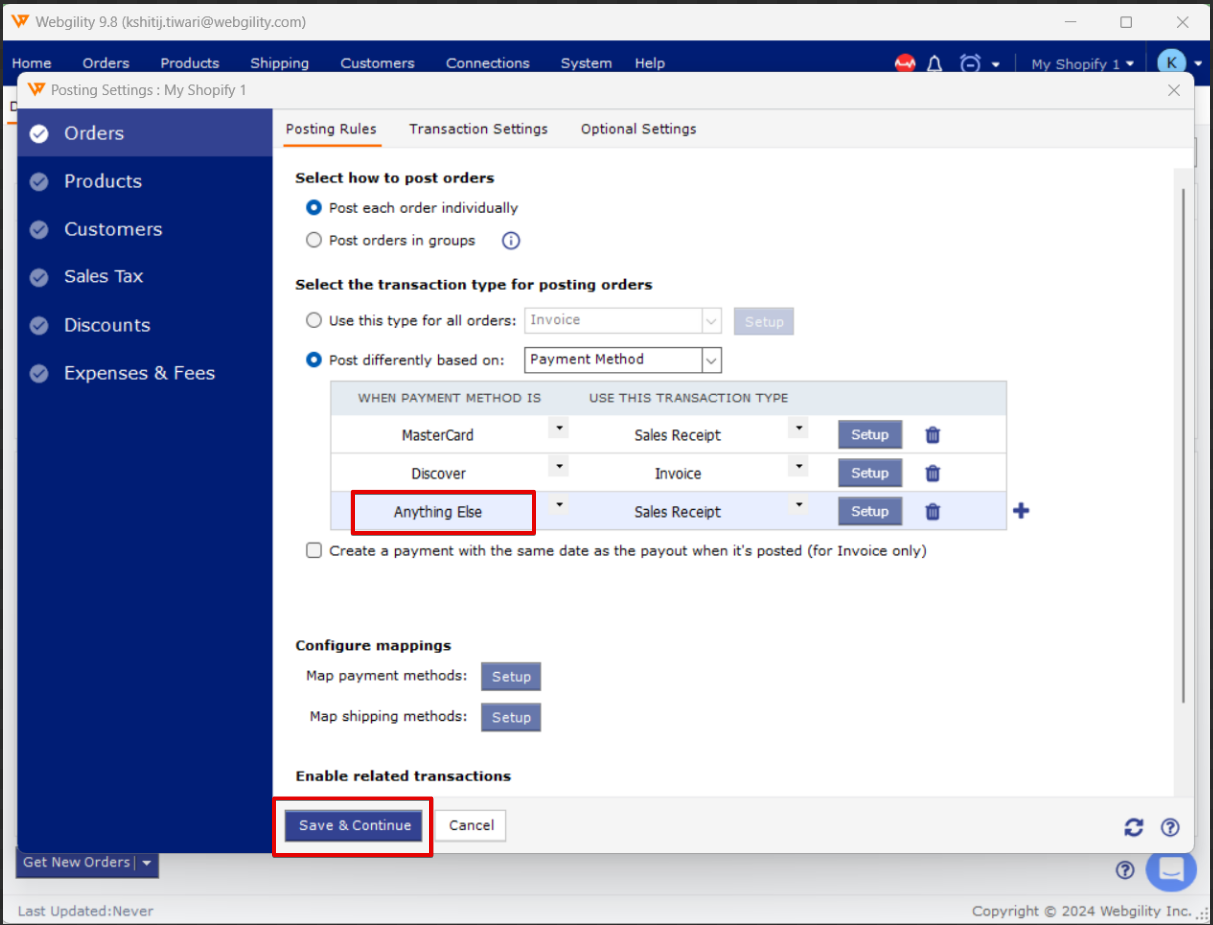
6. After all the payment methods and their rules are defined, it is mandatory to set up a rule for Anything else. Then click Save & Continue to finish.
Note:
-
For payment method Shopify_Payments select the mark invoice paid option and choose a Deposit to account. It is recommended that we choose the Invoice option as the transaction to be created in the accounting system for payout reconciliation.
-
Shopify Payout Reconciliation in Webgility Desktop (with QuickBooks Desktop Integration)
-
Shopify Payout Reconciliation in Webgility Desktop (with QuickBooks Online Integration)
-
-
For Unpaid invoices (Past Due) leave the Mark invoice as paid option check box blank.
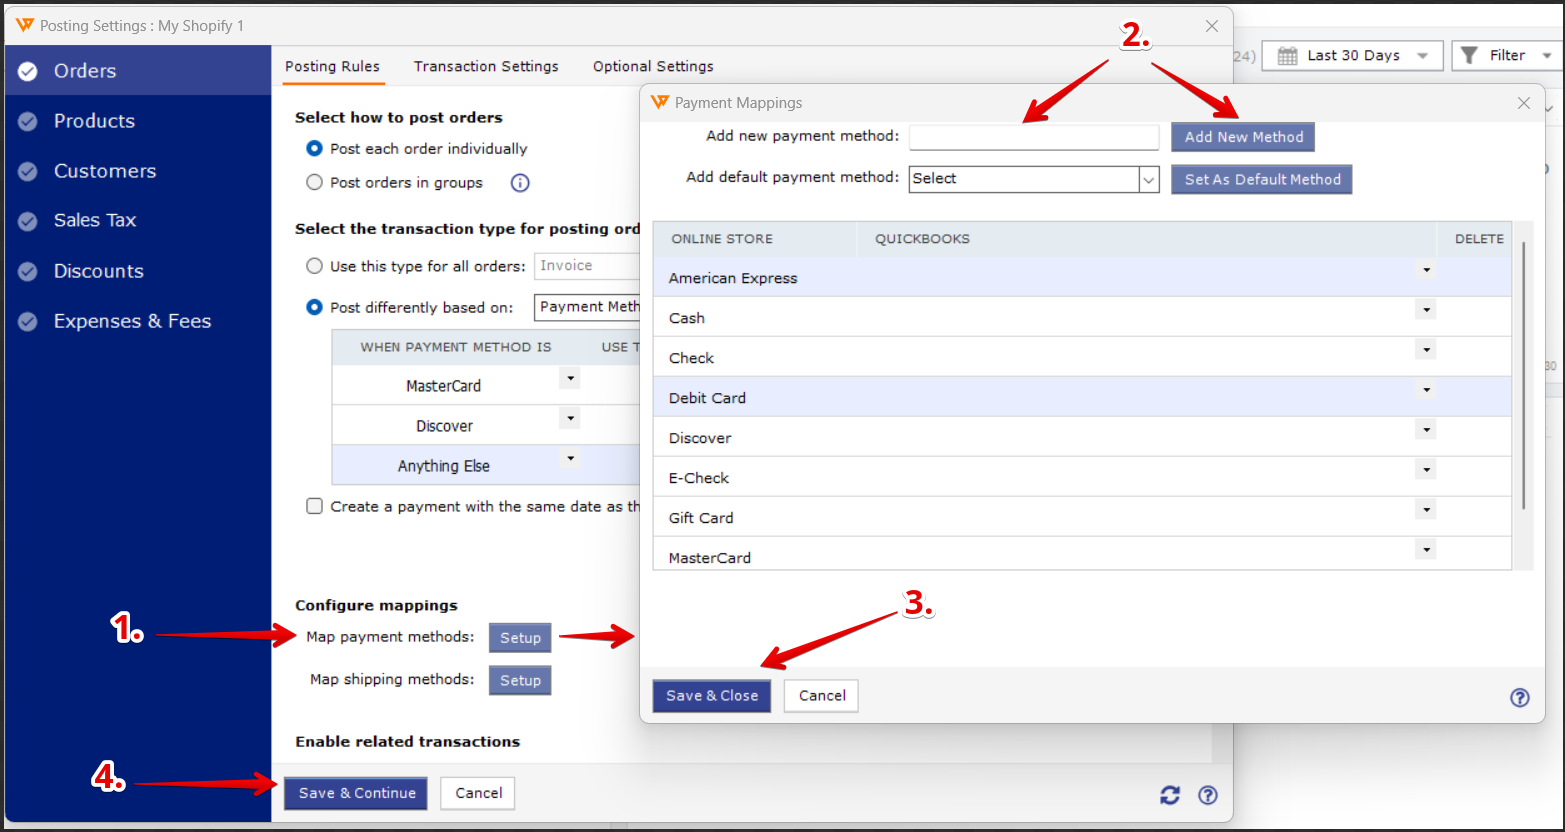
Are payment Methods not showing up in the dropdown? Here is how to add additional payment methods:
1. Click Setup under Configure mappings> Map Payment Method
2. In the new Payment Mappings window that pops up, enter the name of the payment method and click Add New Method.
3. Then click Save & Close.
4. Click Save & Continue in the main window to complete the addition of this payment method.
Disclaimer 1:
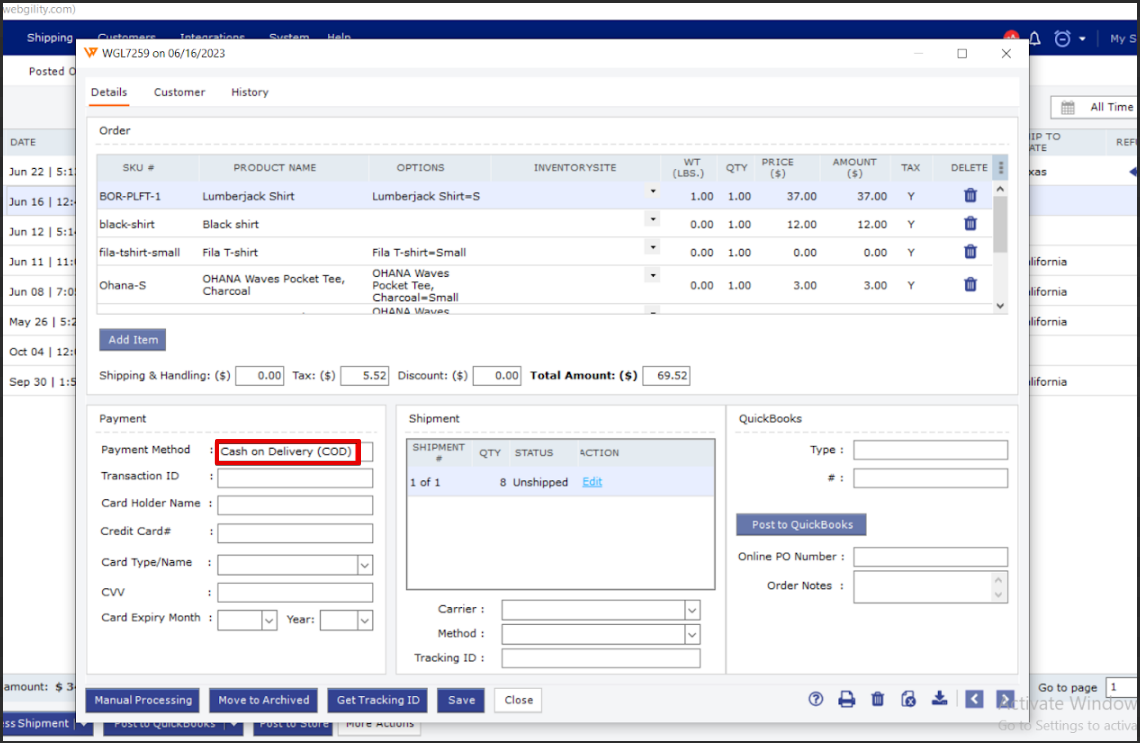
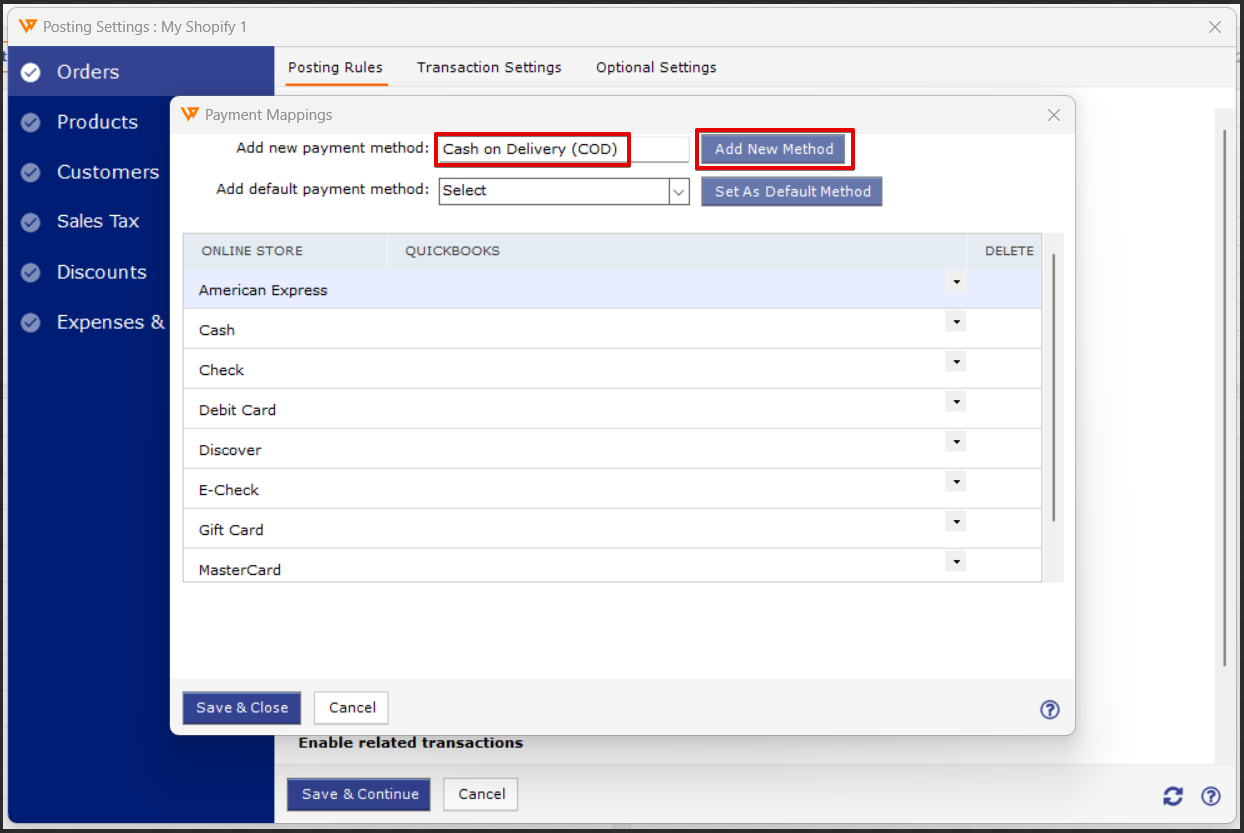
When adding a new payment method, please ensure that you navigate to the orders section and copy the precise payment method that is associated with each order. When adding the new method, paste it directly into the designated box.
Disclaimer 2:
If you are unable to find the payment method in the drop-down that you have recently added, Simply go back to the dashboard and come back to the posting settings again.
Pro Tips:
Remove Unnecessary Payment Methods
Streamlining your sales process is crucial for enhancing customer experience. If you identify payment methods that are not essential for your business, consider removing them. Here’s how to do it:
-
Access Settings: Log in to your sales channel's settings (e.g., Shopify, WooCommerce, BigCommerce).
-
Navigate to Payment Methods: Find the Payment Methods section within the settings.
-
Select and Remove: Identify the manually added payment method you wish to eliminate, then click on Delete or Disable.
-
Save Changes: Ensure you save the changes to apply them.
By removing irrelevant payment options, you can reduce confusion during checkout, allowing customers to see only the most relevant payment methods.
Avoid Confusing Names
When creating manual payment methods, choose names carefully. Avoid generic terms that could be mistaken for online gateway options, such as "Credit Card," "Visa," or "MasterCard." This will help prevent any misunderstandings and ensure clarity for your customers.