How to fix List element Error
The error "List element is already in use" typically occurs in software applications or programming when attempting to add an element to a list or database that already exists in that list or database. This error can occur for various reasons, including:
-
Duplicate entries: If the list or database already contains an entry with the same value as the one you are trying to add, you may encounter this error. The system may not allow duplicates and may produce this error to prevent them.
-
Race conditions: If multiple users or processes are attempting to modify the list or database simultaneously, it is possible that one user or process may attempt to add an element that another user or process has already added. This can result in the "List element is already in use" error.
To resolve the error, you should first check the list or database to see if the element already exists. If it does, remove the duplicate or update the existing entry instead of trying to add a new one. If race conditions are the cause, you may need to implement better concurrency control or locking mechanisms to prevent multiple users or processes from modifying the list or database simultaneously.
Troubleshooting
1. To download the latest accounting data, please follow these steps:
How to Download the Latest Accounting Data from Scratch
2. To check if the "Customer Name" is already in use in QuickBooks as a Vendor or Employee, please follow these steps:
-
Open QuickBooks and navigate to the Customers tab.
-
Click on Customer Center.
-
Look for the "Customer Name" in question.
-
If the "Customer Name" is also used as a vendor or employee, QuickBooks will display a message indicating that the name is already in use.
-
If the "Customer Name" is not in use as a vendor or employee, you can proceed to download the latest accounting data in Webgility.
NOTE: It is important to avoid using the same name for multiple accounts in QuickBooks to ensure accurate financial reporting and analysis.
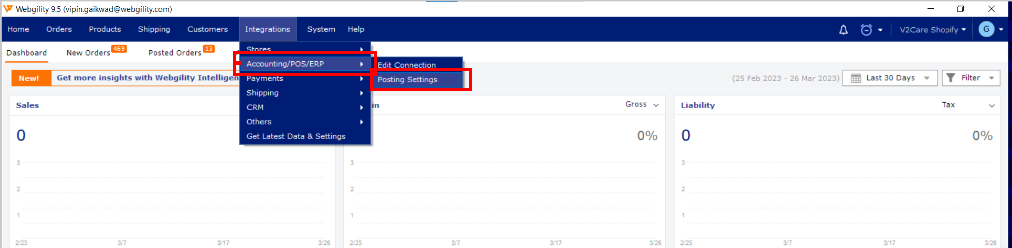
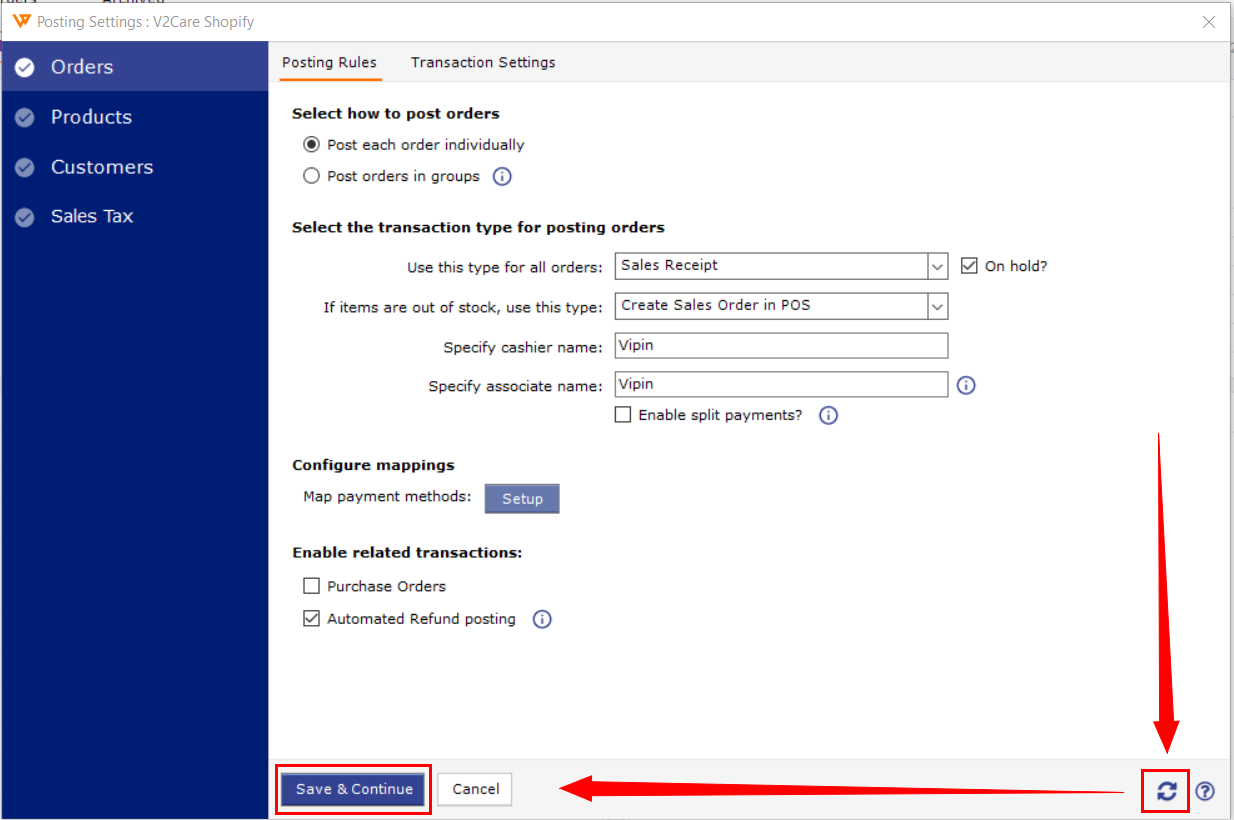
3. To refresh the posting settings in Webgility, please follow these steps:
-
Navigate to the Integrations menu.
-
Click on Accounting.
-
Select Posting Settings.
- Click the Refresh icon in the bottom right corner, and save the settings for each tab.
4. Try to post the order now and it should post to your QuickBooks.
Please feel free to contact Webgility Support and let us know if the issue still persists.