How to Connect Webgility Online with ShipStation
Follow these steps to connect Webgility to ShipStation.
Steps:
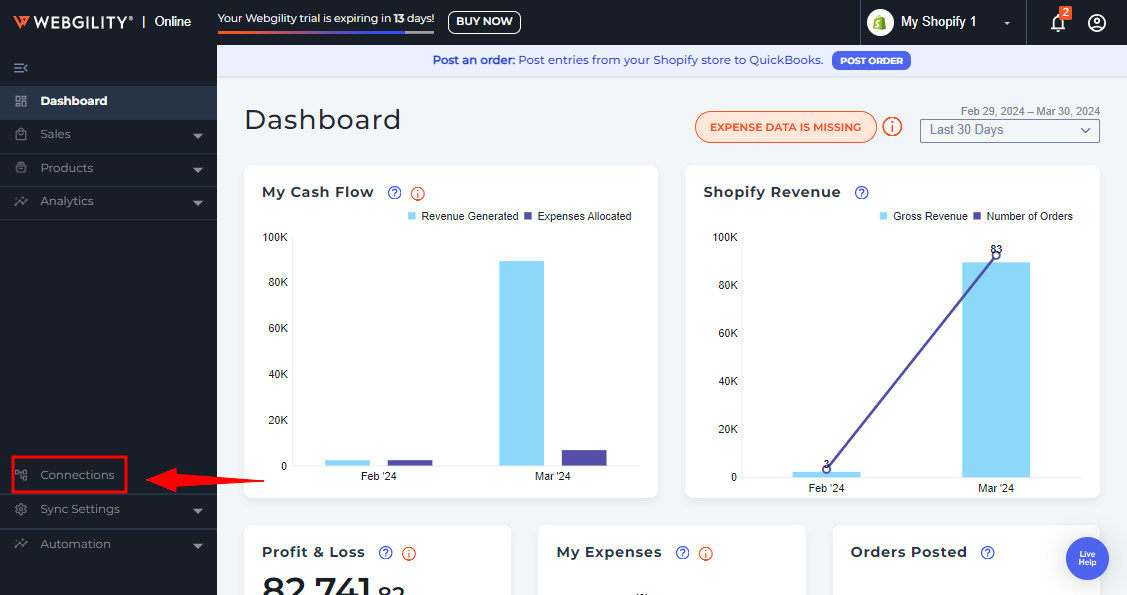
1. Navigate to Connections.
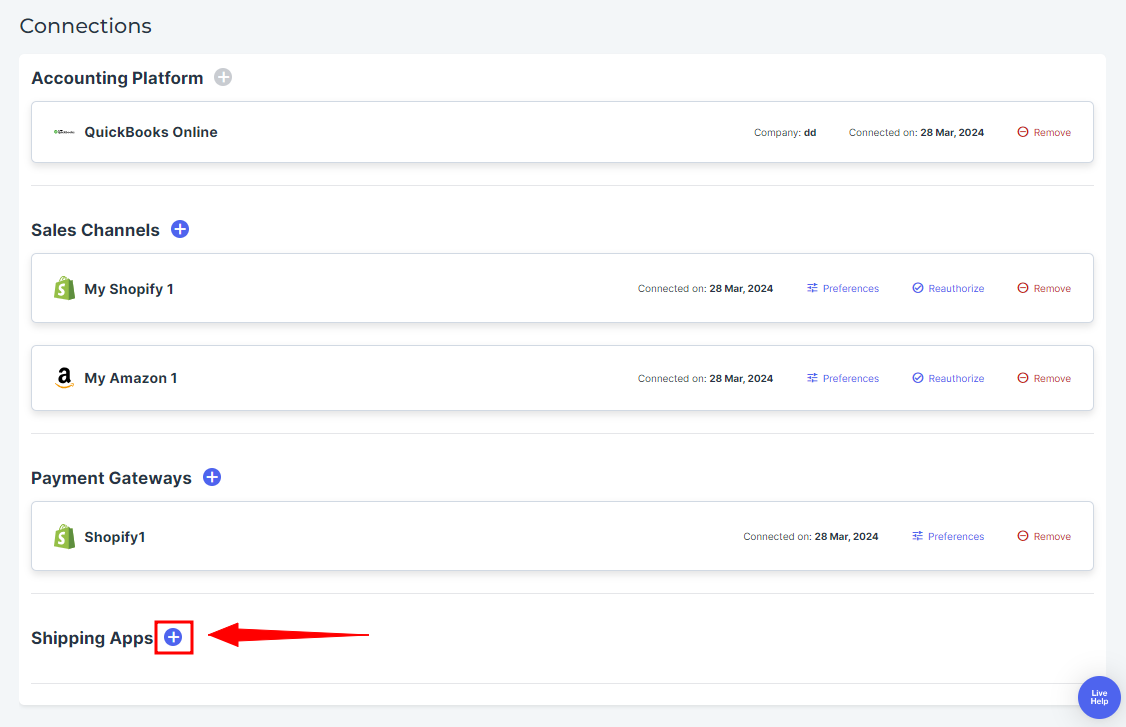
2. Please navigate to the Shipping Apps section and click on the "+" icon.
Note: If this is the first sales channel that you're setting up, read the getting started process here.
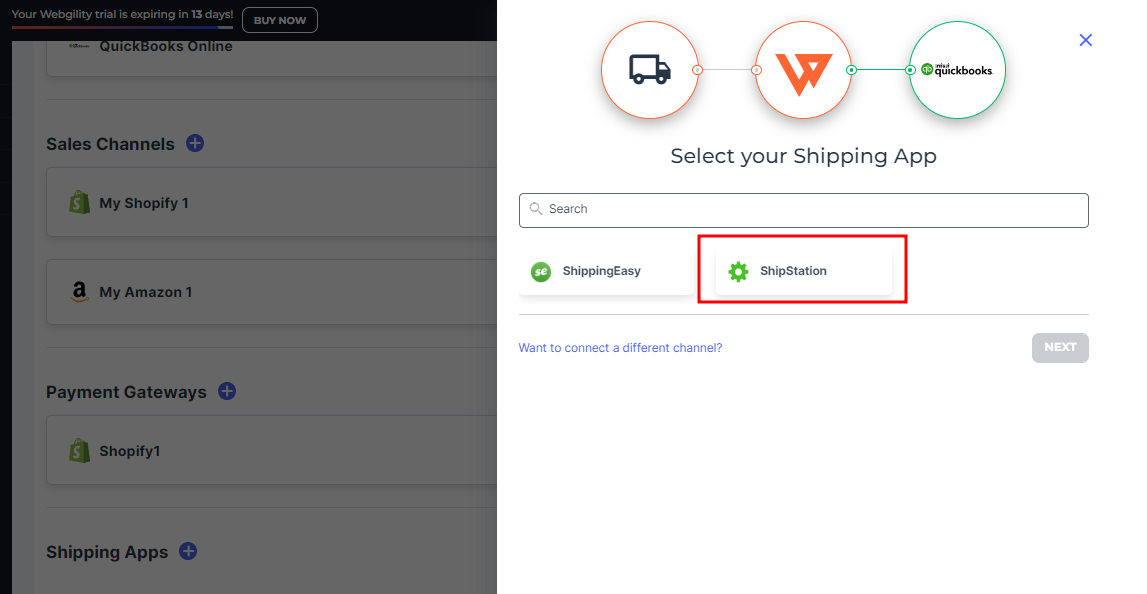
3. Select Shipstation and click Next.
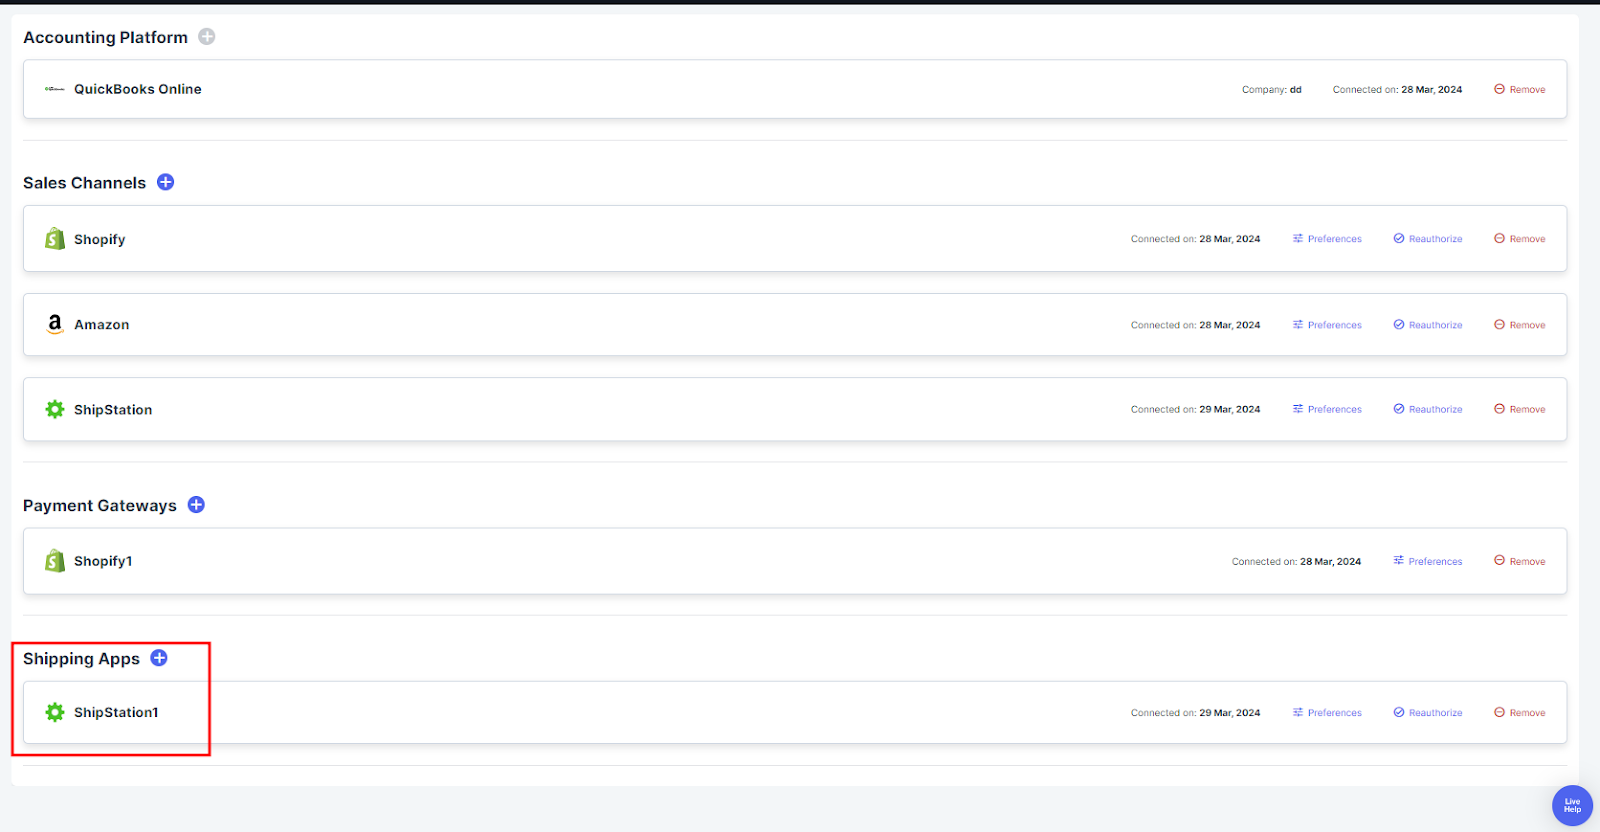
Note: When you add ShipStation as a sales channel, it will also add ShipStation under the shipping area to download shipping fees.
4. Then, enter the following details:
-
Email address
-
API key
-
API secret
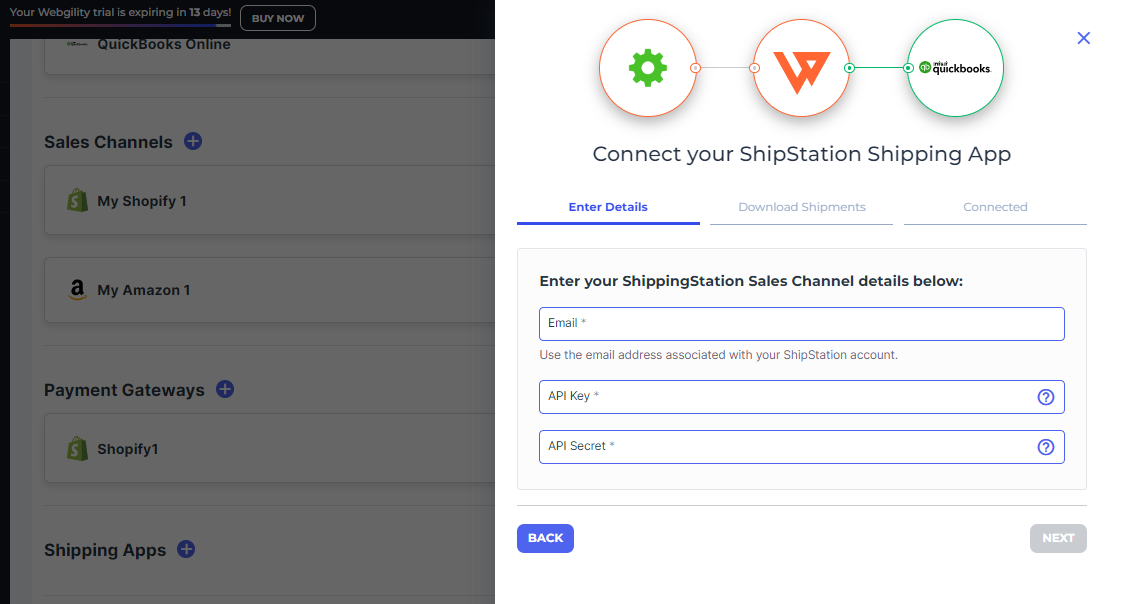
If you don't know these details, follow the below instructions.
How to Retrieve ShipStation Credentials
Log in to your ShipStation admin account and go to Account Settings. Under the account area click on API settings to retrieve the API Key and API Secret. If you don't see them here, click Generate.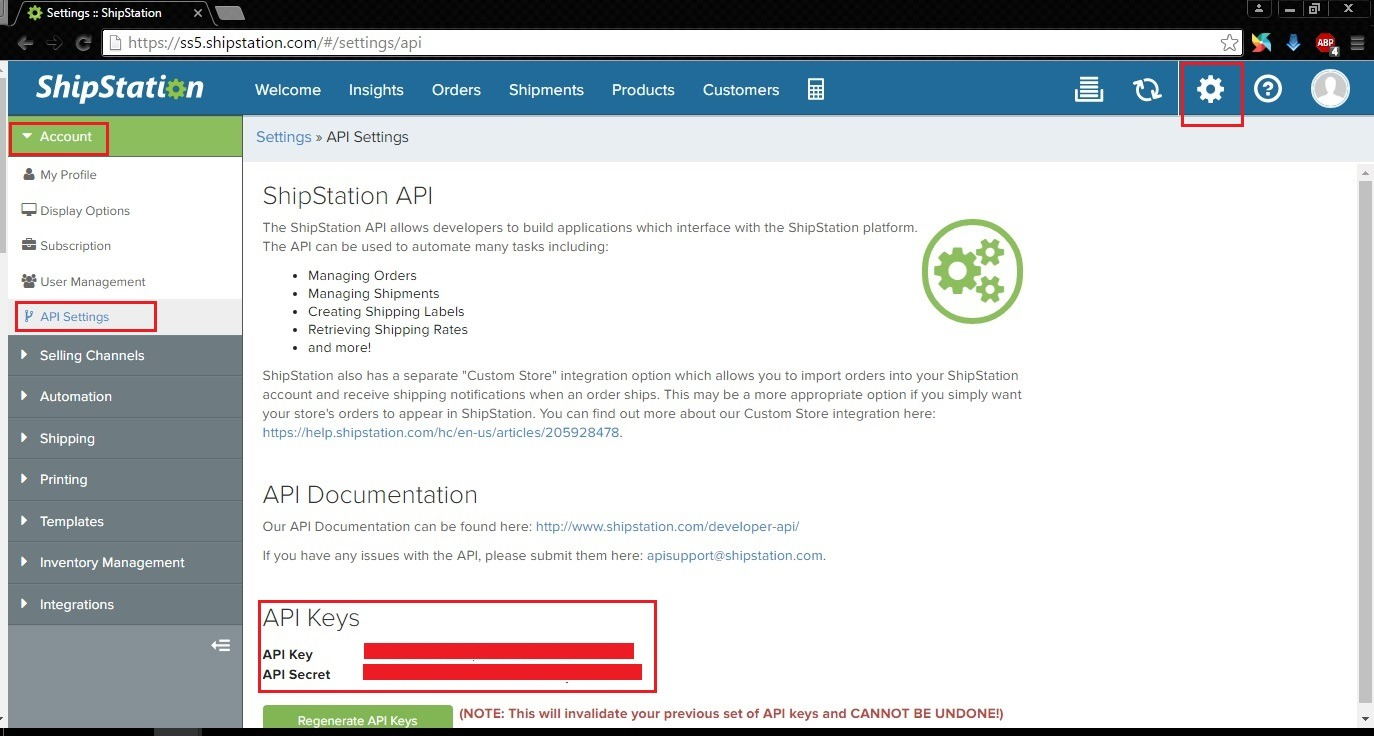
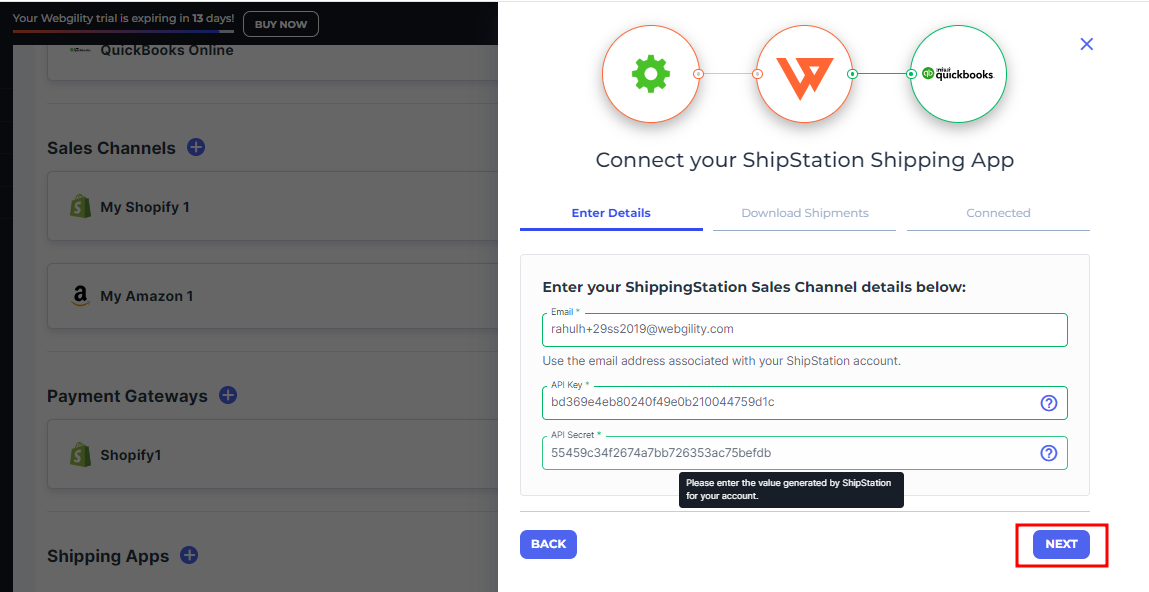
5. Copy the details, add them to Webgility Online, and click Next.
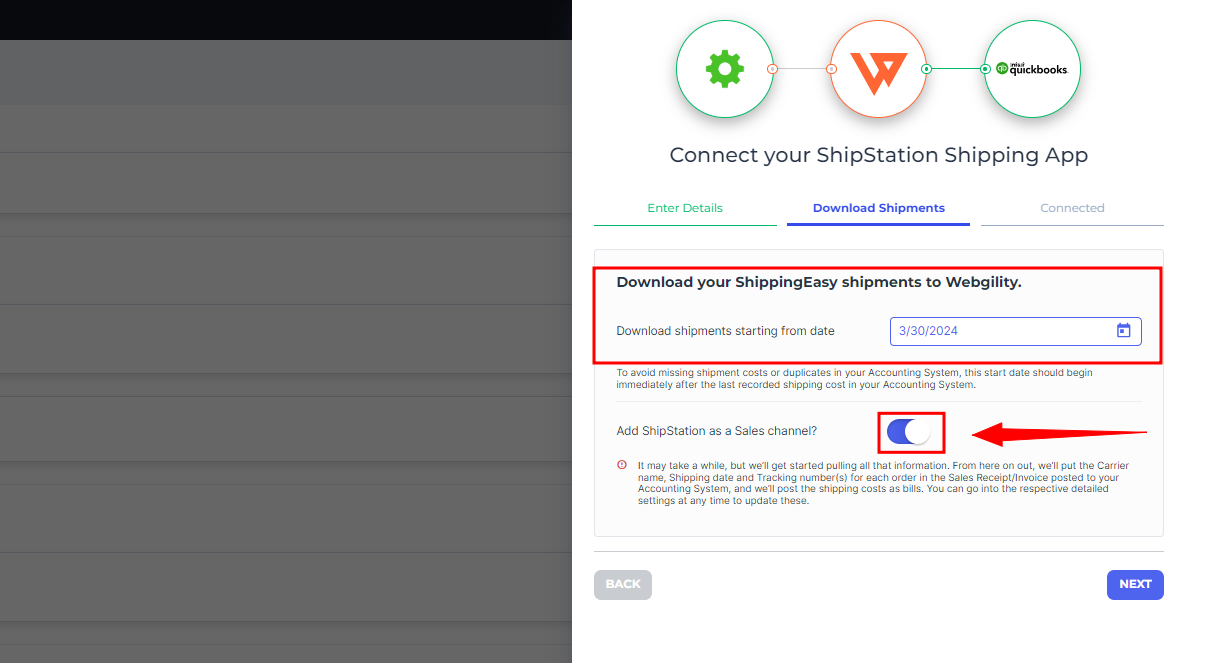
6. Afterward, you'll encounter various options to choose the date range for retrieving shipping costs. By default, you can download shipping costs for the past 90 days. Additionally, there's an option to enable Webgility Online to include ShipStation as an additional sales channel for downloading orders.
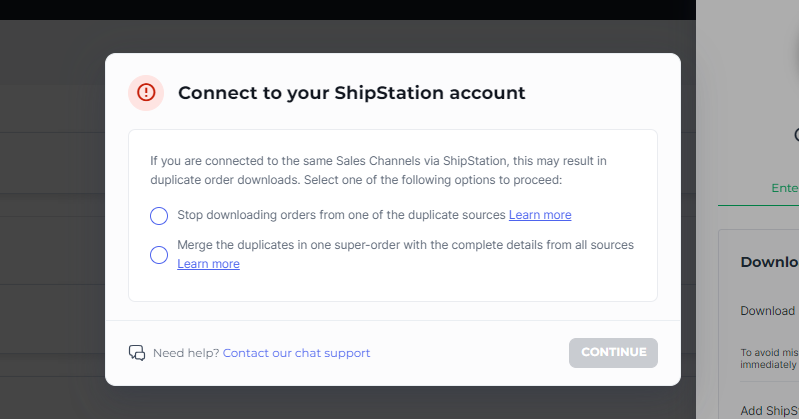
7. A pop-up window will appear where you can choose between options to prevent the download of duplicate orders or to merge duplicate orders into one super order.
8. Finally, you will receive a notification confirming the integration of ShipStation with Webgility Online. You can then proceed by selecting the "Finish" option.
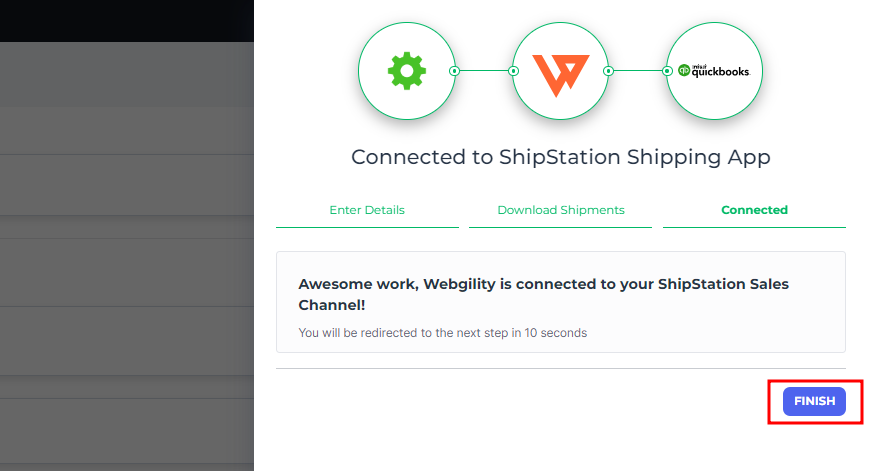
9. After the connection is established successfully, Webgility Online will begin downloading the shipping costs, starting from the selected date.