How to Connect Webgility Online with ShippingEasy
Follow these steps to get Webgility connected with ShippingEasy.
Steps:
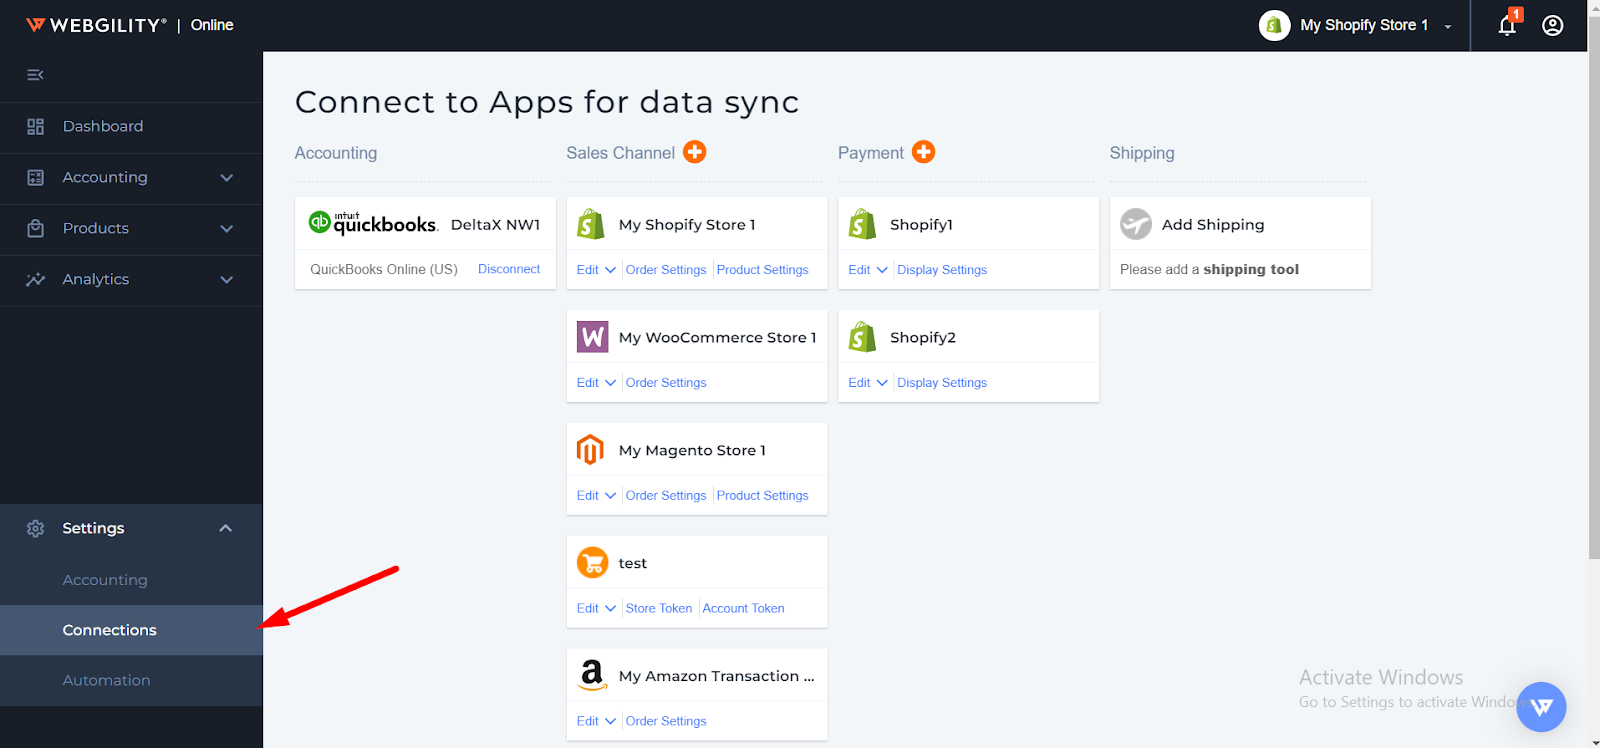
1. Navigate to Settings > Connections & click the orange plus sign next to Shipping.
Note, if this is the first sales channel that you're setting up, read the getting started process here.
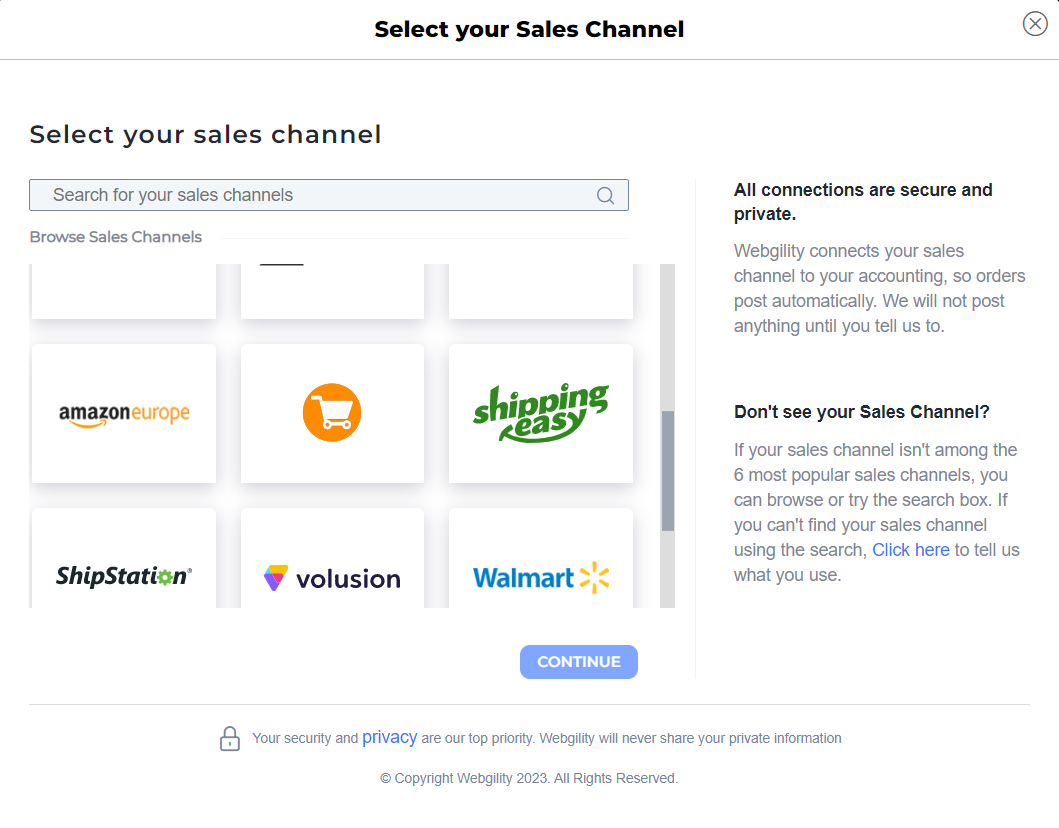
2. Select ShippingEasy and click Continue.
Note: When you add ShippingEasy as a sales channel, it will also add ShippingEasy under the shipping area to download shipping fees.
3. Then, enter the following details.
-
API key
-
API secret
API key
API secret
If you don't know these details, follow the below instructions.
How to Retrieve ShippingEasy Credentials
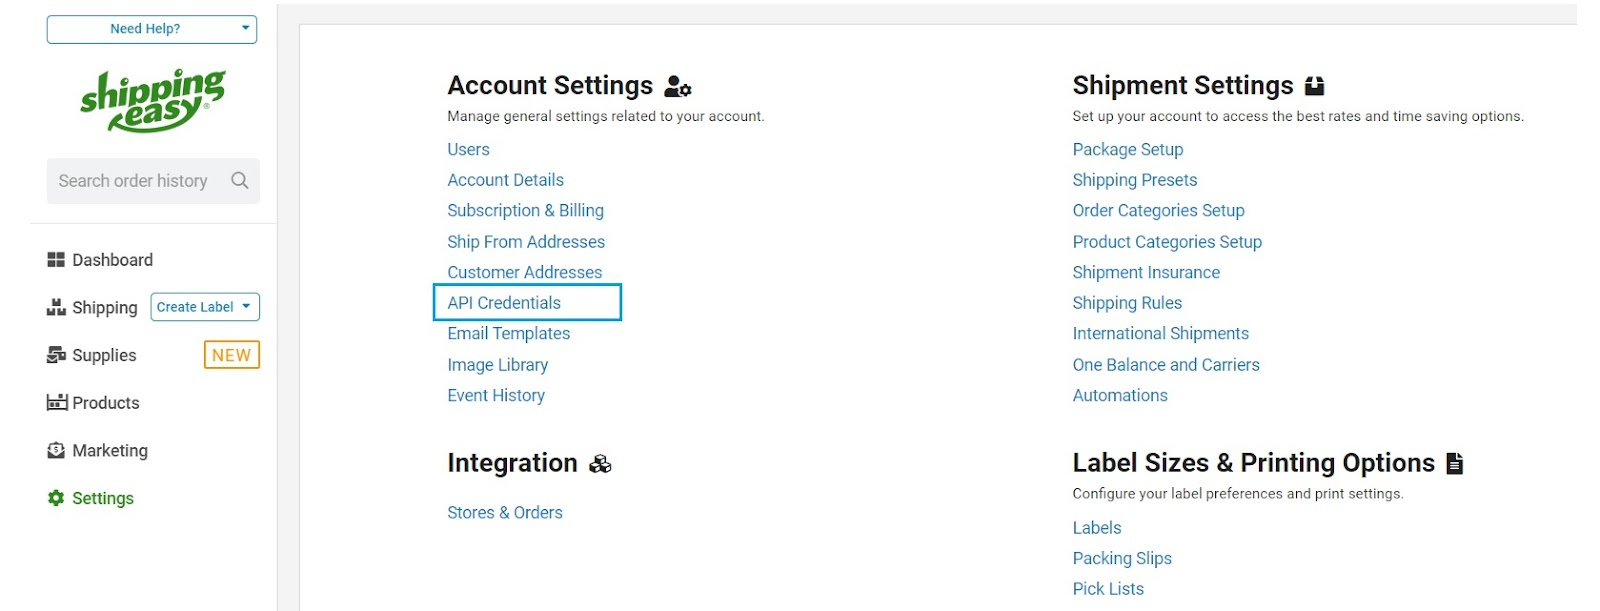
4. Log in to your ShippingEasy admin and go to Settings.

5. Under Account Settings click API Credentials.
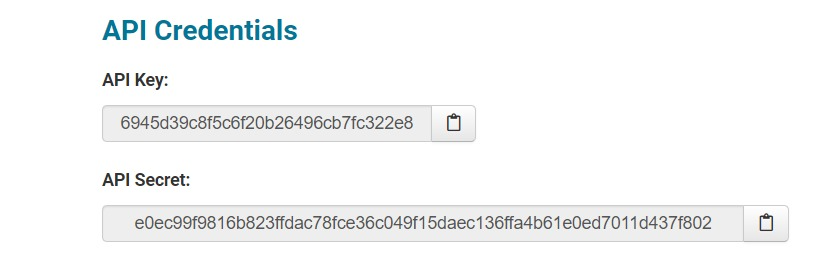
6. Copy the details and add them to Webgility Online, then click Connect.
7. Once successfully connected, Webgility Online will begin downloading orders and shipments from your ShippingEasy account and display them in Webgility. By default, the last 30 days and orders of all statuses will be downloaded. If you wish to download older orders of all statuses, you must adjust the settings in the connections area. You may see orders of more statuses in your ShippingEasy account; however, the ShippingEasy API provides orders of only these four statuses: shipped, cleared, ready for shipment, and drop shipped.