How to Connect Webgility Online with Magento
To integrate Webgility with Magento, you'll need to install the Webgility Extension, which necessitates access to your Sales Channel's FTP Information. Kindly reach out to your System Administrator or Hosting provider to obtain these details.
Steps:
1. Go to the Connections section and click on the ‘+’ symbol located beside the Sales Channel option.
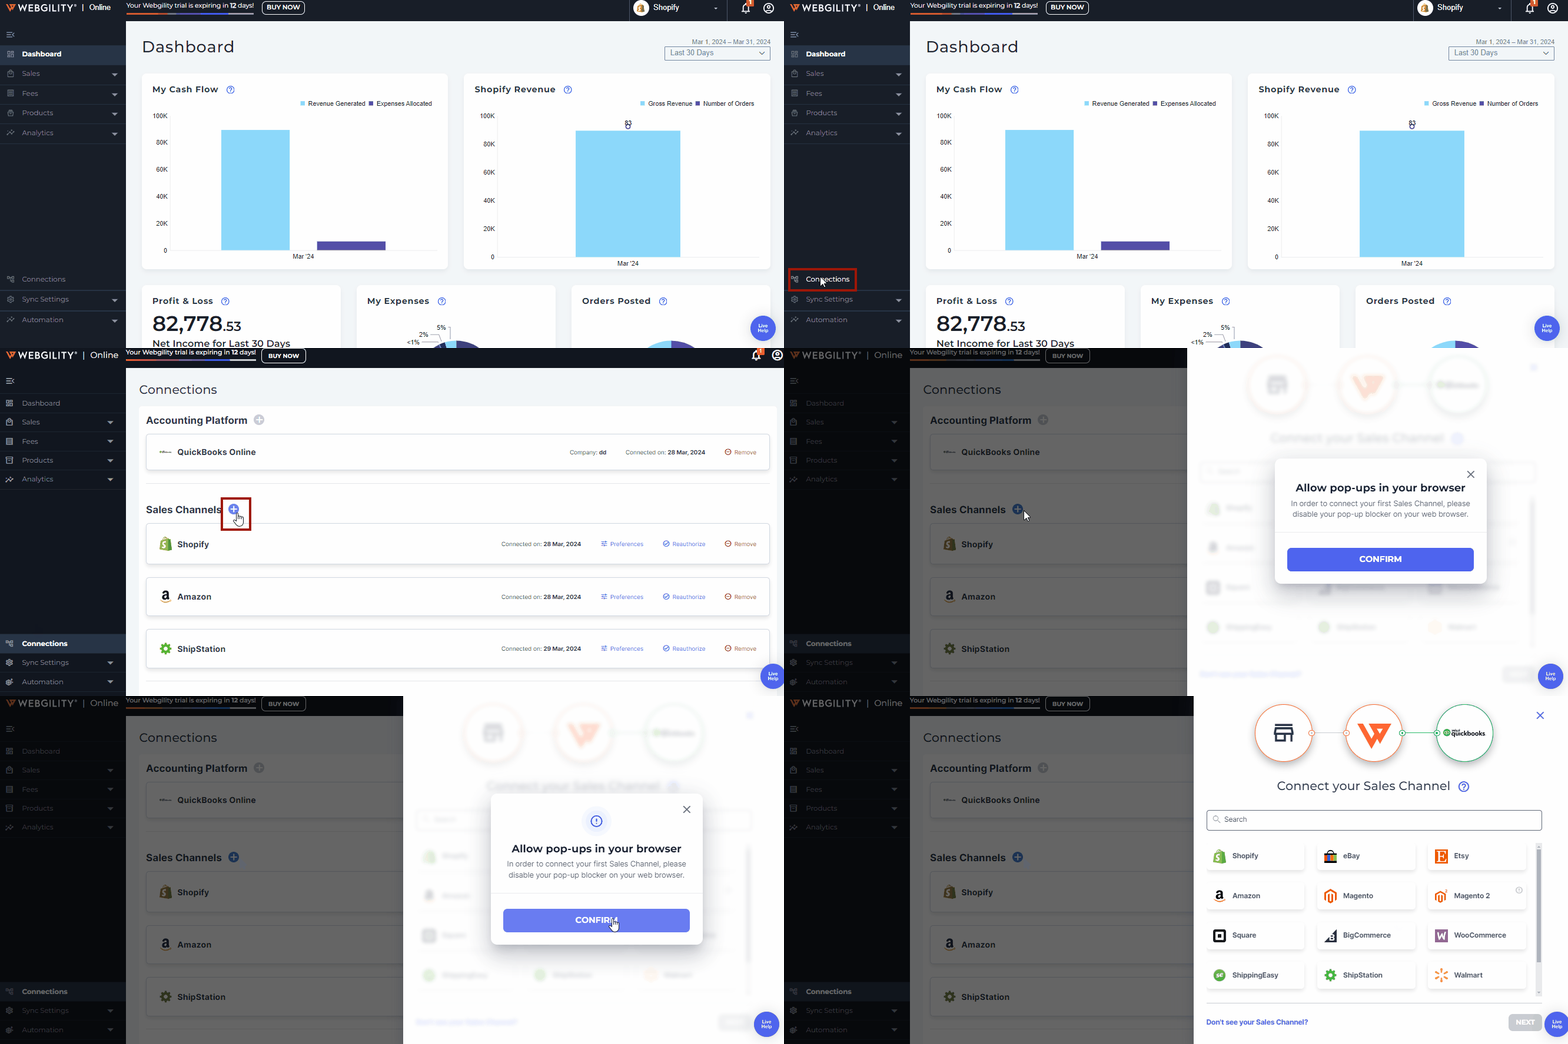
Note: if this is the first sales channel that you are setting up, read the getting started process, here.
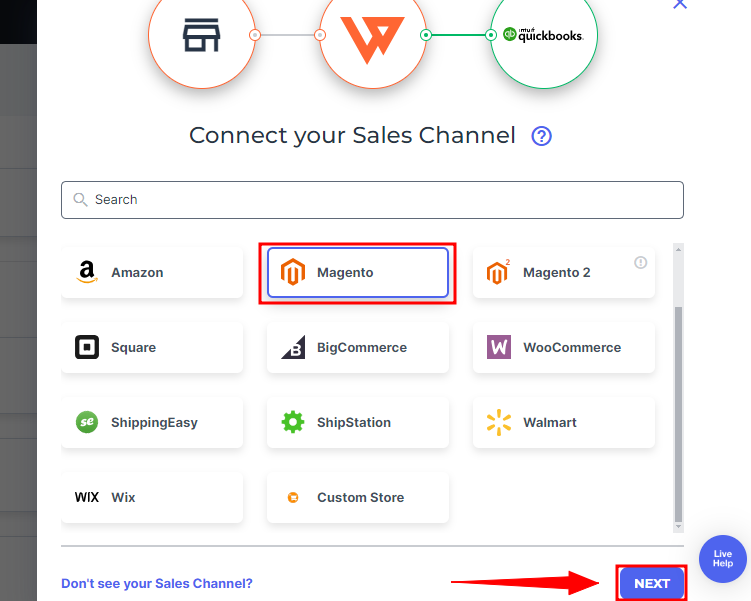
2. Select Magento, then click Next.
3. You’ll be redirected to the Install Webgility Extension Tab.
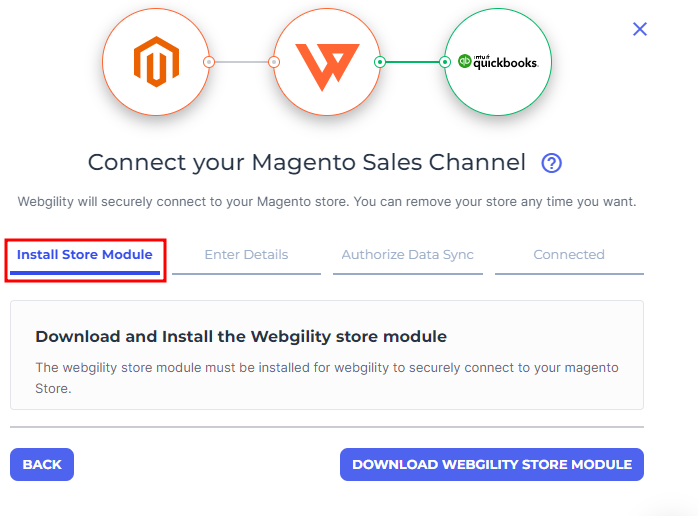
4. The subsequent step involves downloading the Webgility Extension file and installing it as a Magento extension.
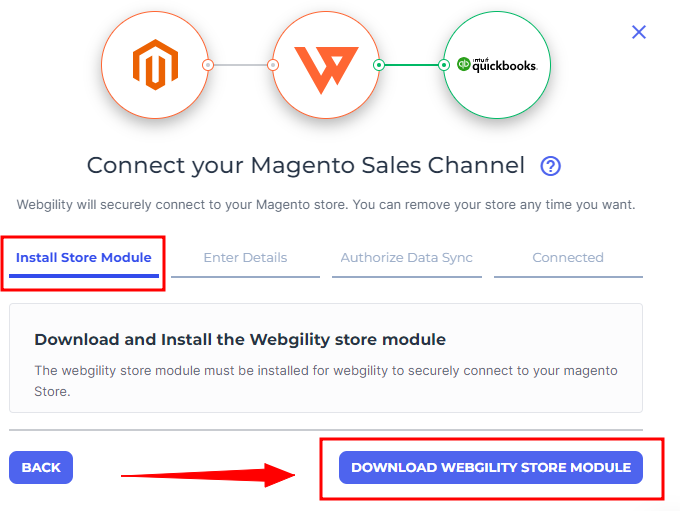
5. Once the Webgility Extension is downloaded, it will show the Next option at the button right corner then proceed with the Next option.
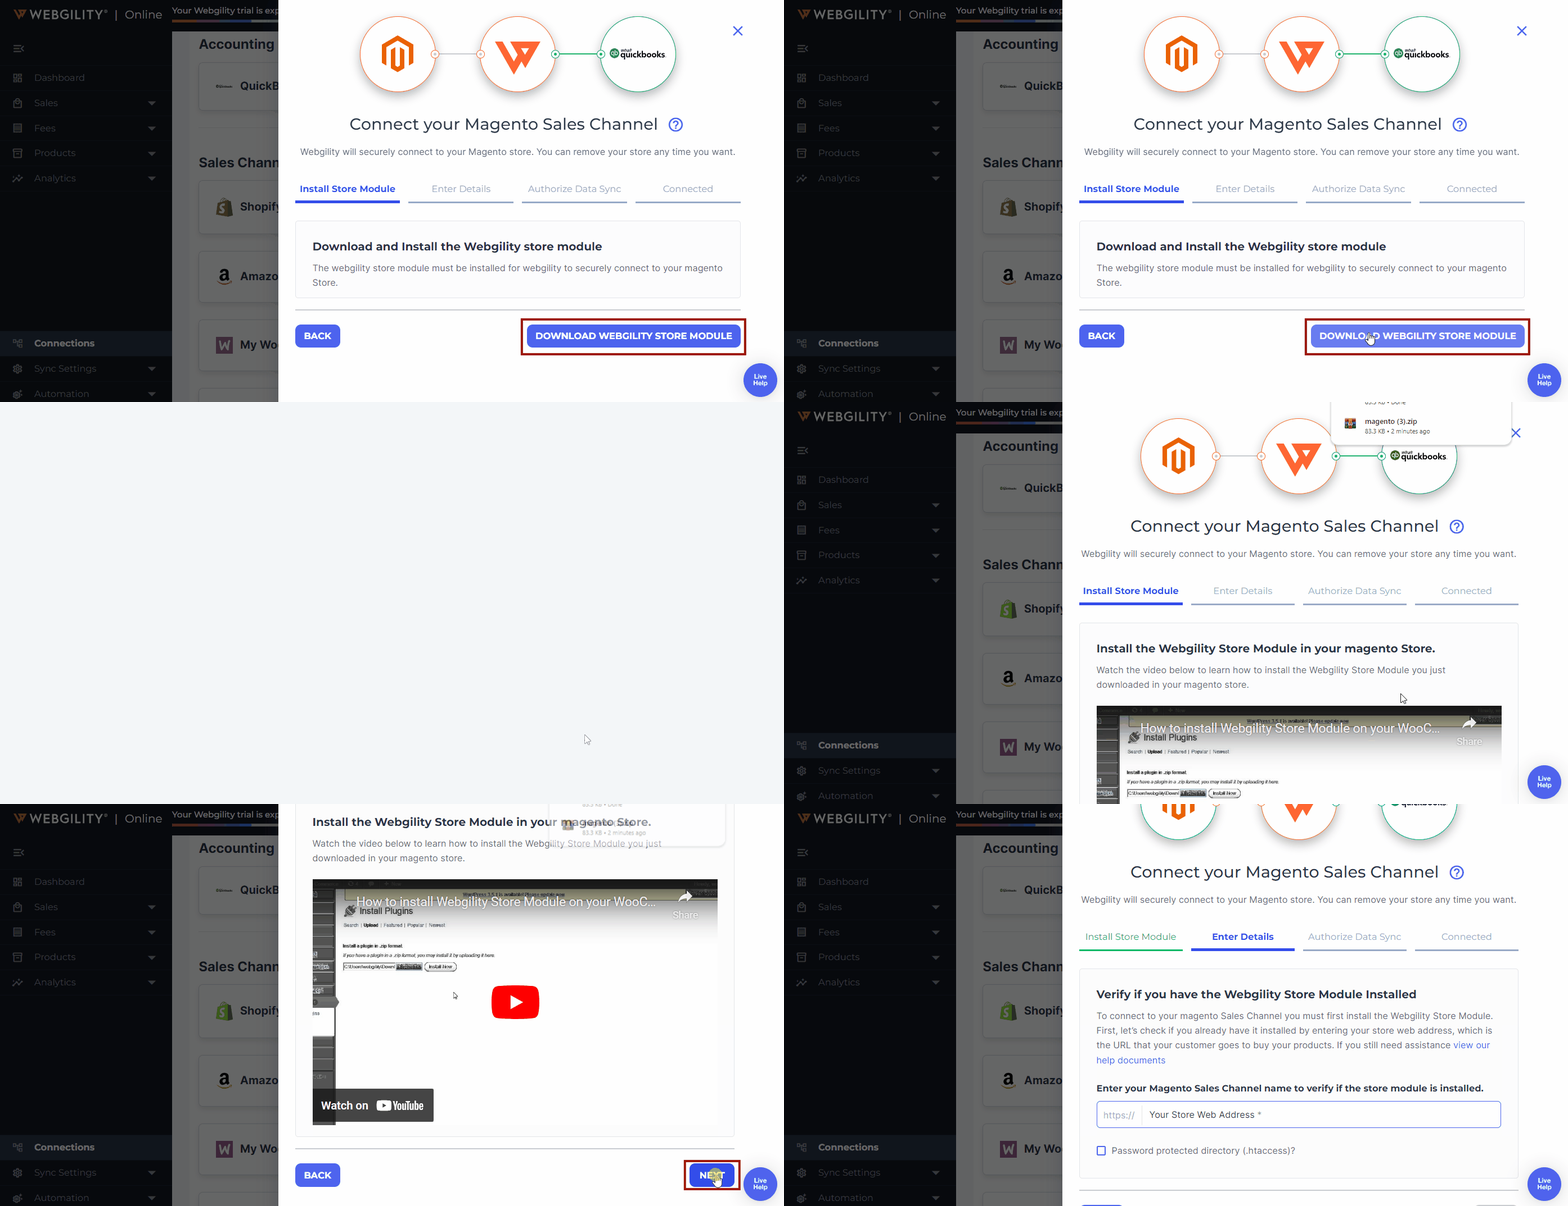
6. You will be directed to the "Enter Details" tab. Fill in the web address details and then proceed by selecting the "Next" option.
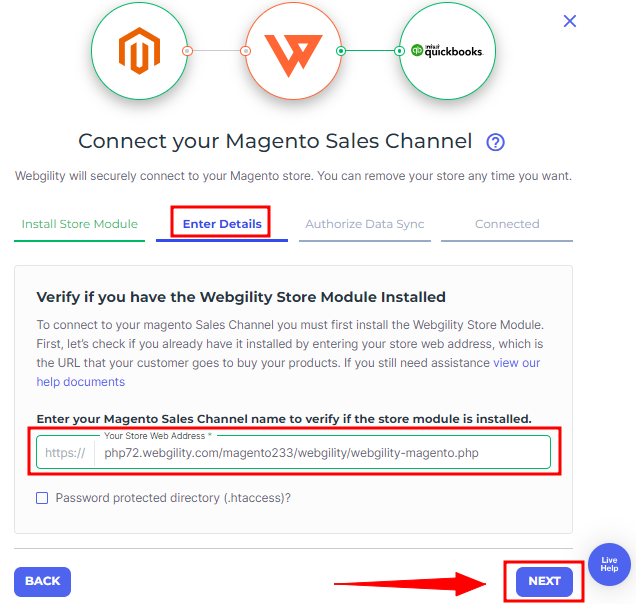
Note: In your Sales Channel web address field, enter the location URL for the Webgility Extension.
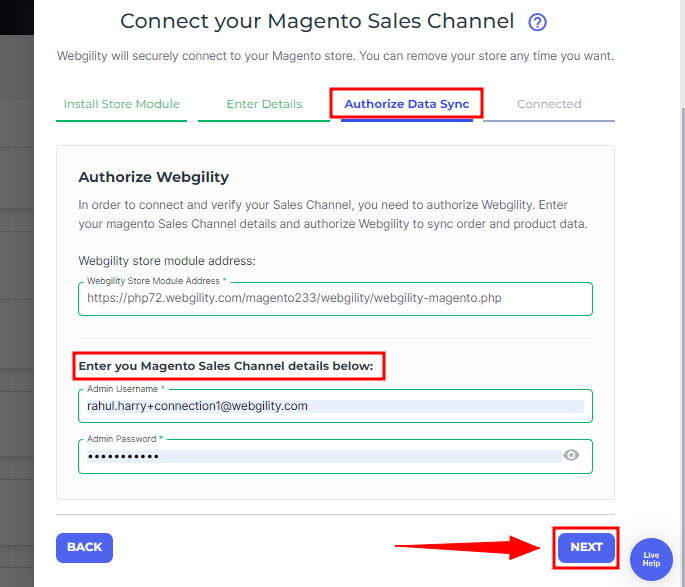
7. You’ll be redirected to the Authorize Data Sync tab, here enter the Admin/Primary Username and Password of the Magento sales channel and proceed with the Next option.
8. Another pop-up will appear, giving you the option to copy your sync settings from other connected sales channels within Webgility Online. If you want to duplicate the existing settings, toggle the button to enable it, then choose the sale channels from the drop-down menu. Otherwise, just select the "Finish" option.
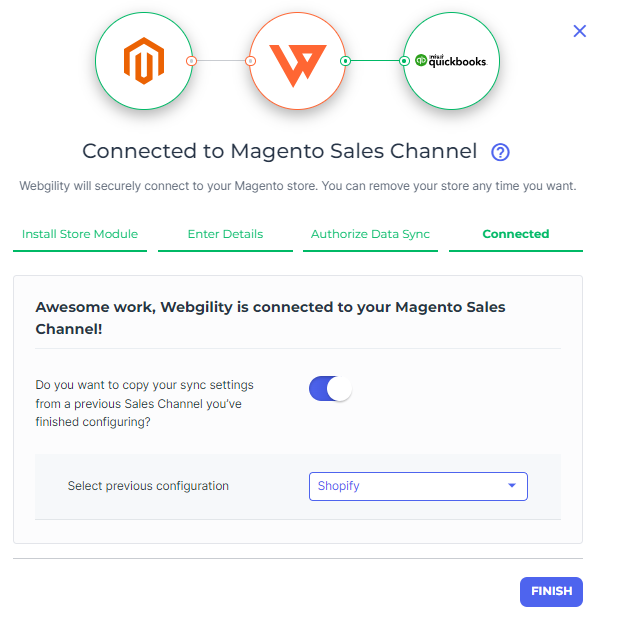
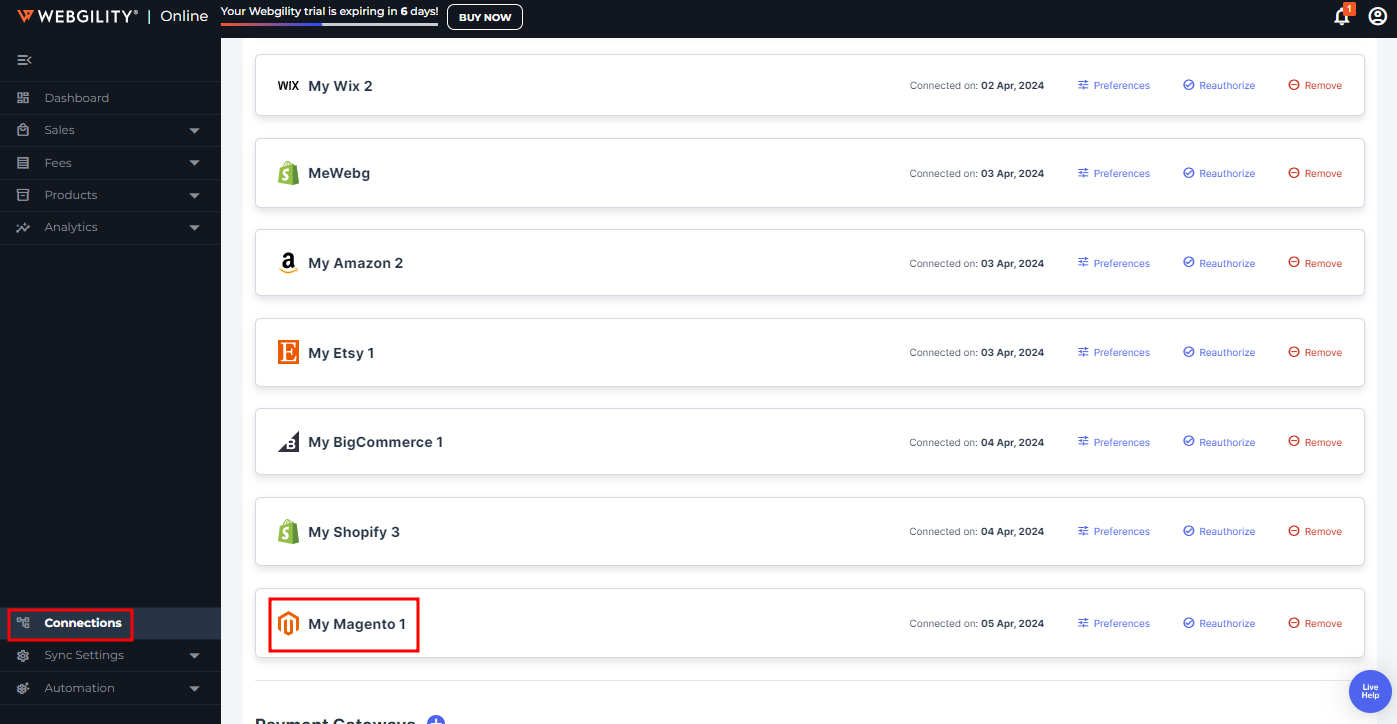
9. Upon successful connection of the sales channel, you will find the Magento sales channel profile listed under the Sales Channel column.
Feel free to reach out to our Webgility Support for further assistance.
