
The Webgility Desktop Scheduler is a background automation that runs the download, sync, and post tasks you have enabled per sales channel, on the schedule you configure. It runs on the same computer where Webgility Desktop is installed and keeps working as long as that computer is powered on and the Windows session is active.
Where to find it in the appThere is a scheduler clock icon in the top-right of the Webgility Desktop window, next to the sales channel selector. This icon is always visible:
- Colorless clock — scheduler is stopped or has not been started yet.
- Green clock — scheduler is running (actively processing scheduled tasks).
- Orange clock — scheduler is running but paused or waiting (between cycles, or a scheduled task is on hold).
One-way switchThe scheduler clock icon is a start-only control. Once the scheduler is running, you cannot stop it from the clock icon — stopping is done from the Scheduler icon in the Windows system tray (see below).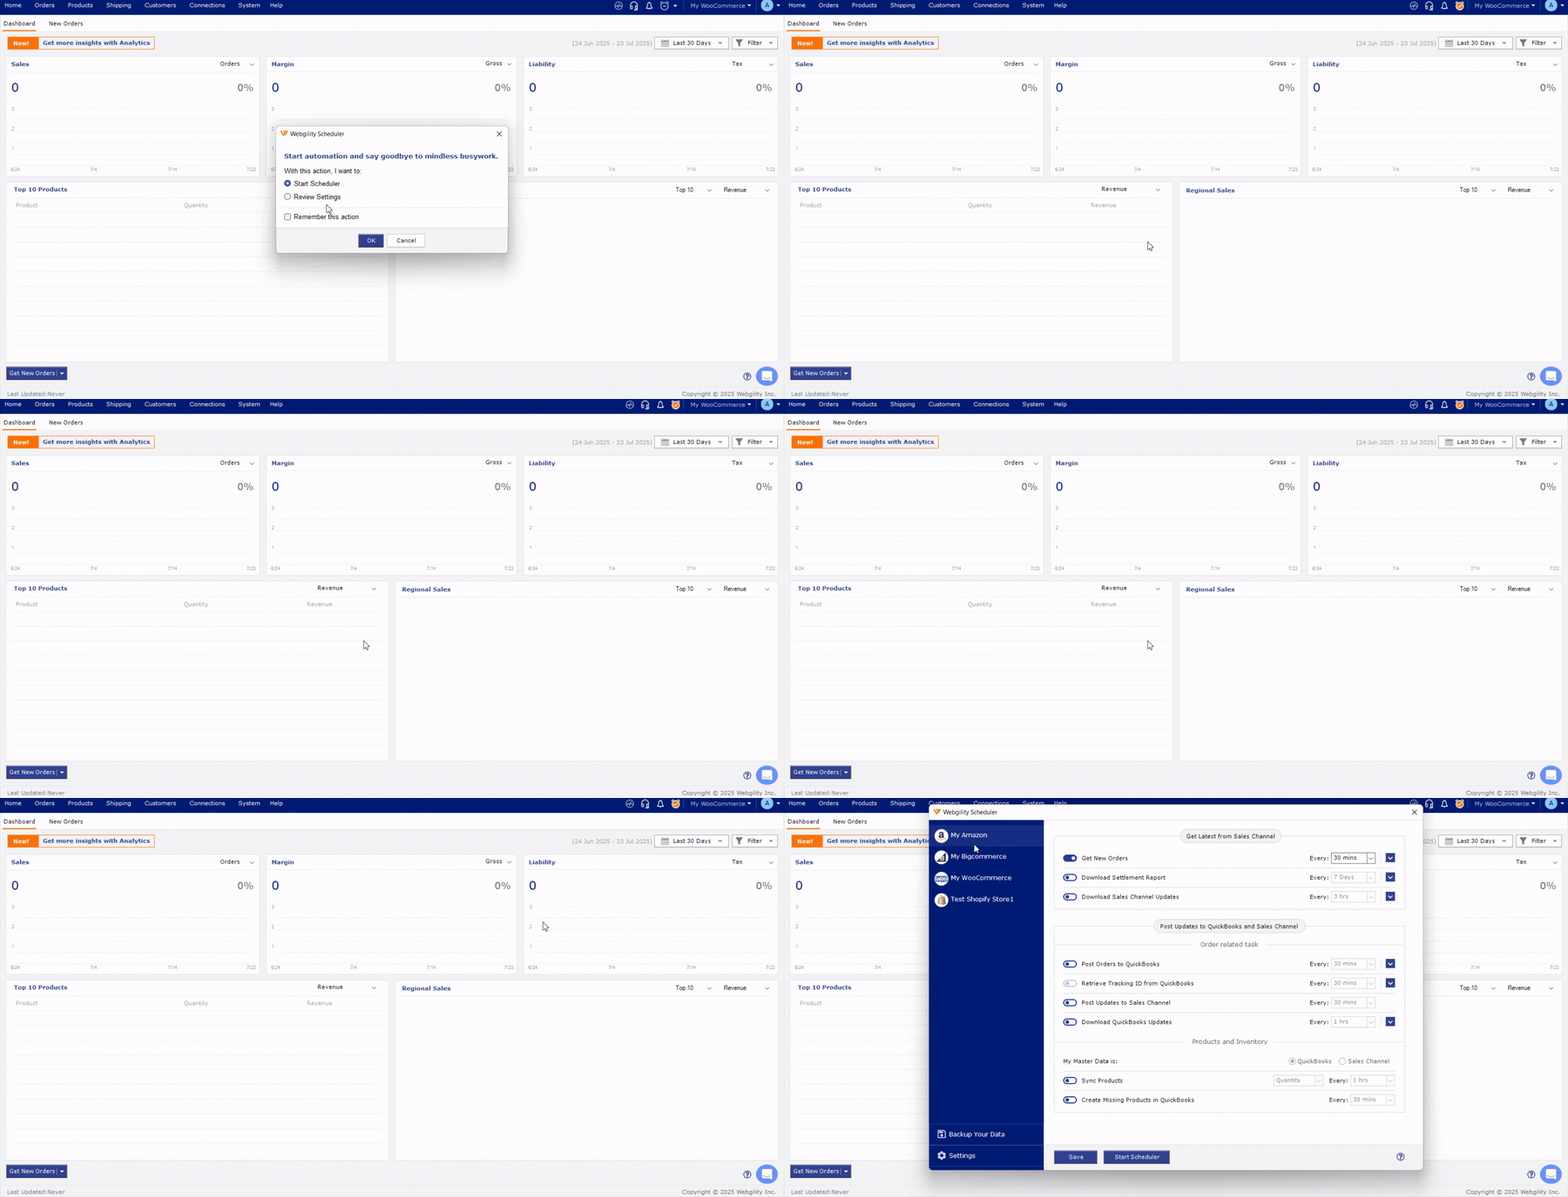 Screen recorded in Webgility Desktop with sample data. Your data will differ.
Step-by-step: configure the scheduler
Step1
Open Scheduler Settings
Click the scheduler clock icon in the top-right of the app. In the dialog that appears, click Review Settings. This opens the Scheduler Configuration Window.
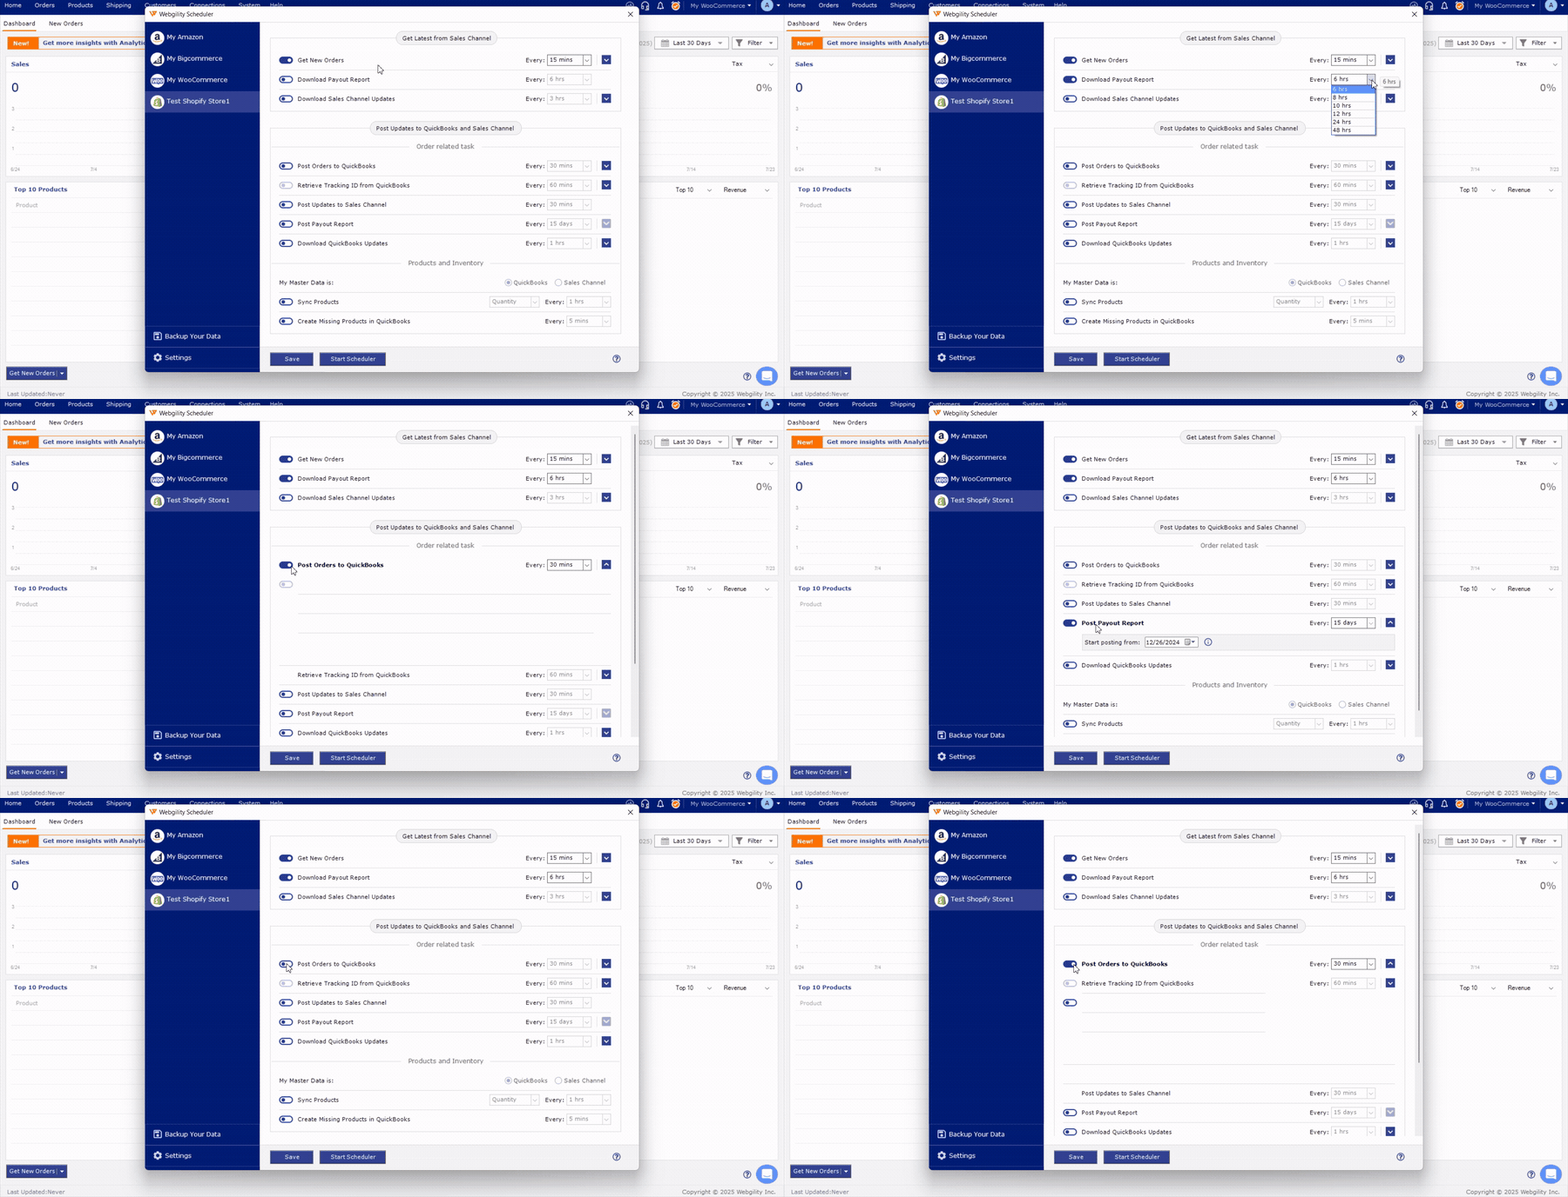
Step 2Turn scheduled actions on or off per sales channel
The Scheduler Configuration Window lists your connected sales channels along with individual toggles for the actions the scheduler can run. Turn each action ON or OFF for each channel independently. There is no single master switch — you control the scheduler at the per-channel, per-action level.
Notable actions include:
- Post to store — pushes tracking numbers and shipment status back to the sales channel.
For the complete list of available per-channel actions and what each one does, refer to the official Scheduler Settings Overview. Setting names shown in the app are authoritative — do not go by memory.
 Screen recorded in Webgility Desktop with sample data. Your data will differ.
Step 3
Set the run frequency
In the Scheduler Configuration Window, set how often the scheduler should check for and process new work for each action. Refer to the official article for the exact frequency options exposed in your version of Webgility Desktop.
Step 4Save and start the scheduler
Save your settings, close the Scheduler Configuration Window, and click the scheduler clock icon at the top-right again. This time choose Start Scheduler and confirm with OK. The clock icon turns colored, and a Scheduler icon appears in the Windows system tray.
 Screen recorded in Webgility Desktop with sample data. Your data will differ.
How to stop or exit the scheduler
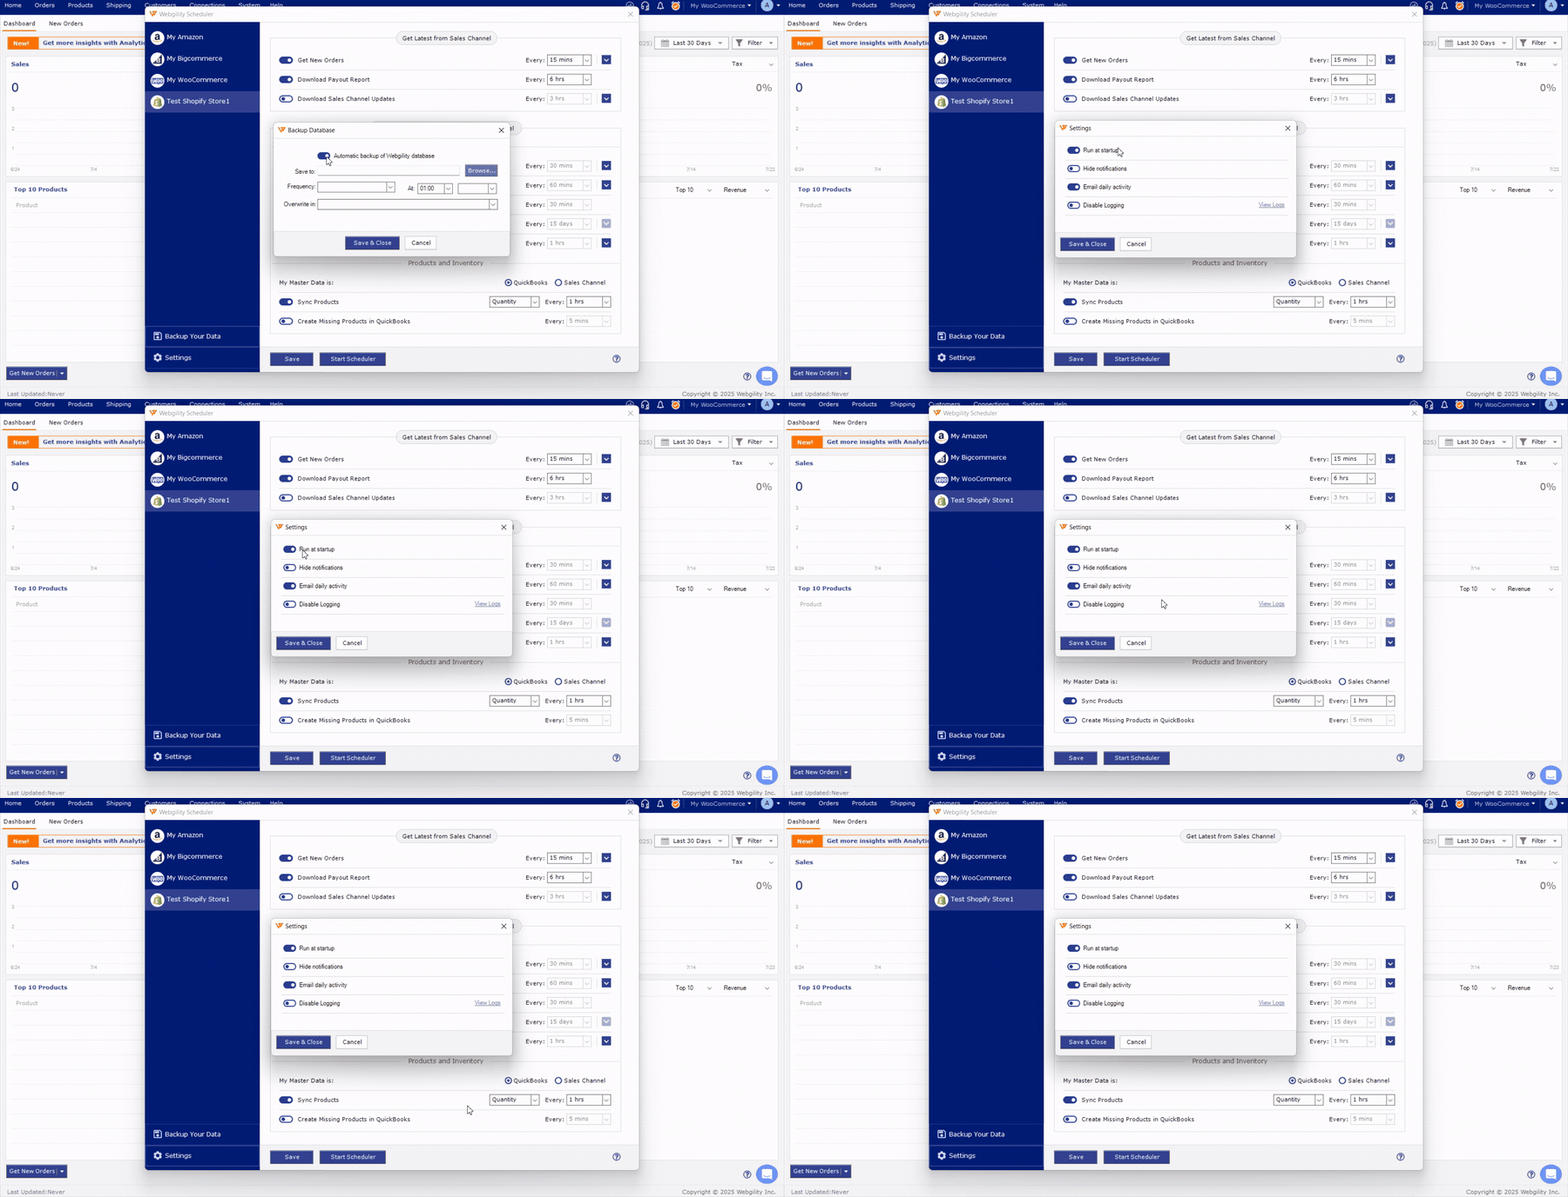
Once the scheduler is running, all control moves to the Scheduler icon in the Windows system tray (bottom-right of your Windows screen — you may need to expand the tray to see it). Right-click that icon to see the menu:
- Start — resume the scheduler if it was stopped.
- Stop — halt automation. The scheduler stays running in the tray but no scheduled tasks execute.
- Today's Logs — open today's log file to review what has run and any errors.
- Exit — quit the scheduler entirely. To restart after Exit, click the clock icon in the app.
When to stop the scheduler
Stop the scheduler before installing a Webgility Desktop update or making a database backup or restore. Otherwise the scheduler holds files open and blocks those operations.
Where scheduler logs live on disk
All scheduler logs are written to C:\Webgility\UnifyEnterprise\SchedulerLog\. The quickest way to open today's log is right-click the Scheduler tray icon → Today's Logs. For historical logs, browse to the folder directly.
When the scheduler will not run
Prerequisites for the scheduler to actually run
- The Webgility Desktop computer is powered on.
- The Windows user account is logged in and the Windows session is active — the scheduler runs under your logged-in session, not as a system service.
- Windows Sleep / Hibernate is not active during scheduled run times.
- For QuickBooks Desktop integrations: QuickBooks Desktop is open with the correct company file. For QuickBooks Online: an active internet connection is sufficient.
Related troubleshooting
If the clock icon is colored but no tasks appear to run, or if orders download but do not post, see the companion troubleshooting article: Troubleshoot: Orders Not Posting to QuickBooks via the Scheduler.
Related articles
- Scheduler Settings Overview
- Troubleshoot: Orders Not Posting to QuickBooks via the Scheduler
- How to Configure Order Download and Posting Settings for a Sales Channel