
Part of How to Add and Switch Between Multiple Businesses in Webgility i.
Steps: Switch to another business
- At the bottom of the left menu, click the business name. Under the name, the menu shows QuickBooks Online when the business has a connected company, or a Connect accounting link when it has none. The link opens Business settings.
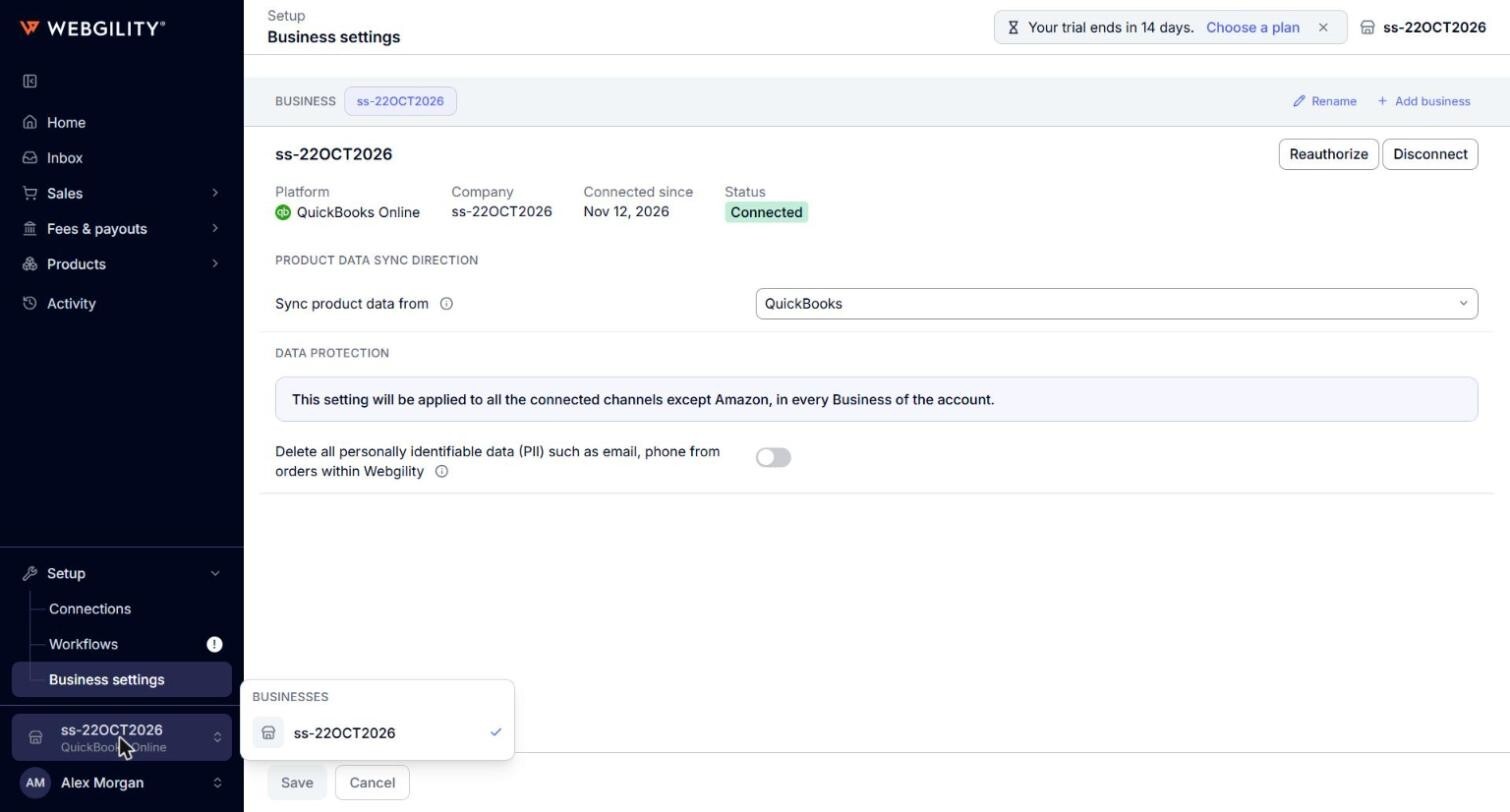
- Under Businesses, click the business you want to view. The page you were on opens again with the data of that business, and its name shows at the bottom of the left menu and at the top right of the page.
Note: You can also switch on Setup > Business settings: click the name of a business in the row at the top of the page.