
Overview
Use this guide to confirm that Webgility Desktop is connected to the correct QuickBooks company file, review payment fee settings, and post transactions. Fee options can vary by sales channel and payment processor.
Check the QuickBooks connection- Open the correct company file in QuickBooks Desktop.
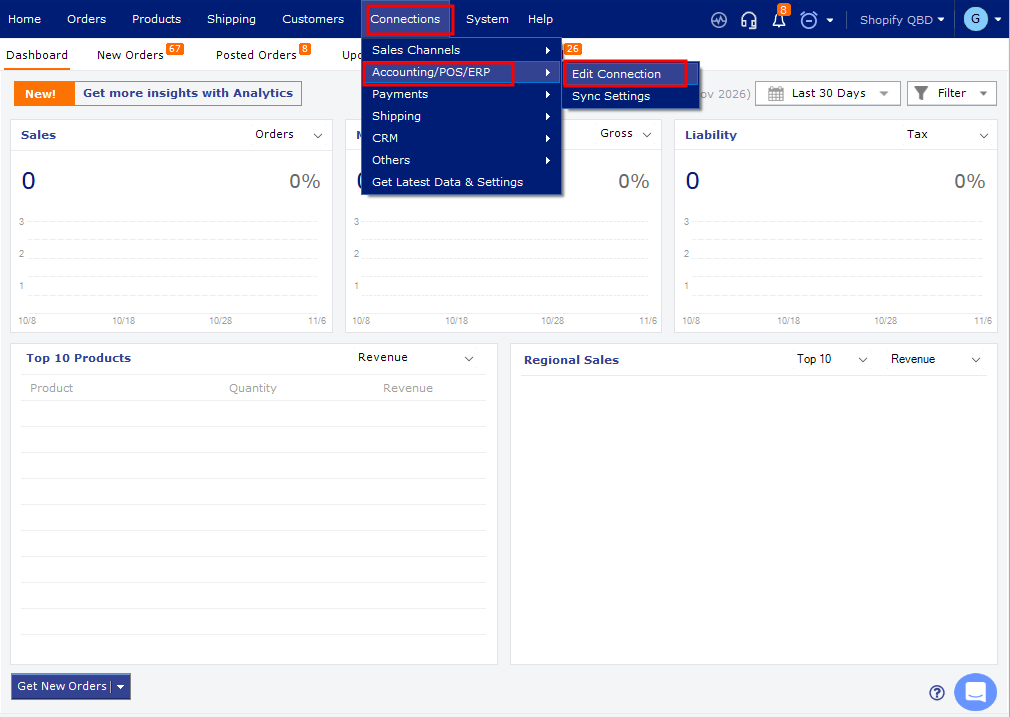
- In Webgility Desktop, go to Connections > Accounting/POS/ERP > Edit Connection.
- Select Test QuickBooks Connection and confirm the connection succeeds.
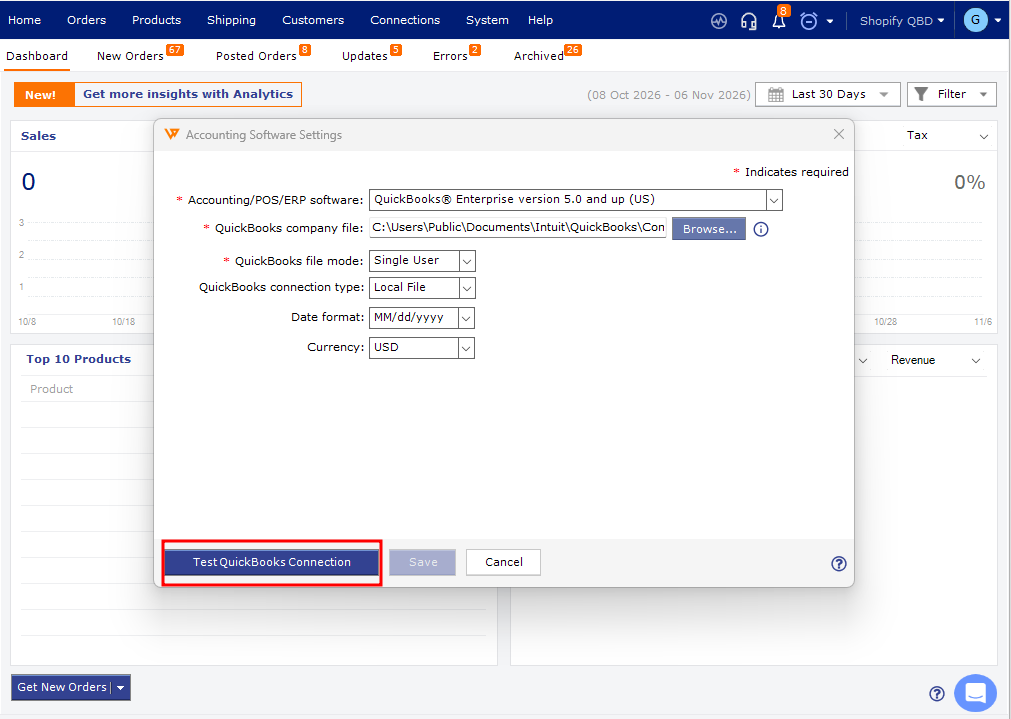
For detailed connection instructions, see How to Test QuickBooks Connection in Webgility Desktop.
Review fee settings- Go to Connections > Accounting/POS/ERP > Sync Settings > Expenses & Fees.
- Review the fee recording options and confirm the appropriate QuickBooks accounts or items are selected.
- Select Save if you make changes.
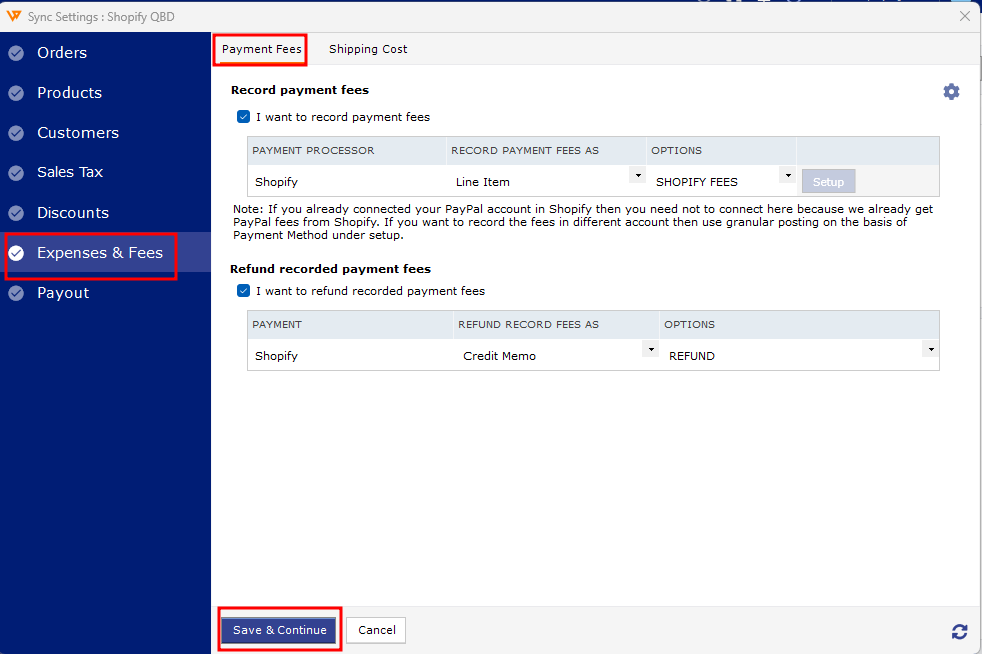
For setup details, see Manage and Record PayPal, Stripe Fees Using Webgility Desktop.
Post transactions
Select the transactions in Webgility Desktop and choose Post to QuickBooks. Review the posting status, then confirm the entries appear in the correct QuickBooks company file.
If you have any questions or need more help, please contact our support team.