
Overview:
If the primary computer is updated but an add-on computer is not, the add-on may lose its connection to the shared Webgility SQL database or appear to be missing files or permissions.
All Webgility users must run the same version of Webgility Desktop before reconnecting to the database.
Steps to follow:
-
If the add-on computer's Webgility Desktop was not updated, then refer to the following article: Webgility Desktop upgrade guide.
-
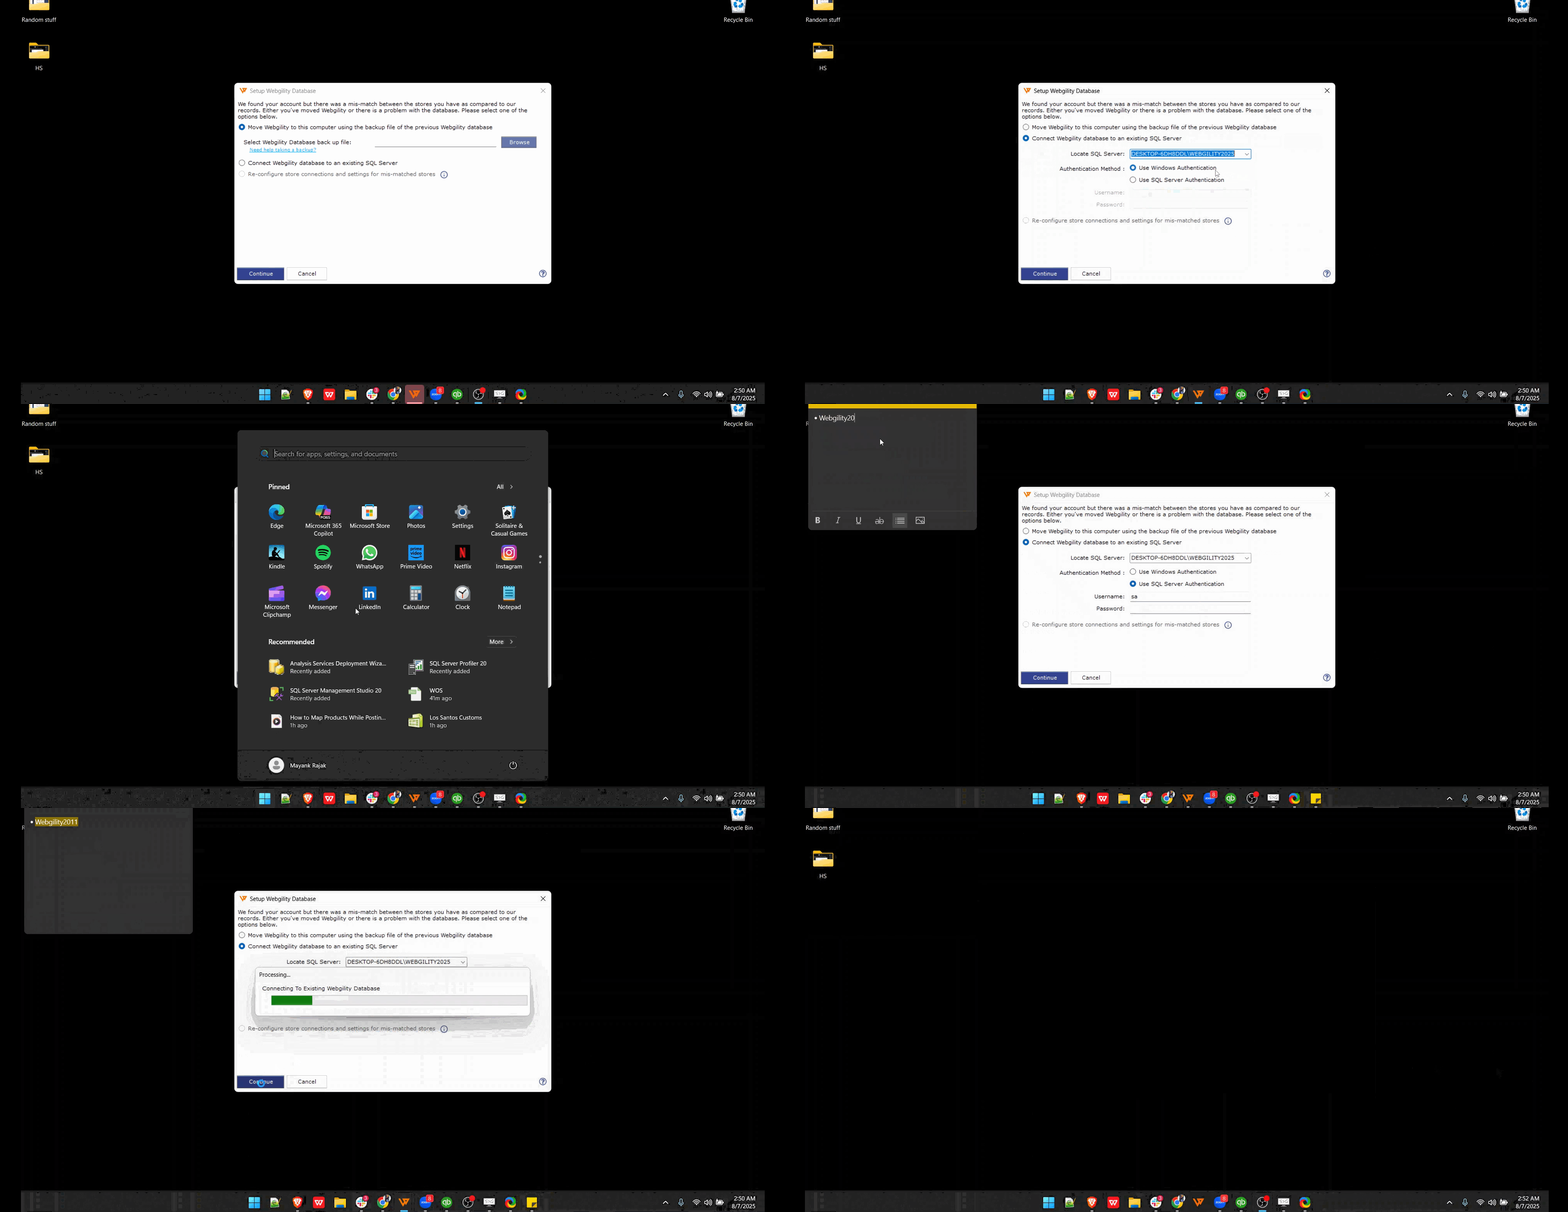
After updating open Webgility Desktop on the add-on computer and log in. When the database configuration screen appears, select the Connect to an existing SQL Server option.
-
In Locate SQL Server, select the SQL Server used by the primary computer. If it is not listed, select Browse for more options and refresh the list.
- Select your SQL database Instance Name. To find the Database name on your Primary Desktop, navigate to the path
C:\Webgility\UnifyEnterprise\XML, open the ApiConfig file with Notepad & check the source.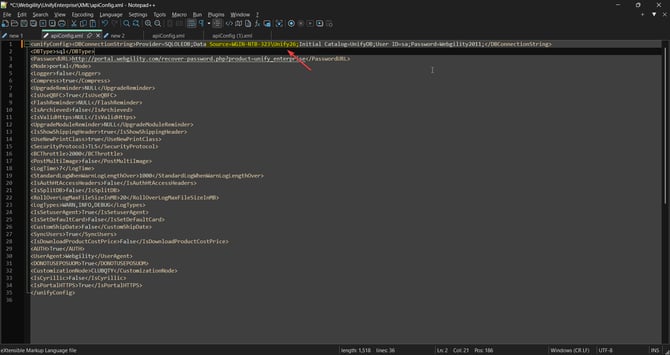
-
For authentication mode, select SQL Authentication Mode, then select the correct database using the Locate SQL Server Dropdown, then enter the SQL credentials configured for the Webgility database and select Connect.
- Username: sa (lowercase)
- Password: Webgility2011 (W is in uppercase)
-
Confirm that the add-on computer opens the Webgility Desktop dashboard and can access the shared database.
For the detailed connection walkthrough, see Unable to Connect Add-On Computer with SQL Database and follow the final GIF.