
Overview
If you have several months of unposted or partially posted payouts in Webgility Desktop and your QuickBooks account shows a large open balance for the same period, you can clear the backlog by posting the payouts individually and in chronological order.
Webgility Desktop is designed to process payouts one at a time, allowing each payout to be reconciled with its corresponding deposit in QuickBooks.
Important: Do not post the entire payout backlog at once or post payouts out of order. Processing payouts individually and in date order helps maintain an accurate running balance and makes it easier to identify and resolve any payout that does not reconcile correctly.
Problem Description
You may encounter the following situation:
"I have several months of unposted or partially posted payouts sitting in Webgility. The customer account in QuickBooks shows a large open balance from that period, and I do not know the safe order to clear them."
This can occur when older payouts were:
- Interrupted while posting.
- Partially posted.
- Never posted.
- Downloaded again after the original payout data changed.
Why This Happens
Older payouts may need to be reprocessed when they were interrupted during posting, remained unposted, or were downloaded again.
Posting payouts out of order or attempting to process multiple payouts together can make reconciliation more difficult and may prevent you from accurately tracking the corresponding deposits in QuickBooks.
Processing each payout individually, starting with the oldest, allows the QuickBooks running balance to be updated correctly.
Solution
Follow the steps below to process the payout backlog safely.
Step 1: Identify the Affected Payouts
- Open Webgility Desktop.
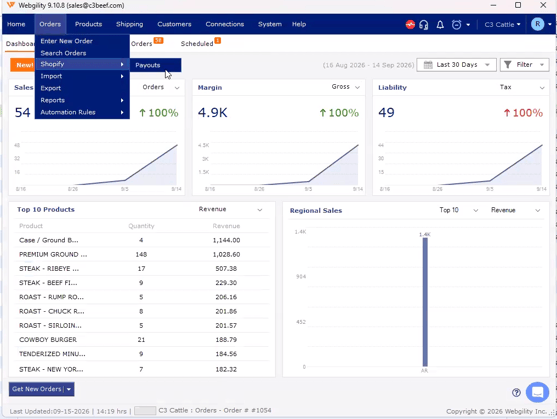
- Navigate to Orders then go to Shopify Payouts.
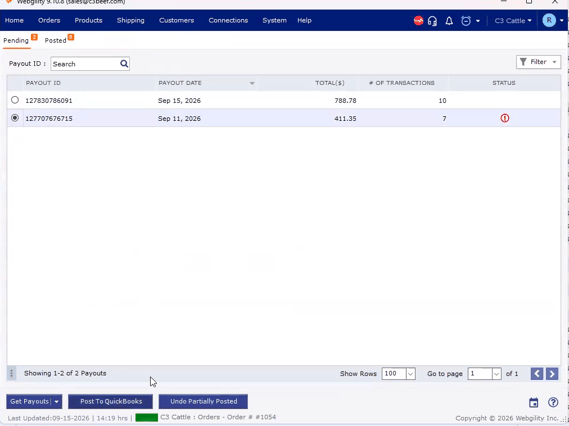
- Sort the payouts by date.
- Identify all payouts in the affected period that are:
- Unposted.
- Partially posted.
- Showing any status other than fully posted.
Start with the oldest affected payout.
Step 2: Undo Sync for Partially Posted Payouts
-
If a payout is partially posted, run Undo Sync first.
-
This returns the payout to a clean, unposted state so it can be processed again.
For detailed instructions, refer to:
How to Unpost Transactions from Webgility Desktop with Undo Sync
Step 3: Re-download the Payout
After the payout has been returned to an unposted state:
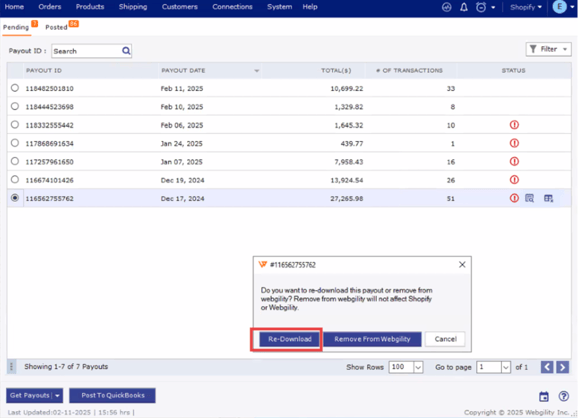
- Re-download the payout from the sales channel.
- Allow Webgility to retrieve the latest payout information.
This step is important because the payout's line items or other details may have changed since the original download.
Step 4: Post the Payout to QuickBooks
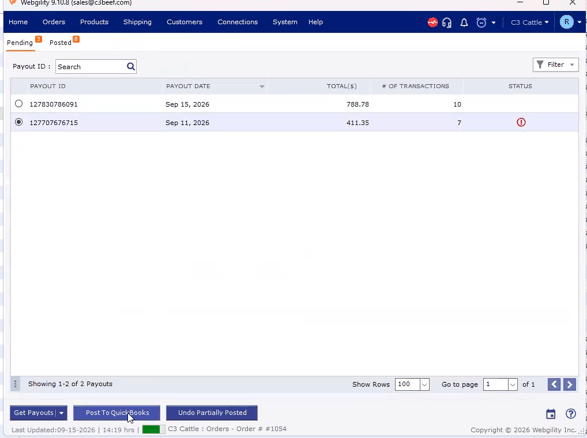
Post the payout by itself to QuickBooks.
After posting:
- Open QuickBooks.
- Verify that the deposit total matches the corresponding bank statement.
- Confirm that the customer-account balance decreased by the expected amount.
- Make sure the payout reconciles correctly before continuing.
Step 5: Repeat in Date Order
Once the first payout has been successfully reconciled, move to the next payout chronologically.
For each payout:
- Undo Sync if it is partially posted.
- Re-download the payout.
- Post the payout individually.
- Verify the deposit and account balance in QuickBooks.
Continue until all affected payouts have been processed.
For the complete Shopify workflow, refer to:
Shopify Payout Reconciliation in Webgility Desktop with QuickBooks Desktop integration
Important Considerations
Process One Payout at a Time
-
Always post one payout at a time and verify the result in QuickBooks before moving to the next payout.
-
Posting the entire backlog in a single pass can make it difficult to determine which individual payout failed to reconcile.
Process Payouts from Oldest to Newest
-
Do not skip ahead to newer payouts.
-
Starting with the oldest payout helps maintain the correct QuickBooks running balance and keeps each deposit traceable to its corresponding payout.
Best Practice
-
If you see a large open customer-account balance in QuickBooks, review your historical payouts date by date.
-
Although processing payouts individually may take longer, it provides a clear audit trail and makes it easier to identify and resolve discrepancies.
Recommended workflow:
-
Oldest payout → Undo Sync (if needed) → Re-download → Post → Verify in QuickBooks → Move to the next payout
-
Following this process will help you clear the payout backlog while keeping each transaction traceable and properly reconciled.
If you still need assistance, contact Webgility Support at support@webgility.com